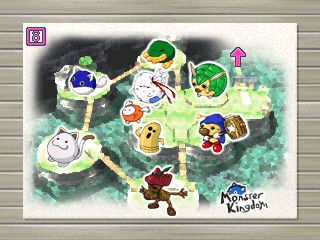
Monster Kingdom
Overview
Monster Kingdom is a zoo type area for monsters that unlocks after clearing Onigashima.
Monsters captured using Monster Pots can be registered and made to live here.
You can take or deposit monsters freely, and monsters registered to Monster Kingdom
return here in the event that they are defeated in a dungeon.
Kingdom Zones
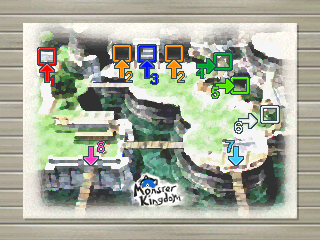
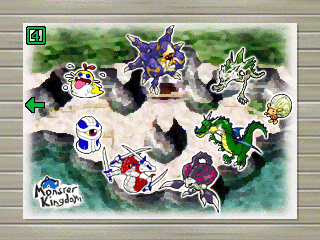
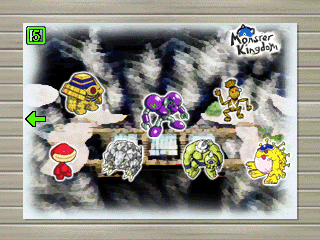
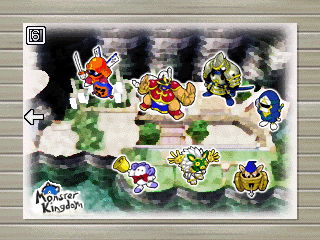
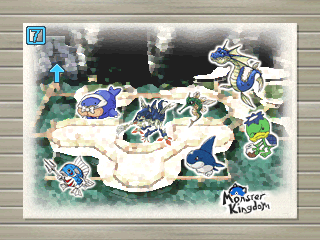
Zones are areas within the Kingdom where you can enjoy viewing registered monsters.
Monsters are organized by family, except for N'dubbas which have individual enclosures.
The sign next to an enclosure provides descriptions for each monster within the enclosure.
The same descriptions are displayed if you swing or throw a Knowledge Staff at a monster.
Monster attack animations can also be enjoyed by idling after selecting a monster name,
though some monsters won't use their special attack animations while inside Monster Kingdom.
Overall, one could say it's Shiren 2's most popular relaxation spot.
It might be fun to visit these zones every now and then, and recall where you met each monster.
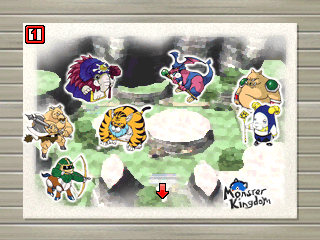
Wild Kingdom
| Lv1 | Lv2 | Lv3 | Lv4 |
|---|---|---|---|
| Taur | Minotaur | Megataur | - |
| Porky | Porko | Porkon | - |
| King Tusker | Monarch Tusker | Emperor Tusker | - |
| Horse Ronin | Horse Samurai | Horse Shogun | Horse Emperor |
| Bat Kangaroo | Evil Kangaroo | Devil Kangaroo | - |
| Sheep Priest | Goat Pastor | Gazelle Pope | - |
| Tiger Tosser | Tiger Hurler | Tiger Chucker | - |
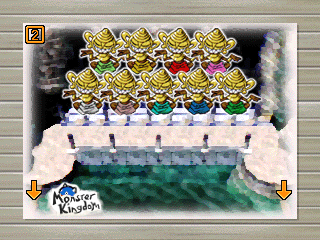
N'dubba House
Every color of N'dubba must be captured to complete Monster Kingdom.
There are a total of 9 colors based on the N'dubba's age.
| Color | Age | Color | Age | Color | Age |
|---|---|---|---|---|---|
| Green | 1~19yr | Pink | 20~29yr | Blue | 30~59yr |
| Red | 60~69yr | Light Blue | 70~76yr | Yellow | 77~87yr |
| Gray | 88~89yr | Light Green | 90~98yr | White | 99yr |
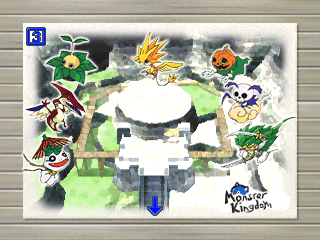
Flying Friends
| Lv1 | Lv2 | Lv3 | Lv4 |
|---|---|---|---|
| Pumphantasm | Pumphantom | Pumpanshee | - |
| Tiny Phoenix | - | - | - |
| Weather Doll | Rainy Doll | Stormy Doll | Monsoon Doll |
| Gale | Whirlwind | Kamikaze | Typhoon |
| Mr. Drone | Mr. Helico | Mr. Gyro - | |
| Gyadon | Gyairas | Gyandora | - |
| Yamikichi | Warukichi | Zurukichi | - |
Dragon Mountain
Manegineko enters the Dragon family enclosure once Monster Kingdom is complete.
Armor Spider and Queen Spider are in the same enclosure.
| Lv1 | Lv2 | Lv3 | Lv4 |
|---|---|---|---|
| Dragon | Sky Dragon | Archdragon | - |
| Gazer | Super Gazer | Hyper Gazer | - |
| Sluggy | Bitter Sluggy | Rancor Sluggy | Venom Sluggy |
| Shagga | Nashagga | Lashagga | - |
| Escargon | - | - | - |
| Scorpion | Demon Scorpion | Stun Scorpion | - |
| Bone Dragon | Skull Dragon | Garm Dragon | - |
| Armor Spider | - | - | - |
| Queen Spider | - | - | - |
Underground Empire
| Lv1 | Lv2 | Lv3 | Lv4 |
|---|---|---|---|
| Nigiri Novice | Nigiri Morph | Nigiri Boss | Nigiri Master |
| Straw Voodoll | Nailed Voodoll | Spiked Voodoll | - |
| Wolf Droid | Gorilla Bot | Bear Borg | - |
| Ironhead | Chainhead | Gigahead | - |
| Mixer | Mixermon | Mixergon | - |
| Golem | Stone Golem | Magma Golem | - |
| Stone Beast | Rock Beast | Boulder Beast | - |
Ninja's Hidden Village
| Lv1 | Lv2 | Lv3 | Lv4 |
|---|---|---|---|
| Kengo | Iai | Shihan | - |
| Schubell | Menbell | Bellthoven | - |
| Copycat Mask | Trickster Mask | Impostor Mask | - |
| Bow Boy | Boy Cart | Pop Tank | Cranky Tank |
| Droplet Ninja | Landmine Ninja | Summon Ninja | Bomber Ninja |
| Dosukoi | Hakkeyoi | Gottsuan | - |
| Ashigarudon | Samuraidon | Taishodon | Tonosamadon |
Underwater Paradise
Kappas will occasionally throw the grass found inside their enclosure,
but the grass will never be thrown at Shiren.
| Lv1 | Lv2 | Lv3 | Lv4 |
|---|---|---|---|
| Zalokleft | Green Zalokleft | Iron Zalokleft | - |
| Bored Kappa | Kappa Pest | Vexing Kappa | - |
| Shotfish | Dragon Shotfish | King Shotfish | - |
| Orcan | Orcada | Orcaon | - |
| Aqua Dragon | Sea Dragon | Water Shinryu | - |
| Spearfish | Lt. Spearfish | Capt. Spearfish | Adm. Spearfish |
| Water Strider | - | - | - |
Mamel Land
| Lv1 | Lv2 | Lv3 | Lv4 |
|---|---|---|---|
| Mamel | Pit Mamel | Cave Mamel | - |
| Froggo | Froggucci | Froggon | - |
| Twisty Hani | - | - | - |
| Chintala | Mid Chintala | Big Chintala | - |
| Hunger Puppet | Starve Puppet | Famine Puppet | Diet Puppet |
| Armordillo | Armordillo Bro | Armordillo Pop | - |
| Patient Bag | - | - | - |
| Snacky | - | - | - |
| Piko Hammer | Poko Hammer | Pako Hammer | - |
Going for Completion
Useful Monsters
- Armordillo Family
- Possibly the most useful monster in the game.
Use its special attack to quickly obtain Monster Pots and level up items.
Armordillos can be captured early on in any dungeon, excluding Shuten Trail Mid.
- Possibly the most useful monster in the game.
- Mixer Family
- Living Synthesis Pot that can be used to quickly strengthen equipment.
Registering a Mixer to Monster Kingdom lets you synthesize inside Napus Storage.
Send out → throw items → defeat using 火 seal → collect items → take out Mixer Pot again.
Be careful not to return it to its pot or exit the storage before defeating it.
- Living Synthesis Pot that can be used to quickly strengthen equipment.
- Kengo Family
- Disliked as an enemy, but treasured as an ally.
Lets you collect shields (Kengo, Iai, Shihan), weapons (Iai, Shihan), and bracelets (Shihan).
Collect equipment with positive upgrade value in Shuten Trail Easy or Shrine's Hidden Hole,
and look for equipment with useful seals in Onigashima.
- Disliked as an enemy, but treasured as an ally.
- Snacky
- Capture a higher level monster by letting an enemy monster defeat an ally Snacky.
- Gazer Family
- Can be used to level up an enemy monster when 2 monsters are present.
Simply confuse one or both monsters, and then wait until one defeats the other.
- Can be used to level up an enemy monster when 2 monsters are present.
- Monsoon Doll
- Nice to have when capturing Tonosamadon and Mixer Family Monsters.
It has a growth limit of 50, so it's a solid choice for general use as well.
- Nice to have when capturing Tonosamadon and Mixer Family Monsters.
- Gazelle Pope
- Can be used to perform the Gazelle Pope glitch to quickly register monsters.
However, do keep in mind that using the glitch is cheating, so it's not recommended.
- Can be used to perform the Gazelle Pope glitch to quickly register monsters.
Useful Items
Think ahead and ensure safety before leveling up an enemy monster.
It's best to keep Revival Grass and Escape Scroll on hand to avoid losing items.
- Monster Pot
- Required to capture monsters.
Obtained from Shrine's Hidden Hole, and can be used anywhere that allows carry-in items.
- Required to capture monsters.
- Happy Grass
- Throw at an enemy monster to level it up.
- Happy Staff
- Swing at an enemy monster to level it up.
Obtained from Sealed Room (Presto Pot), Onigashima (Specialty Shop), or Road to the End.
- Swing at an enemy monster to level it up.
- Grass Gainer, Grass Tosser
- Insert Happy Grass to basically turn it into a Happy Staff.
- Soil (Castle Material)
- Similar to Snacky, enemy monsters that defeat figures made from Soil will level up.
It's best to weaken the Figure beforehand to ensure it loses against the desired monster.
- Similar to Snacky, enemy monsters that defeat figures made from Soil will level up.
- Fear Scroll
- Read when 2 enemies are lined up in a hallway to have one defeat the other and level up.
- Parry Bracelet
- Found in Sealed Room (1st Golden Interval).
Equip it when you're surrounded by multiple enemies to redirect damage
and have a monster level up by defeating another monster.
- Found in Sealed Room (1st Golden Interval).
- Possession Staff
- Take control of a monster and use it to block a room entrance or hallway to have
another monster defeat the monster you took control of, resulting in leveling up.
- Take control of a monster and use it to block a room entrance or hallway to have
- Unlucky Staff
- Occasionally found on the floor in Onigashima.
Use it to when you need to catch a lower level monster.
- Occasionally found on the floor in Onigashima.
- Seal Staff
- Tonosamadon must be sealed in order to be captured,
so you'll need this, Monsoon Doll, or King Tusker.
- Tonosamadon must be sealed in order to be captured,
- Evaporate, Freeze, Great Hall Scrolls
- Read these scrolls to capture aquatic monsters such as Shotfish and Aqua Dragon.
These scrolls only take effect in Random Dungeons, and shouldn't be read in Shuten Trails.
- Read these scrolls to capture aquatic monsters such as Shotfish and Aqua Dragon.
Tricky or Tedious Monsters
Most monsters can be captured between the Shuten Trails, Onigashima, and Shrine's Hidden Hole.
If you plan to capture many monsters outside of Shrine's Hidden Hole, use an ally Armorillo in
Shrine's Hidden Hole to obtain lots of Monster Pots, and then store them in Mamo's drawers.
The trickiest monsters to capture are likely Queen Spider and each of the N'dubba colors.
Requires Extra Steps
- Mixer Family
- It eats Monster Pots like any other item, so you need to either seal it or throw
unneeded items until it's full before throwing the Monster Pot.
The number of items each level can eat are: Mixer (2), Mixermon (3), and Mixergon (4).
If you'd prefer to seal it, you can use a Seal Staff, Monsoon Doll, or King Tusker.
- It eats Monster Pots like any other item, so you need to either seal it or throw
- Tonosamadon
- It reflects thrown items including Monster Pots, so it needs to be sealed first.
Use a Seal Staff, Monsoon Doll, or King Tusker to seal it.
- It reflects thrown items including Monster Pots, so it needs to be sealed first.
- Copycat Mask
- It's always disguised as another monster when it spawns, so reveal its disguise first.
Get hit by a direct attack while equipped with a shield that has the 識 seal (Identify Scroll),
or seal it using a Seal Staff, Monsoon Doll, or King Tusker.
Copycat Masks can't be found in Sealed Room, so search 22~23F of Onigashima instead.
They have low attack power, so it's easier to level it up using Happy Grass
or Happy Staff instead of trying to have it defeat another monster.
- It's always disguised as another monster when it spawns, so reveal its disguise first.
- Zalokleft, Froggo Families
- These two monster families basically have 0 attack power,
so use items like Happy Grass or Happy Staff to level them up instead.
- These two monster families basically have 0 attack power,
- Mr. Drone Family
- Capturing it while it's hovering over water results in a submerged Monster Pot,
so be extra careful when capturing it in Dororo Creek (Shuten Trail Mid 6~7F),
since Freeze, Evaporate, and Great Hall scrolls don't take effect in Shuffle Dungeon maps.
Use items like Happy Grass or Happy Staff to level it up.
- Capturing it while it's hovering over water results in a submerged Monster Pot,
- Aqua Dragon
- Only generated inside water, so throwing a Monster Pot at it results in a submerged pot.
Use a Swap Staff to force it onto land, or read an Evaporate, Freeze, or Great Hall scroll.
- Only generated inside water, so throwing a Monster Pot at it results in a submerged pot.
- Shotfish
- Always generated underwater, so it can't be hit by thrown items.
Read an Evaporate or Great Hall scroll to force it onto land in order to capture it.
Hakkeyoi and Gottsuan can shift the Shotfish onto land with their special attack.
Can be leveled up while it's underwater by having it defeat a Figure or Snacky.
- Always generated underwater, so it can't be hit by thrown items.
Limited Locations
- Kengo, Mixer Families
- Can't be found in Shrine's Hidden Hole, so you'll need to visit Shuten Trail Hard, etc.
- Gyadon, Dosukoi, Orcan, Schubell Families
- Can't be found in the Shuten Trails or Onigashima.
Search for them in Sealed Room or Shrine's Hidden Hole instead.
It's easiest to capture the entire group in Sealed Room using Happy Grass or Happy Staff.
- Can't be found in the Shuten Trails or Onigashima.
- Poko Hammer, Pako Hammer
- These two can only be found naturally in Halfway Well.
Recommended to use Happy Grass or Happy Staff in Shuten Trail Easy.
- These two can only be found naturally in Halfway Well.
- Tiny Phoenix
- Only found on floors 50F+ in Shrine's Hidden Hole, or 20F+ in Sealed Room.
Faster to capture it in Sealed Room, provided you've upgraded your equipment.
- Only found on floors 50F+ in Shrine's Hidden Hole, or 20F+ in Sealed Room.
- Escargon
- Rarely found on floors 50F+ inside Sealed Room.
Appears between 40~80F in Road to the End, but can't be found in Shrine's Hidden Hole.
- Rarely found on floors 50F+ inside Sealed Room.
- Taur Family
- Only found in Sealed Room or Road to the End.
In both dungeons, Minotaurs appear on 78F+, and Megataurs appear on 86F+.
Taur can't be found in any dungeon, so use Twisty Grass, Unlucky Seed, or Unlucky Staff.
- Only found in Sealed Room or Road to the End.
- Queen Spider
- Only found on floors 60F+ inside Shrine's Hidden Hole.
Queen Spider no longer spawns in Shuten Trail Hard after clearing Onigashima.
If you want to complete Monster Kingdom, there's no way around having to capture it
in Shrine's Hidden Hole. Use the information on this site to reach 60F. You can do it!
- Only found on floors 60F+ inside Shrine's Hidden Hole.
- N'dubbas
- The age of a N'dubba is equivalent to its level.
If you swing a Happy Staff at a N'dubba 1yr (green), it becomes N'dubba 2yr (green).
If you swing the staff at a N'dubba 1yr (green) 19 times, it becomes N'dubba 20yr (pink).
The floor number in Sealed Room directly correlates to N'dubba's age, so it's faster
to search for specific ages there instead of relying on level up items:
Green: 1~19F
Pink: 20~29F
Blue: 30~59F
Red: 60~69F
Light Blue: 70~76F
Yellow: 77~87F
Gray: 88~89F
Light Green: 90~98F
White: 99F
N'dubbas can be picked up by switching places with a character standing on top
of a disguised N'dubba. This allows you to store N'dubbas in Storage Pots,
removing the need to bring Monster Pots into Sealed Room.
Disguised N'dubbas can't be registered, but the disguise is canceled if you throw
the N'dubba while inside a dungeon, allowing you to capture it.
※ Throwing a disguised N'dubba inside Napus Storage won't cancel the disguise.
- The age of a N'dubba is equivalent to its level.
Kingdom Monster List
This list is ordered using the in-game order when taking monsters out of Monster Kingdom.
| Page 1 | Page 2 | Page 3 | Page 4 | Page 5 |
|---|---|---|---|---|
| Mamel | Green Zalokleft | Gazer | Iai | N'dubba 70~76yr |
| Pit Mamel | Iron Zalokleft | Super Gazer | Shihan | N'dubba 77~78yr |
| Cave Mamel | Twisty Hani | Hyper Gazer | Sluggy | N'dubba 88~89yr |
| Dragon | Taur | Chintala | Bitter Sluggy | N'dubba 90~98yr |
| Sky Dragon | Minotaur | Mid Chintala | Rancor Sluggy | N'dubba 99yr |
| Archdragon | Megataur | Big Chintala | Venom Sluggy | Tiny Phoenix |
| Froggo | Nigiri Novice | Porky | N'dubba 1~19yr | Shagga |
| Froggucci | Nigiri Morph | Porko | N'dubba 20~29yr | Nashagga |
| Froggon | Nigiri Boss | Porkon | N'dubba 30~59yr | Lashagga |
| Zalokleft | Nigiri Master | Kengo | N'dubba 60~69yr | Schubell |
| Page 6 | Page 7 | Page 8 | Page 9 | Page 10 |
| Menbell | Famine Puppet | Rainy Doll | King Tusker | Horse Emperor |
| Bellthoven | Diet Puppet | Stormy Doll | Monarch Tusker | Wolf Droid |
| Pumphantasm | Armordillo | Monsoon Doll | Emperor Tusker | Gorilla Bot |
| Pumphantom | Armordillo Bro | Gale | Bow Boy | Bear Borg |
| Pumpanshee | Armordillo Pop | Whirlwind | Boy Cart | Ironhead |
| Straw Voodoll | Patient Bag | Kamikaze | Pop Tank | Chainhead |
| Nailed Voodoll | Copycat Mask | Typhoon | Cranky Tank | Gigahead |
| Spiked Voodoll | Trickster Mask | Mr. Drone | Horse Ronin | Bat Kangaroo |
| Hunger Puppet | Impostor Mask | Mr. Helico | Horse Samurai | Evil Kangaroo |
| Starve Puppet | Weather Doll | Mr. Gyro | Horse Shogun | Devil Kangaroo |
| Page 11 | Page 12 | Page 13 | Page 14 | Page 15 |
| Escargon | Kappa Pest | Gazelle Pope | Tonosamadon | Spearfish |
| Mixer | Vexing Kappa | Tiger Tosser | Shotfish | Lt. Spearfish |
| Mixermon | Piko Hammer | Tiger Hurler | Dragon Shotfish | Capt. Spearfish |
| Mixergon | Poko Hammer | Tiger Chucker | King Shotfish | Adm. Spearfish |
| Snacky | Pako Hammer | Gyadon | Orcan | Golem |
| Droplet Ninja | Dosukoi | Gyairas | Orcada | Stone Golem |
| Landmine Ninja | Hakkeyoi | Gyandora | Orcaon | Magma Golem |
| Summon Ninja | Gottsuan | Ashigarudon | Aqua Dragon | Yamikichi |
| Bomber Ninja | Sheep Priest | Samuraidon | Sea Dragon | Warukichi |
| Bored Kappa | Goat Pastor | Taishodon | Water Shinryu | Zurukichi |
| Page 16 | Page 17 | |||
| Scorpion | Queen Spider | |||
| Demon Scorpion | Water Strider | |||
| Stun Scorpion | ||||
| Bone Dragon | ||||
| Skull Dragon | ||||
| Garm Dragon | ||||
| Stone Beast | ||||
| Rock Beast | ||||
| Boulder Beast | ||||
| Armor Spider |
Gazelle Pope Glitch
If you defeat an ally monster that had their level halved by a Gazelle Pope, the lower level monster
is added to Monster Kingdom, and the original monster returns to Monster Kingdom if registered.
If you decide to use this glitch, be sure not to perform it on unregistered monsters.
Growth will be halved for both the newly registered monster and the monster used for the glitch.
Required Items:
- Gazelle Pope Pot
- Possession Staff
- Monster Pot (containing a monster of the same family + higher level than the target monster).
Send out both monsters inside Napus Storage, take control of Gazelle Pope using Possession Staff,
halve the level of the target monster using Gazelle Pope, and then defeat the target monster.
Be careful not to hit Shiren if you use Gazelle Pope to defeat the target monster.
You can conserve Possession Staff uses by sending out multiple targets.
※ Lv4 monsters result in Lv2 monsters, so a Lv3 monster is also needed for families with 4 levels.
The Monster Kingdom completion events can progress out of order if this glitch is used to
register the final monster needed for completion, so it's best to avoid doing so.
Twisty Hani can't lower ally monster levels, so it can't be used in place of Gazelle Pope.
Growth Limit Breaking
Requirements:
- Gazelle Pope (ally or enemy)
- Level 2 or higher monster (ally)
※ ally monster must have a higher growth limit after having their level halved.
Ally monsters can still grow stronger while their level is halved by a Gazelle Pope, so the idea is to
halve the level of a monster with low max growth → max out growth before the level down effect
wears off, at which point max growth returns to the lower value of the higher level monster.
Example: N'dubba 99yr has a max growth of 0, and N'dubba 50yr (halved) has a max growth of 52.
However, note that:
- Any growth over the limit won't be reflected in the monster's stats.
- Defeating an enemy in a growth limit broken state resets growth to the regular max value.
- Sending out the monster also resets growth to the regular max value.
So there's no benefit to stats, it can't be used in combat, and it can't be sent outside of its pot.
Limit broken monsters can be registered to Monster Kingdom while retaining their growth,
so it could be fun to try for a "perfect" Monster Kingdom with limit broken monsters as trophies.
Completion Rewards
The following rewards are granted when you complete Monster Kingdom:
- A Mamel icon gets added to your save file.
- One-time exclusive Carp Streamer Castle Decoration is given to you. (Don't lose it!)
- A new dungeon, Shrine's Hidden Hole (B), is unlocked.
- Muchigoro gives you a Fast Clear Campaign Password.
- More visitors arrive, including NPCs from the nearby Nabus Village.
