Cavern of Suiryu
Overview
| Unlock | Clear Dune of Batsu. |
|---|---|
| Entrance | Shukuba Beach (Talk to Kokatsu near the exit) |
| Floors | 20F | ||
|---|---|---|---|
| Bring Items | No | Stairs | Descending |
| Companions | No | Roamers | No |
| Rescues | 3 | Starting Level | Lv1 |
| Starting Item | Large Onigiri | ||
| Unidentified | Equipment, Grass, Scrolls, Staves, Pots | ||
| Shops | Yes | Monster Houses | Yes (Regular, Sudden, Special) |
| Behemoths | No | Wishing Shrines | Yes |
| Kron's Challenge | Yes | Fever Time | Yes |
| Initial Enemies | Spawn Rate | 30 Turns | |
| Wind (1st Gust) | 900 Turns | Reward | |
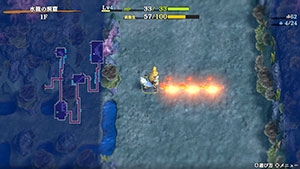
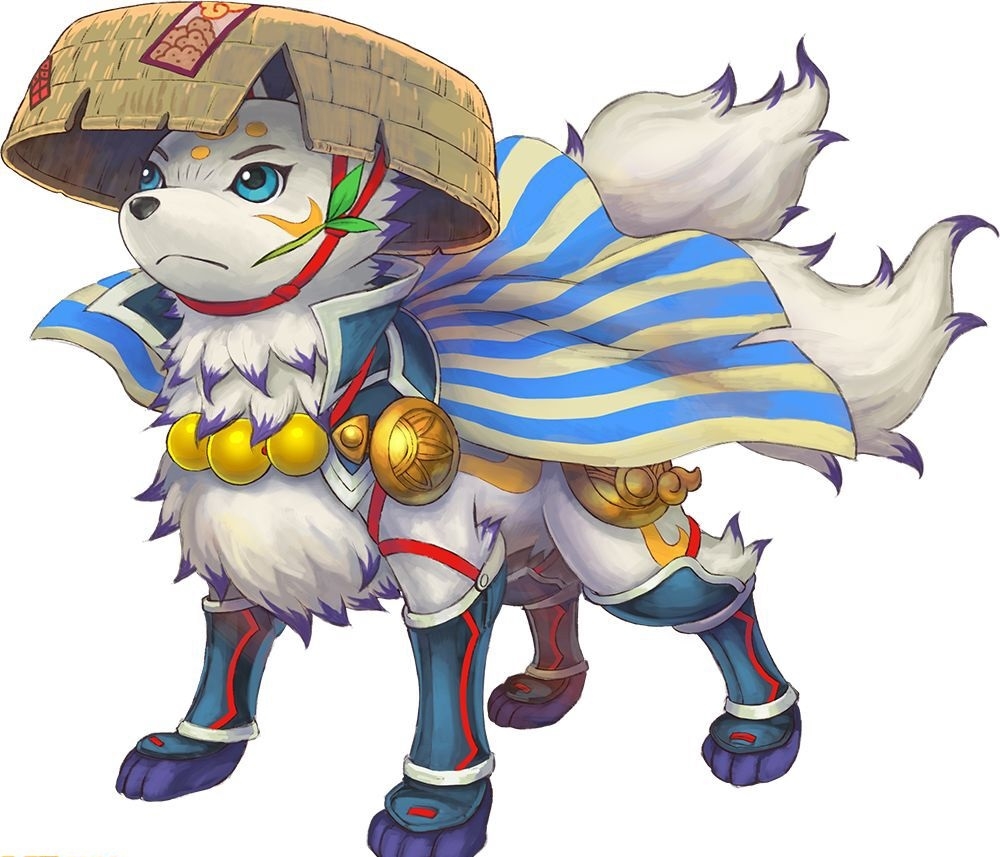
Postgame story dungeon where you play as Kokatsu fused with Shiren (1st clear only).
Kokatsu Shiren can't equip weapons, shields, or bracelets, and also can't use arrows or rocks.
This form isn't simply a restriction, however, as Kokatsu Shiren can use abilities by spending Fullness.
Kokatsu Shiren's normal attack also changes to a flame which increases in range as you slay foes.
Overall, the first clear of this dungeon is a fun diversion from the standard gameplay.
Navigation
Strategy
First Clear vs. Second Clear
As mentioned earlier, the player can't play as Kokatsu Shiren after the first clear in the base game.
This is a problem, since the item and monster tables are balanced around Kokatsu Shiren's abilities.
You'll be facing stronger enemies like Nashagga, Mixer, and Hoppin' Slugger without a range advantage,
and most items on the ground are low quality since they expect you to use Sun's Blessing on them.
Equipment is also on the rare side, and it's impossible to create a Cave Mamel to quickly level up.
Update Info (Game version 1.1.0)
Sacred Tree Mode lets you replay the dungeon as Kokatsu Shiren even after the first clear.
First Clear
Kokatsu Shiren Basics
Innate Attack Power & Defense Power
Kokatsu Shiren seems to have a small amount of innate attack and defense compared to Normal Shiren,
which also seems to scale upwards very slowly as Kokatsu Shiren levels up.
Item Category & Status Restrictions
Kokatsu Shiren can't equip weapon, shield, or bracelet category items, and can't use arrows or rocks.
In addition, Sumo status will not activate even if you increase Max Fullness to 150+.
Normal Attack Changes
Kokatsu Shiren's normal attack reaches 1 tile ahead, but gains 1 tile of range per enemy slain (max: 3 tiles).
However, the boosted normal attack range resets to the initial state when Kokatsu Shiren takes damage.
Since Kokatsu Shiren can't equip a shield, it's important to utilize the extended range to avoid damage.
This normal attack can cut through corners, and can also hit Pumphantasms inside walls.
Abilities (Special Attacks)
| Name | Fullness | Effect |
|---|---|---|
| Sand-handling | 10 | Creates a pillar of sand in front of you. If the tile in front is a wall, digs out the wall tile. |
| Deception | 20 | Creates a decoy (50 HP). Decoy receives normal amount of damage, unlike Disguising Staff. Decoy loses 2 HP per turn, and a monster that slays it won't level up. |
| Blazing Heat | 60 | Deals 40~50 damage to all monsters in the room. Inflicts Blind status at the same time. |
| Sun's Blessing | 10 | Turns a selected item into a random Grass or Onigiri category item. |
Altered Effects
Certain traps and monster special attacks affect Kokatsu Shiren differently.
| Trap / Monster | Notes |
|---|---|
| Mudkin | Lowers Attack Power and Defense Power. |
| Removal Trap | Lowers Attack Power and Defense Power. |
| Silver-seal Trap | Inflicts Sealed status. |
Important Items (Kokatsu Shiren)
The special attack "Sun's Blessing" is the key to stocking up on most of the following items.
However, it often gives mediocre items as well, so don't expect only useful items when you use it.
 Grass
Grass
Revival Grass, Invincible Grass, Swift Grass, Leaping Grass, Power-up Grass
These are all consumable items that help you out in tricky situations one way or another.
Invincible, Swift, Power-up, and Revival grasses are also great for the boss fight.
Life Grass, Healing Grass, Otogirisou, Herb, Strength Grass, Fortune Grass
Without access to shields, increasing Max HP is the main way to improve Shiren's survivability.
Likewise, increasing Shiren's level and strength is the only way to deal more damage.
 Food
Food
Onigiri, Large Onigiri, Grilled Onigiri, Special Onigiri
Since Fullness is consumed to fuel special attacks, aim to keep 1~3 onigiri on hand at all times.
Onigiri can be grilled using an Explochin (9-15F) or Explosion Trap if desired, but it can be a bit risky.
Special Onigiri's Knowledgeable status bonus is helpful early on, but it only replenishes 30 Fullness,
so prioritize more filling onigiri items as you descend further into the dungeon.
 Staves
Peach Staff
If you're lucky enough to find this staff, you can perform additional Farming Techniques.
Of course, being able to one-shot any monster besides Hoppin' Batter types is handy as well.
 Scrolls
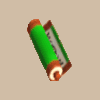
Mapping Scroll
Being able to see where enemies are located makes it easier to maintain 3 tile normal attacks.
Most monsters in this dungeon don't have ranged attacks, so it puts you at a big advantage.
It's recommended to linger and hunt monsters whenever you use one of these scrolls.
Other Scrolls
Windblade Scroll isn't essential since you have access to Blazing Heat, but it does conserve Fullness.
Blank Scroll should probably be used as an Eradication Scroll if you have it unlocked.
Equipment related scrolls are simply fodder for Sun's Blessing.

 Pots & Gitan
Cashing Pot, Gitan
Kokatsu Shiren can throw Gitan bags just like Normal Shiren.
If you find 2 Fortune Grass, throw them at Super Gazer (16-20F) and hunt the Ultra Gazer for 3,000 Gitan.
Froggo family monsters appear throughout the dungeon, so it's not too hard to come by Gitan bags either.
Insert weapons, shields, bracelets, and Special Onigiri into Cashing Pots to create high value Gitan bags,
then throw said bags during the boss fight to make quick work of Embodiment of Suiryu.
Farming Techniques (Kokatsu Shiren)
 Poison Grass (6-11F) / Confusion Grass (16-19F)
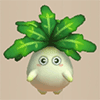
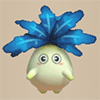
If you find a Peach Staff, turn into a Ghost Radish (6-11F) or Daze Radish (16-19F) and throw grass,
then use Sun's Blessing on the Poison Grass or Confusion Grass to obtain better grass and food items.
Chow, Gazer, Mudkin, or Explochin can cause issues while you do this, so be sure to seal off the room
using Sand-handling beforehand - and check for hidden traps if you want to be extra safe.
Don't forget that Seewell Grass's effect wears off when you eat a Peach Bun.

 Mudster / Mudder Hunting (6-11F)
Mudkin (6-11F)'s special attack lowers Kokatsu Shiren's attack and defense.
So the idea is to intentionally get weakened by Mudkin a few times, then attack to make them multiply.
Once there are lots of Lv1 Mudkin, use Blazing Heat once to blind them and create a Lv2 Mudkin,
then repeat the process until you ultimately have a bunch of Lv3 or Lv4 Mudkin in the room.
At that point, wipe out all remaining monsters using Blazing Heat to earn lots of experience points.
Seal off the room using Sand-handling beforehand, and stand on the stairs in case it gets out of control.
Lv3-4 Mudkin require 3 uses of Blazing Heat, so you'll likely need at least 300~350 Fullness.


 Item Drop Hunting (6-19F)
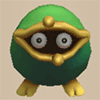
Hunt Froggo (6-10F), Chow (6-10F, 16-19F), Thiefwalrus (9-19F), and Froggucchi (16-19F) for extra items.
Not much to say about this one, other than try to maintain 3 tile range to avoid their stealing attacks.
 3,000 Gitan Bag (16-19F)
Throw 2 Fortune Grass obtained via Sun's Blessing at a Super Gazer (16-20F) to create an Ultra Gazer,
then simply defeat the Ultra Gazer using Blazing Heat or such to secure a Gitan bag worth 3,000 Gitan.
Embodiment of Suiryu only has 555 HP, while 3,000 Gitan deals 600 damage - enough to one-shot Suiryu.
It's best to hunt 2 Ultra Gazers so you can throw 2 bags in a row, in case the first one misses.

 Sand-handling & Arrow Traps
Use Seewell Grass to find an arrow trap, then create a pillar next to it and throw items at the pillar,
followed by performing Sun's Blessing on each of the single arrows that land on the ground.
 Monstercall Scroll & Blazing Heat
Write Monstercall Scroll on a Blank Scroll, then use Blazing Heat to clear out the Monster House.
Generally more practical during early game, since it takes more uses of Blazing Heat later on.
Second Clear
Important Items (Normal Shiren)

 Weapon & Shield
Cyclops Bane, Gazer Shield
Either item is a significant help against Gazer (4-8F) and Super Gazer (16-20F).
Watersplitter
Aquatic type monsters appear on all floors, and even the boss is an Aquatic type.
You can activate the damage boost resonance effect if a Spearfish drops a Spearscale Shield.
Sickle of Salvation
Nice for Pumphantasm (4-8F), Ghost Radish (6-11F), Pumpanshee (12-19F), and Daze Radish (16-20F).
Masked Samurai doesn't appear in this dungeon, so don't worry about handling Ghost Samurai.
 Food
Food
Special Onigiri
Satiated status is valuable, since food is on the uncommon side here.
It's best to eat it at the start of a floor if you want to try and maximize potential benefits.
Farming Techniques (Normal Shiren)
 Mudster Hunting (6-11F)
You can level up a Mudkin (6-11F) by inflicting Blind status (Blinding Grass, Rotten Onigiri, etc.),
inflicting Confused status (Confusion Grass, Confusion Scroll, etc.), or by throwing Fortune Grass.
However, it's rare to find multiples of such items, so you're unlikely to be able to do this in practice.
If you're determined, search for a Rotting Trap and make it a point to collect lots of Rotten Onigiri.
As always, unequip your gear and stand on the stairs when punching Mudsters for exp.


 Item Drop Hunting (6-19F)
Hunt Froggo (6-10F), Chow (6-10F, 16-19F), Thiefwalrus (9-19F), and Froggucchi (16-19F) for extra items.
You won't have a range advantage as Normal Shiren unless you lucked out and found arrows or rocks,
so consider throwing Gitan bags from Froggo family monsters at Thiefwalrus to ensure item drops.
 3,000 Gitan Bag (16-19F)
Throw Rotten Onigiri at Super Gazer (16-20F) to inflict Blind status and have it level up into an Ultra Gazer,
then use items like Sealing Staff and Sluggish Staff to slay the Ultra Gazer for a 3,000 Gitan bag drop.
With lots of luck, a Super Gazer might randomly defeat a Chow (16-19F) and level up on its own instead.
Embodiment of Suiryu only has 555 HP, while 3,000 Gitan deals 600 damage - enough to one-shot Suiryu.

 Rocks & Arrow Traps
Use Seewell Grass to find an arrow trap, then throw rocks onto the trap to collect lots of arrows.
Alternatively, run column by column or row by row in a room to hopefully step on a hidden arrow trap.
However, the second method isn't recommended because food isn't super common in this dungeon,
and you also risk stepping on a negative trap like Rotting Trap, Curse Trap, or Onigiri Trap.
 Rotten Onigiri
Use Seewell Grass to find a Rotting Trap, then lure a monster onto the trap and use projectiles.
If the projectile misses, it'll land on the trap instead, triggering it and creating a Rotten Onigiri.
It's quite risky, but Explochin (9-15F) can be used to grill Rotten Onigiri if desired.
Floor Guide
1-5F
Remember that Kokatsu Shiren's normal attack can cut corners and hit enemies that are in walls.
It's fine to use staves and grass items to identify them - at worst, you might eat a bad status grass.
Alternatively, collect unidentified items and then try for Special Onigiri's Knowledgeable status bonus.
Use equipment and Gitan as fodder for Sun's Blessing - dash to step on Gitan without picking it up.
If you find a shop, sell Special Onigiri obtained from Sun's Blessing to secure funds for shopping.
Kokatsu Shiren levels up at a much faster pace than Normal Shiren up until Lv25.
Pumphantasm (4-8F) and Gazer (4-8F) are both tougher, so aim to reach Lv7 by the end of 3F.
Hoppin' Hitter (5-8F) is even stronger, so aim to reach Lv10 for faster HP regen before 5F.
Monster Stats (1-5F)
| Floor | Monster | HP | Atk | Def | Exp | Type |
|---|---|---|---|---|---|---|
| 1-5 | Shagga | 18 | 6 | 4 | 12 | Dragon |
| 1-5 | Pullfrog | 15 | 5 | 4 | 8 | Aquatic |
| 1-5 | Spearfish | 16 | 6 | 2 | 7 | Aquatic |
| 2-5 | Octopling | 14 | 4 | 6 | 4 | Aquatic |
| 4-8 | Gazer | 30 | 18 | 14 | 40 | Cyclops |
| 4-8 | Pumphantasm | 23 | 16 | 10 | 25 | Ghost/Floating |
| 5-8 | Hoppin' Hitter | 32 | 22 | 15 | 34 | Normal |
6-11F
This is usually the last floor range where you can comfortably keep up with enemies,
so use this floor range to finalize stocking up on food and grass items for the second half.
If you have a Peach Staff, morph into Ghost Radish (6-11F) and throw Poison Grass for Sun's Blessing.
Otherwise, check rooms for items while being careful about groups of enemies.
Hunt Mudkins (6-19F) using the method explained in an earlier section to level up if possible.
Chow (6-10F) can cause a different monster to level up, so keep a close eye on the message log.
Remember that you can use Deception or Blazing Heat to deal with a leveled up monster if needed.
Nashagga (9-15F) attacks 2 times per turn. It hurts - don't be deceived by its lower attack stat.
Explochin (9-15F) turns red when HP ≤ 50%, and explodes when HP ≤ 24 (96+ damage dealt).
The explosion can be used to grill onigiri if you stepped on a Rotting Trap, but your HP will be set to 1.
Monster Stats (6-11F)
| Floor | Monster | HP | Atk | Def | Exp | Type |
|---|---|---|---|---|---|---|
| 4-8 | Gazer | 30 | 18 | 14 | 40 | Cyclops |
| 4-8 | Pumphantasm | 23 | 16 | 10 | 25 | Ghost/Floating |
| 5-8 | Hoppin' Hitter | 32 | 22 | 15 | 34 | Normal |
| 6-10 | Chow | 20 | 1 | 1 | 5 | Floating |
| 6-10 | Froggo | 23 | 10 | 13 | 18 | Normal |
| 6-11 | Ghost Radish | 40 | 18 | 15 | 49 | Ghost |
| 6-19 | Mudkin | 70 | 5 | 9 | 53 | Draining/Aquatic |
| 9-11 | Fresh Octopling | 60 | 19 | 14 | 55 | Aquatic |
| 9-12 | Lt. Spearfish | 60 | 24 | 17 | 55 | Aquatic |
| 9-15 | Explochin | 120 | 25 | 22 | 55 | Exploding/Cyclops/Aquatic |
| 9-15 | Nashagga | 70 | 21 | 20 | 60 | Dragon |
| 9-15 | Bored Kappa | 50 | 18 | 11 | 48 | Aquatic |
| 9-19 | Thiefwalrus | 65 | 25 | 23 | 75 | Aquatic |
12-15F
Chow exits the monster table in this range, so you don't need to worry about monsters leveling up.
Mixer (12-19F) and Pumpanshee (12-19F) have higher attack power than Nashagga and Explochin.
Don't just trade hits with them - fight with a range advantage, or use an ability or item.
If you have food and see an opportunity to seal off the stairs room to hunt Mudkins, go ahead and do so,
but remember to keep onigiri on hand for the boss fight too.
Monster Stats (12-15F)
| Floor | Monster | HP | Atk | Def | Exp | Type |
|---|---|---|---|---|---|---|
| 6-19 | Mudkin | 70 | 5 | 9 | 53 | Draining/Aquatic |
| 9-12 | Lt. Spearfish | 60 | 24 | 17 | 55 | Aquatic |
| 9-15 | Explochin | 120 | 25 | 22 | 55 | Exploding/Cyclops/Aquatic |
| 9-15 | Nashagga | 70 | 21 | 20 | 60 | Dragon |
| 9-15 | Bored Kappa | 50 | 18 | 11 | 48 | Aquatic |
| 9-19 | Thiefwalrus | 65 | 25 | 23 | 75 | Aquatic |
| 12-19 | Pumpanshee | 60 | 35 | 22 | 250 | Ghost/Floating |
| 12-19 | Mixer | 78 | 39 | 29 | 280 | Normal |
| 12-20 | Schubell | 50 | 20 | 20 | 100 | Normal |
16-19F
Mixer and Pumpanshee are still around, and Chow (16-19F) returns.
Rush to the stairs using any Mapping Scrolls and Seewell Grass you saved for this floor range.
Don't hesitate to use an ability or item before things becomes dire if you end up in a bad situation.
Also, boost your normal attack range and replenish Fullness before descending the stairs on 19F.
If you're feeling adventurous, throw 2 Fortune Grass at a Super Gazer to create an Ultra Gazer,
then hunt the Ultra Gazer to secure a bag of 3,000 Gitan → throw the bag at the boss to one-shot it.
You can safely hunt the Ultra Gazer by using Blazing Heat (inflicts Blind status) or such.
Hoppin' Slugger (16-19F) nullifies or reflects magic bullets and thrown items.
Capt. Spearfish (16-20F) has high survivability thanks to its underwater HP regen.
Daze Radish (16-20F) throws Confusion Grass → Poison Grass within a 2 tile radius.
Dartingfrog (18-20F) pulls you closer and attacks from 5 tiles ahead, negating any range advantage.
Super Gazer (16-20F) hypnotizes you and makes you either attack a random direction or use an item.
Monster Stats (16-19F)
| Floor | Monster | HP | Atk | Def | Exp | Type |
|---|---|---|---|---|---|---|
| 6-19 | Mudkin | 70 | 5 | 9 | 53 | Draining/Aquatic |
| 9-19 | Thiefwalrus | 65 | 25 | 23 | 75 | Aquatic |
| 12-19 | Pumpanshee | 60 | 35 | 22 | 250 | Ghost/Floating |
| 12-19 | Mixer | 78 | 39 | 29 | 280 | Normal |
| 12-20 | Schubell | 50 | 20 | 20 | 100 | Normal |
| 16-19 | Chow | 20 | 1 | 1 | 5 | Floating |
| 16-19 | Froggucchi | 60 | 20 | 30 | 80 | Normal |
| 16-19 | Hoppin' Slugger | 72 | 39 | 31 | 400 | Normal |
| 16-20 | Super Gazer | 66 | 30 | 26 | 222 | Cyclops |
| 16-20 | Daze Radish | 80 | 37 | 27 | 400 | Ghost |
| 16-20 | Capt. Spearfish | 100 | 39 | 30 | 410 | Aquatic |
| 18-20 | Dartingfrog | 75 | 40 | 28 | 300 | Aquatic |
Boss (20F)
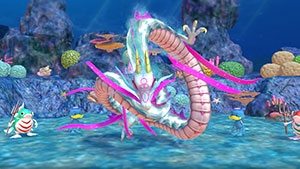
Embodiment of Suiryu (555 HP, 40 atk, 22 def) is an Aquatic and Dragon dual-type monster.
Status conditions can be inflicted, but they get cured in roughly 2~4 turns depending on the status.
Sanctuary Scroll and Knockback Staff do not work, but Paralyzing Staff and Narrow-escape Staff do work.
Special attacks:
- [Content]
Other notes:
- Suiryu's bad status conditions will automatically be cured if she's on a water tile.
- Blazing Heat can be used to blind all regular monsters on the field at the cost of 60 Fullness.
- Blind status doesn't wear off as turns elapse, so it's great for shutting down special attacks.
- The boss shuffles character positions and soaks your inventory after a few turns.
- So if you plan on using scrolls, it's best to read them near the start of the fight.
- Swift Grass, Power-up Grass, and Invincible Grass are fantastic.
- Aggressive Incense can be paired with Invincible Grass to quickly deal massive damage.
- Empathetic Staff can be used to supplement damage if your damage output is low.
- Thrown Gitan is effective against the boss.
- If you want to try this strategy, you can hunt Froggucchis on 16-19F.
Monster Stats (20F)
| Floor | Monster | HP | Atk | Def | Exp | Type |
|---|---|---|---|---|---|---|
| 20 | Embodiment of Suiryu | 555 | 40 | 22 | 0 | Aquatic/Dragon |
| 12-20 | Schubell | 50 | 20 | 20 | 100 | Normal |
| 16-20 | Super Gazer | 66 | 30 | 26 | 222 | Cyclops |
| 16-20 | Daze Radish | 80 | 37 | 27 | 400 | Ghost |
| 18-20 | Dartingfrog | 75 | 40 | 28 | 300 | Aquatic |
| 20 | Bored Kappa | 50 | 18 | 11 | 48 | Aquatic |
| 20 | Pesky Kappa | 75 | 29 | 22 | 330 | Aquatic |
| 20 | Spearfish | 16 | 6 | 2 | 7 | Aquatic |
| 20 | Lt. Spearfish | 60 | 24 | 17 | 55 | Aquatic |
| 16-20 | Capt. Spearfish | 100 | 39 | 30 | 410 | Aquatic |
Monsters
See Monsters for individual monster details.
- F - Dark hallways, Boss Floor
- S - Shop is possible
- M - Monster House is possible
- W - Wishing Shrine is possible
Monster Colors = Farming, Useful, Lowers Stats, Targets Items, Dangerous
Items
※ This section is currently incomplete.
Item Table Key
| ID | Explanation |
|---|---|
| F | Floor |
| S | Shop |
| P | Peddler |
| M | Monster drop |
| B | Buried |
| H | Thiefwalrus |
| I | Island |
| T | Transmutation Pot |
| U | Surprise Pot |
| W | Tunnel of Wishes |
| K | Kokatsu Shiren: Sun's Blessing |
 Weapon
| Weapon | ||||||||||
|---|---|---|---|---|---|---|---|---|---|---|
| Name | F | S | P | M | B | H | I | T | U | W |
| Wooden Sword | ||||||||||
| Bronze Sword | X | |||||||||
| Katana | X | |||||||||
| Doutanuki | X | X | ||||||||
| Manji Kabura | X | |||||||||
| Kajin Fuuma | ||||||||||
| Kabura Sutegi | ||||||||||
| Golden Sword | X | |||||||||
| Kama Itachi | X | |||||||||
| Axe of the Minotaur | ||||||||||
| Accurate Sword | ||||||||||
| Swift Sword | X | |||||||||
| Watersplitter | X | |||||||||
| Primal Axe | ||||||||||
| Dragonkiller | X | |||||||||
| Crescent Blade | X | |||||||||
| Sky Sword | X | X | X | X | X | |||||
| Sickle of Salvation | ||||||||||
| Drain Slayer | X | X | X | |||||||
| Cyclops Bane | X | X | X | |||||||
| Steel Severer | X | X | ||||||||
| Whopping Harisen | X | X | X | |||||||
| Healing Sword | ||||||||||
| Peach Club | ||||||||||
| Spender's Club | X | X | ||||||||
| Ferrous Greatsword | X | X | ||||||||
| Steak Knife | X | |||||||||
| Jagged Sword | X | |||||||||
| Quad-edge | X | |||||||||
| Auspicious Kumade | X | X | ||||||||
| Pickaxe | X | |||||||||
| Golden Pickaxe | ||||||||||
| Wooden Mallet | ||||||||||
| Epic Hammer | ||||||||||
| Trapseeker | X | |||||||||
| Bonito Block | X | |||||||||
| Yamanba's Cleaver | X | |||||||||
| Break-Off Blade | X | |||||||||
 Shield
| Shield | ||||||||||
|---|---|---|---|---|---|---|---|---|---|---|
| Name | F | S | P | M | B | H | I | T | U | W |
| Wooden Shield | X | X | ||||||||
| Bronze Shield | X | |||||||||
| Iron Shield | X | X | ||||||||
| Wolfshead | X | |||||||||
| Fuuma Shield | ||||||||||
| Rasen Fuuma | ||||||||||
| Golden Shield | X | |||||||||
| Counter Shield | X | |||||||||
| Watchful Shield | X | |||||||||
| Dragon Shield | X | |||||||||
| Blast Shield | ||||||||||
| Targe of the Minotaur | ||||||||||
| Walrus Stopper | X | |||||||||
| Froggo Stopper | ||||||||||
| Hat Stopper | X | |||||||||
| Nigiri Stopper | X | |||||||||
| Spearscale Shield | X | X | ||||||||
| Kappa's Dish | ||||||||||
| Gazer Shield | X | X | ||||||||
| Shield of Negation | X | |||||||||
| Unmoving Wall | X | |||||||||
| Zabuton | X | |||||||||
| Spender's Shield | X | |||||||||
| Ferrous Kite | X | X | ||||||||
| Steak Plate | X | X | ||||||||
| Gutsy Shield | X | |||||||||
| Hunky-dory Shield | X | |||||||||
| Bodhi Shield | ||||||||||
| Shield of Sating | X | |||||||||
| Auspicious Omamori | ||||||||||
| Shield of Presage | X | |||||||||
| Yamanba's Potlid | ||||||||||
| Break-Off Shield | X | X | X | |||||||
 Bracelet
| Bracelet | ||||||||||
|---|---|---|---|---|---|---|---|---|---|---|
| Name | F | S | P | M | B | H | I | T | U | W |
| Healing Bracelet | ||||||||||
| Strength Bracelet | ||||||||||
| Bellyexpand Bracelet | X | |||||||||
| Bellyshrink Bracelet | ||||||||||
| Fortune Bracelet | X | |||||||||
| Cleansing Bracelet | X | |||||||||
| Focusing Bracelet | ||||||||||
| Rousing Bracelet | ||||||||||
| Rustproof Bracelet | X | |||||||||
| Cursebreak Bracelet | ||||||||||
| Affixing Bracelet | X | |||||||||
| Far-throwing Bracelet | ||||||||||
| Bad-aim Bracelet | ||||||||||
| Sure-aim Bracelet | ||||||||||
| Bouncy Bracelet | ||||||||||
| Rapid-fire Bracelet | ||||||||||
| Daredevil Bracelet | ||||||||||
| Dreaded Bracelet | ||||||||||
| Leaping Bracelet | ||||||||||
| Blasting Bracelet | ||||||||||
| Clairvoyant Bracelet | ||||||||||
| Monster-find Bracelet | X | X | ||||||||
| Item-find Bracelet | ||||||||||
| Passage-find Bracelet | X | |||||||||
| Waterwalk Bracelet | ||||||||||
| Floating Bracelet | ||||||||||
| Wallpass Bracelet | ||||||||||
| Tiptoe Bracelet | ||||||||||
| Passerby Bracelet | ||||||||||
| Item-losing Bracelet | ||||||||||
| Gitan-losing Bracelet | ||||||||||
| Monstercall Bracelet | ||||||||||
| Trapmore Bracelet | ||||||||||
| Haggling Bracelet | X | |||||||||
| Trapper's Bracelet | ||||||||||
| Appraiser's Bracelet | ||||||||||
| Cannonboost Bracelet | X | |||||||||

 Projectile
| Projectile | ||||||||||
|---|---|---|---|---|---|---|---|---|---|---|
| Name | F | S | P | M | B | H | I | T | U | W |
| Wooden Arrow | X | X | ||||||||
| Iron Arrow | X | X | ||||||||
| Silver Arrow | X | X | X | |||||||
| Poison Arrow | ||||||||||
| Truestrike Arrow | X | X | ||||||||
| Rock | X | X | X | |||||||
| Porky's Rock | X | |||||||||
 Food
Food
| Food | |||||||||||
|---|---|---|---|---|---|---|---|---|---|---|---|
| Name | F | S | P | M | B | H | I | T | U | W | K |
| Onigiri | X | X | X | X | X | ||||||
| Large Onigiri | X | X | X | X | X | X | |||||
| Huge Onigiri | |||||||||||
| Rotten Onigiri | X | X | X | ||||||||
| Grilled Onigiri | |||||||||||
| Special Onigiri | X | X | X | X | |||||||
| Sumo Onigiri | |||||||||||
| Sweet Potato | |||||||||||
| Yakitori | |||||||||||
| Rotten Peach Bun | |||||||||||
 Grass
Grass
| Grass | |||||||||||
|---|---|---|---|---|---|---|---|---|---|---|---|
| Name | F | S | P | M | B | H | I | T | U | W | K |
| Weeds | |||||||||||
| Herb | X | X | |||||||||
| Otogirisou | X | X | X | X | X | ||||||
| Healing Grass | X | X | X | ||||||||
| Life Grass | X | X | X | X | |||||||
| Fragrant Grass | X | ||||||||||
| Revival Grass | X | X | X | X | |||||||
| Bellyexpand Seed | X | X | X | ||||||||
| Bellyshrink Seed | |||||||||||
| Dragon Grass | X | X | X | ||||||||
| Leaping Grass | X | X | X | X | X | ||||||
| Antidote Grass | X | X | X | ||||||||
| Strength Grass | X | X | X | ||||||||
| Poison Grass | X | X | |||||||||
| Confusion Grass | X | X | X | ||||||||
| Sedating Grass | X | X | X | ||||||||
| Berserk Seed | |||||||||||
| Blinding Grass | X | X | X | ||||||||
| Seewell Grass | X | X | X | ||||||||
| Swift Grass | X | X | X | ||||||||
| Power-up Grass | X | X | X | X | |||||||
| Invincible Grass | X | X | X | X | |||||||
| Fortune Grass | X | X | X | ||||||||
| Angel Seed | |||||||||||
| Feeble Grass | |||||||||||
| Unlucky Seed | |||||||||||
| Ill-fated Seed | |||||||||||
 Scroll
| Scroll | ||||||||||
|---|---|---|---|---|---|---|---|---|---|---|
| Name | F | S | P | M | B | H | I | T | U | W |
| Confusion Scroll | X | X | ||||||||
| Slumber Scroll | X | X | X | X | X | |||||
| Jitters Scroll | X | X | ||||||||
| Windblade Scroll | X | X | ||||||||
| Expulsion Scroll | ||||||||||
| Exorcism Scroll | X | |||||||||
| Identifier Scroll | X | X | X | X | ||||||
| Heavenly Scroll | X | X | X | |||||||
| Earthly Scroll | X | X | X | X | X | |||||
| Plating Scroll | X | X | ||||||||
| Slot-adding Scroll | X | |||||||||
| Rune-eraser Scroll | X | |||||||||
| Silver-seal Scroll | ||||||||||
| Silverpurge Scroll | X | X | X | |||||||
| Pot-upsize Scroll | X | X | ||||||||
| Extraction Scroll | ||||||||||
| Onigiri Scroll | X | X | X | |||||||
| Curse Scroll | ||||||||||
| Mapping Scroll | X | X | X | X | ||||||
| Map-loss Scroll | ||||||||||
| Trap-eraser Scroll | X | X | ||||||||
| Trap Scroll | ||||||||||
| Water-drain Scroll | ||||||||||
| Monstercall Scroll | ||||||||||
| Wall-less Scroll | X | |||||||||
| Gathering Scroll | ||||||||||
| Collection Scroll | X | X | X | |||||||
| Gambler's Scroll | ||||||||||
| Muzzle Scroll | ||||||||||
| Carry-ban Scroll | ||||||||||
| Swift Foe Scroll | ||||||||||
| Fixer Scroll | X | X | ||||||||
| Escape Scroll | X | |||||||||
| Eradication Scroll | ||||||||||
| Sanctuary Scroll | X | X | ||||||||
| Blank Scroll | X | X | X | |||||||
| Wet Scroll | ||||||||||
 Staff
Staff
| Staff | ||||||||||
|---|---|---|---|---|---|---|---|---|---|---|
| Name | F | S | P | M | B | H | I | T | U | W |
| Ordinary Staff | ||||||||||
| Paralyzing Staff | X | X | ||||||||
| Sealing Staff | X | X | ||||||||
| Disguising Staff | X | X | ||||||||
| Empathetic Staff | X | X | X | |||||||
| Narrow-escape Staff | X | X | ||||||||
| Knockback Staff | X | X | ||||||||
| Switching Staff | X | |||||||||
| Vaulting Staff | X | X | X | X | ||||||
| Skull Mage's Staff | ||||||||||
| Thunderbolt Staff | X | X | ||||||||
| Burrowing Staff | X | X | ||||||||
| Earthmound Staff | X | X | ||||||||
| Balance Staff | X | X | X | |||||||
| Guiding Staff | ||||||||||
| Swift Staff | ||||||||||
| Sluggish Staff | X | X | X | X | ||||||
| Fortune Staff | ||||||||||
| Unlucky Staff | ||||||||||
| Peach Staff | X | X | ||||||||
 Pot
Pot
| Pot | ||||||||||
|---|---|---|---|---|---|---|---|---|---|---|
| Name | F | S | P | M | B | H | I | T | U | W |
| Preservation Pot | X | X | ||||||||
| Identifier Pot | X | |||||||||
| Transmutation Pot | X | |||||||||
| Cashing Pot | X | X | X | X | ||||||
| Synthesis Pot | X | X | ||||||||
| Exorcism Pot | X | |||||||||
| Curse Pot | ||||||||||
| Upgrading Pot | ||||||||||
| Degrading Pot | ||||||||||
| Bottomless Pot | X | X | X | X | ||||||
| Warehouse Pot | X | |||||||||
| Handtrapper Pot | ||||||||||
| Unbreakable Pot | ||||||||||
| Ordinary Pot | X | X | ||||||||
| Hiding Pot | X | X | ||||||||
| Rejuvenation Pot | X | |||||||||
| Walrus Pot | X | |||||||||
| Water Gun Pot | X | |||||||||
| Hilarious Pot | ||||||||||
| Monster Pot | ||||||||||
| Surprise Pot | ||||||||||
 Incense
| Incense | ||||||||||
|---|---|---|---|---|---|---|---|---|---|---|
| Name | F | S | P | M | B | H | I | T | U | W |
| Heat-ban Incense | X | X | ||||||||
| Evasive Incense | X | X | X | X | X | |||||
| Cautious Incense | X | X | ||||||||
| Reflective Incense | X | |||||||||
| Aggressive Incense | X | X | ||||||||
| Defensive Incense | X | X | X | |||||||
| Blurry Incense | X | X | ||||||||
| Weighted Incense | X | |||||||||
| Unwanting Incense | X | |||||||||

