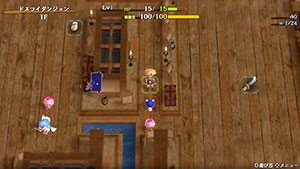
Sumo Dungeon
Overview
| Unlock | Clear Serpentcoil Island → Go to Harbor Inn Yuunagi in Small Harbor. |
|---|---|
| Entrance | Small Harbor (Harbor Inn Yuunagi) |
| Floors | 20F / 99F (Sacred Tree) | ||
|---|---|---|---|
| Bring Items | Yes | Stairs | Ascending |
| Companions | Yes | Roamers | |
| Rescues | 3 | Starting Level | Lv1 |
| Starting Item | Sumo Onigiri | ||
| Unidentified | Equipment, Grass, Scrolls, Staves, Pots | ||
| Shops | Yes | Monster Houses | Yes (Regular) |
| Behemoths | No (99F: Yes) | Wishing Shrines | Yes |
| Kron's Challenge | Yes | Fever Time | Yes |
| Initial Enemies | 5~7 (1F - 20F) 6~16 (21F - 99F) | Spawn Rate | 30 Turns |
| Wind (1st Gust) | 900 Turns | Reward | Steak Plate |
Postgame dungeon featuring Sumo Onigiri as the only food item found on the ground.
The player can bring items, but it can be cleared without bringing any items thanks to Sumo status.
The dungeon has lots of items buried in wall tiles, since Sumo status allows digging through walls.
Overall, it's basically just a place where players can visit to learn how Sumo status works.
Navigation
Strategy
General Advice (First Clear & Sacred Tree Extension)
Dungeon where you're expected to progress while managing Fullness and utilizing Sumo status.
Sumo Onigiri is the only food item found on the ground, and Feeding Traps are also pretty common.
Rotting Trap, Onigiri Scroll, and fire & explosion sources appear, so other onigiri items can be obtained.
Hidden items can appear in wall tiles, incentivizing digging out walls during Sumo status.
Wishing Shrines and Gitan Vaults can also be generated, generally making it easier to amass items.
It's easy among dungeons that allow bringing items, making it a great first stop after clearing the story.
Many players like to challenge the first clear without bringing any items into the dungeon.
Sumo status is an extremely powerful mechanic that can be utilized in other postgame dungeons,
so it's great to spend time here to learn how it works, along with practicing Fullness management.
An effective strategy is to activate Sumo status in harder floor ranges, and disable it in easier ones.
However, said strategy is tricky to apply to this dungeon due to the dungeon's gimmick.
 Sumo Status
Occurs when Max Fullness reaches 150, and is canceled when Fullness depletes to 120.
Sumo status boosts the player's attack power by 50%, and also increases max HP by 50.
In addition, Shiren can also dig through wall tiles without penalty, and becomes immune to traps.
However, fullness depletion is doubled, and movement effects like Vaulting Staff are nullified,
so Sumo status isn't strictly all positive effects.
 Sumo Onigiri
Nigiri Baby does not appear, so Sumo Onigiri is likely going to be your only food source.
It's hard to maintain Sumo status if you don't bring items like Peach Club or Shield of Sating,
so aim to only activate Sumo status when you need the additional HP and attack power.
Beware of monster special attacks that cause onigiri to become grilled or rotten.
 Behemoth Monsters (Sacred Tree Extension)
Behemoth Gates have a chance to spawn on 21-95F in the 99F Sacred Tree Mode extension.
However, only 1 type of Behemoth appears, and the specific monster changes every 5 floors.
Up to 3 Behemoth Monsters can spawn at once, or up to 2 for B-Soul Reaper (91-95F).
B-Soul Reaper also despawns faster than other Behemoths - roughly 12 turns.
Important Items (First Clear & Sacred Tree Extension)
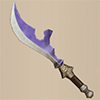
 Weapon & Shield
Drain Slayer
Sword that boosts damage dealt to Draining type monsters (x1.5 multiplier).
Particularly good for Scorpion and Polygon Spinna families in the Sacred Tree Extension.
Shield of Sating
Halves hunger rate while equipped (1 Fullness / 10 Turns → 1 Fullness / 20 Turns).
Shiren's Sumo status is x2.0 hunger, so this shield sets Sumo status hunger to normal speed.
 Bracelets
Item-find Bracelet, Clairvoyant Bracelet
Reveals where items are buried inside wall tiles.
Monster-find Bracelet, Clairvoyant Bracelet
Reveals where monsters are located on the current floor - Nice for dark hallway (15-30F) floors.
Trapper's Bracelet (Carry-In)
Reveals hidden traps, and lets you pick up traps as items & set traps to ensnare monsters.
Great for locating Feeding Traps and avoiding Starvation Traps in particular.

 Projectiles
Wooden Arrow, Iron Arrow
Sumo status's x1.5 damage multiplier also applies to arrows shot by the player.
Strength Grass is common, so the combo of high strength + Sumo status makes arrows potent.
Arrows can only be collected from Bowboy & Crossbowboy (6F) during the first clear,
but Baby Tank (23-49F) appears for a long time during the Sacred Tree Extension.
Poison Arrow
A single Poison Arrow reduces a monster's attack power by 50%.
However, it's quite hard to collect these in this dungeon since Karakuroid doesn't appear at all.
Your only realistic option is to check for traps using normal attacks if Sumo status is active,
since Sumo status destroys traps you step on - all said, it's likely not worth the effort.
Rock, Porky's Rock
A single rock type item one-shots a Ghost Samurai (6F) or Behemoth Monster (21-95F).

 Other Items
Collection Scroll, Burrowing Staff
Makes it easier to obtain items that are hidden inside wall tiles.
It's probably best to save these for when you find a shop, Preservation Pot, or Identifier Pot.
Mapping Scroll
Pretty common, and great for dark hallway (15-30F) floors in particular.
If you're attempting the first clear, it's recommended to save 2 Mapping Scrolls for 19-20F.
Invincible Grass, Confusion Scroll, Jitters Scroll
Items that can be used in Monster Houses even when Sumo status is active.
Confusion Scroll is best for single room MHs, while Invincible Grass is great for pop-up MHs.
Paralyzing Staff, Narrow-escape Staff
Single-target options that can be used even when Sumo status is active.
Narrow-escape Staff can be combined with Monster-find Bracelet to locate the stairs.

 Traps
Traps
Feeding Trap
Positive Trap - Increases Fullness and Max Fullness by 25, then breaks.
Stops generating around 30F or so? - don't forget to cancel Sumo status before stepping on it!
Starvation Trap
Negative Trap - Decreases Fullness and Max Fullness by 25, then breaks.
It's safe to step on this when Sumo status is active, since the trap will simply be destroyed.
Floor Guide
First Clear
General Advice
This section assumes that the player isn't bringing any items into the dungeon.
The first clear is like a slightly harder version of Serpentcoil Island condensed to 20 floors.
You'll burn through Sumo Onigiri very quickly if you try to explore while Sumo status is active,
so it's best to only rely on Sumo status when rushing to the stairs or when fighting stronger foes.
Some players begin rushing to the stairs starting from 10F.
Try to claim items buried in walls if you have Fullness or digging-related items to spare.
Use items like Item-find Bracelet, Clairvoyant Bracelet, or Mapping Scroll to locate buried items.
Retrieving options include Collection Scroll, Burrowing Staff, Wallpass Bracelet, Pumphantasm Bun, etc.
Sumo status can also be used, but Fullness depletes quickly without
 Sating (shield rune).
1F
Enemy lineup is based on Serpentcoil Island 1F (Sozoro Bay) - Stay in normal form.
Linger until the wind blows for experience points and item drops, and check for
 Feeding Traps,
which can be intentionally stepped on to increase the player's Max Fullness by 25.
Monster Stats (1F)
| Floor | Monster | HP | Atk | Def | Exp | Type |
|---|---|---|---|---|---|---|
| 1 | Mamel | 8 | 3 | 4 | 2 | Normal |
| 1 | Spearfish | 16 | 6 | 2 | 7 | Aquatic |
| 1 | Octopling | 14 | 4 | 6 | 4 | Aquatic |
2F
Enemy lineup is based on Serpentcoil Island 3-4F (Suzunari Pass).
Pumphantasm (2F) appears, so consider eating a Sumo Onigiri if you haven't found a shield.
However, if you're able to linger without activating Sumo status, you'll have more onigiri for later.
After checking rooms for items, go ahead and advance to the next floor if Sumo status is active.
Monster Stats (2F)
| Floor | Monster | HP | Atk | Def | Exp | Type |
|---|---|---|---|---|---|---|
| 2 | Chintala | 15 | 9 | 4 | 12 | Beast |
| 2 | Armordillo | 20 | 11 | 15 | 15 | Beast |
| 2 | Pit Mamel | 11 | 5 | 8 | 5 | Normal |
| 2 | Pumphantasm | 23 | 16 | 10 | 25 | Ghost/Floating |
3-5F
Enemy lineup is based on Serpentcoil Island 5-9F (Mount Jingara) + Scorpion (3-4F).
Scorpion has higher HP and occasionally lowers current strength by 1 when adjacent.
Fire Ninja D (3-5F) grills precious Sumo Onigiri found on the ground or located in your inventory.
Water Ninja D (4-5F) shoots water up to 3 tiles ahead when not adjacent, which rots Sumo Onigiri.
Hoppin' Hitter (4-5F) is immune to staff magic and projectiles, and Mid Chintala (5-6F) hits hard.
Overall, it's probably best to rush through these floors instead of lingering.
Monster Stats (3-5F)
| Floor | Monster | HP | Atk | Def | Exp | Type |
|---|---|---|---|---|---|---|
| 3-4 | Scorpion | 37 | 14 | 14 | 33 | Draining |
| 3-4 | Tree Ninja D | 25 | 14 | 10 | 27 | Normal |
| 3-5 | Fire Ninja D | 28 | 18 | 5 | 30 | Normal |
| 3-5 | Earth Ninja D | 38 | 11 | 20 | 30 | Normal |
| 4-5 | Hoppin' Hitter | 32 | 22 | 15 | 34 | Normal |
| 4-5 | Metal Ninja D | 27 | 13 | 11 | 35 | Normal |
| 4-5 | Water Ninja D | 24 | 15 | 9 | 31 | Normal |
| 5-6 | Mid Chintala | 45 | 23 | 10 | 27 | Beast |
6-9F
Enemy lineup is based on Serpentcoil Island 10-15F (Underwater Passage).
Fighting starts to get difficult without the help of Sumo status from around this point.
Masked Samurai (6F) and Mudkin (7-8F) don't overlap, so you can't hunt Lv3-4 Mudkin monsters.
Bowboy, Crossbowboy, and Bored Kappa all overlap on 6F, so collect arrows if desired.
That said, don't underestimate Crossbowboy's attack power if your shield is weak.
Monster Stats (6-9F)
| Floor | Monster | HP | Atk | Def | Exp | Type |
|---|---|---|---|---|---|---|
| 5-6 | Mid Chintala | 45 | 23 | 10 | 27 | Beast |
| 6 | Bowboy | 45 | 17 | 18 | 60 | Normal |
| 6 | Crossbowboy | 55 | 20 | 20 | 80 | Normal |
| 6 | Bored Kappa | 50 | 18 | 11 | 48 | Aquatic |
| 6 | Masked Samurai | 47 | 18 | 18 | 48 | Normal |
| 6-7 | Fresh Octopling | 60 | 19 | 14 | 55 | Aquatic |
| 7-8 | Mudkin | 70 | 5 | 9 | 53 | Draining/Aquatic |
| 7-8 | Lt. Spearfish | 60 | 24 | 17 | 55 | Aquatic |
| 7-9 | Metalhead | 66 | 30 | 19 | 61 | Cyclops |
| 7-9 | Floor Dragon | 55 | 25 | 20 | 80 | Dragon |
| 7-10 | Tiger Thrower | 68 | 26 | 22 | 77 | Beast |
10-13F
Enemy lineup is based on Serpentcoil Island 16-19F (Kibanuma Marsh).
Main threats are Pop Tank (10-12F) and Flamepuff (10-11F), since they can grill Sumo Onigiri.
Ghost Radish (10-11F) throws Poison Grass 2 tiles ahead, decreasing strength and action speed.
Rush to the stairs on 13F to avoid Skull Wizard (13-15F) leveling up from Hannya Monk D (12-13F).
Otherwise, most monsters shouldn't really be an issue as long as Sumo status is active.
Monster Stats (10-13F)
| Floor | Monster | HP | Atk | Def | Exp | Type |
|---|---|---|---|---|---|---|
| 7-10 | Tiger Thrower | 68 | 26 | 22 | 77 | Beast |
| 10-11 | Egg Thing | 5 | 2 | 14 | 7 | Cyclops |
| 10-11 | Flamepuff | 50 | 25 | 20 | 175 | Dragon/Floating |
| 10-11 | Ghost Radish | 40 | 18 | 15 | 49 | Ghost |
| 10-11 | Hat Prankster | 70 | 15 | 6 | 50 | Cyclops |
| 10-12 | Minotaur | 70 | 31 | 20 | 90 | Beast |
| 10-12 | Master Hen | 70 | 33 | 21 | 400 | Beast |
| 10-12 | Pop Tank | 90 | 20 | 24 | 100 | Metal/Exploding |
| 10-12 | Okina Monk D | 70 | 25 | 25 | 80 | Normal |
| 10-12 | Kitsune Monk D | 75 | 22 | 24 | 80 | Normal |
| 10-13 | Okame Monk D | 60 | 19 | 23 | 75 | Normal |
| 10-13 | Thiefwalrus | 65 | 25 | 23 | 75 | Aquatic |
| 11-14 | Zapdon | 80 | 43 | 35 | 105 | Metal |
| 12-13 | Tengu Monk D | 80 | 24 | 20 | 85 | Normal |
| 12-13 | Hannya Monk D | 66 | 37 | 25 | 80 | Normal |
| 12-15 | N'dubba | 32 | 16 | 8 | 16 | Metal |
| 13-15 | Skull Wizard | 88 | 35 | 24 | 250 | Ghost |
14-17F
Enemy lineup is based on Serpentcoil Island 20-23F (Firespew Mountain), dark hallways: 15-17F.
Lv2 Ninjas appear, so protect your Sumo Onigiri against Fire (14-17F) and Water (14-18F) ninjas.
Explochin (14-16F)'s explosion occurs at 96+ total damage, and grills Sumo Onigiri in your inventory.
Super Gazer (16-18F) also appears, but losing items to hypnosis isn't a huge deal at this point,
since you can just rush to the stairs for a few more floors until you clear the dungeon.
Monster Stats (14-17F)
| Floor | Monster | HP | Atk | Def | Exp | Type |
|---|---|---|---|---|---|---|
| 11-14 | Zapdon | 80 | 43 | 35 | 105 | Metal |
| 12-15 | N'dubba | 32 | 16 | 8 | 16 | Metal |
| 13-15 | Skull Wizard | 88 | 35 | 24 | 250 | Ghost |
| 14-15 | Tree Ninja C | 70 | 37 | 24 | 88 | Normal |
| 14-15 | Earth Ninja C | 85 | 21 | 28 | 90 | Normal |
| 14-17 | Fire Ninja C | 75 | 45 | 21 | 100 | Normal |
| 14-18 | Water Ninja C | 80 | 37 | 26 | 95 | Normal |
| 14-16 | Explochin | 120 | 25 | 22 | 55 | Exploding/Cyclops/Aquatic |
| 15-17 | Blazeous | 92 | 36 | 24 | 150 | Normal |
| 16-17 | Metal Ninja C | 85 | 42 | 29 | 93 | Normal |
| 16-17 | Skull Mage | 77 | 31 | 21 | 210 | Ghost |
| 16-18 | Super Gazer | 66 | 30 | 26 | 222 | Cyclops |
18-20F
Enemy lineup is based on Serpentcoil Island 25-26F (Mount Jatou), dark hallways: 18-20F.
Aim to remain in Sumo status on these last 3 floors, and focus on finding the stairs quickly.
Mapping Scroll is a significant help, along with arrows in hallways to check for incoming foes.
Pesky Kappa (18-20F) throws ground items at you when you get within a 5 tile radius.
Porko (18-20F) throws a Porky's Rock within a 5 tile radius that deals 20 damage.
Dartingfrog (18-20F) pulls you closer from up to 5 tiles ahead and attacks on the same turn.
Daze Radish (20F) throws Confusion Grass → Poison Grass within a 2 tile radius.
Hunt a Menbell (19-20F) for the Monster Notebook if desired, as it's rare to see it spawn naturally.
However, you can also unlock its notebook entry by eating a Menbell Bun purchased in Shukuba Beach.
You might be tempted to hunt Greenwalrus (19-20F) for items or use Mixer (18-20F) for synthesis,
but it's pointless to do so during the first clear since the goal is so close.
Monster Stats (18-20F)
| Floor | Monster | HP | Atk | Def | Exp | Type |
|---|---|---|---|---|---|---|
| 14-18 | Water Ninja C | 80 | 37 | 26 | 95 | Normal |
| 16-18 | Super Gazer | 66 | 30 | 26 | 222 | Cyclops |
| 18-19 | Dark Owl | 90 | 16 | 25 | 120 | Normal |
| 18-19 | Capt. Spearfish | 100 | 39 | 30 | 410 | Aquatic |
| 18-19 | Famed Octopling | 99 | 25 | 30 | 420 | Aquatic |
| 18-20 | Porko | 65 | 36 | 18 | 840 | Beast |
| 18-20 | Corporal Ant | 100 | 40 | 20 | 220 | Normal |
| 18-20 | Pesky Kappa | 75 | 29 | 22 | 330 | Aquatic |
| 18-20 | N'dulu | 70 | 40 | 31 | 230 | Metal |
| 18-20 | Dartingfrog | 75 | 40 | 28 | 300 | Aquatic |
| 18-20 | Mixer | 78 | 39 | 29 | 280 | Normal |
| 19-20 | Menbell | 100 | 30 | 30 | 400 | Normal |
| 19-20 | Greenwalrus | 88 | 30 | 27 | 240 | Aquatic |
| 20 | Daze Radish | 80 | 37 | 27 | 400 | Ghost |
Sacred Tree Extension
General Advice
Challenging the extension without bringing items is still doable, but can be quite spicy.
You'll probably struggle to fight late game monsters even with the help of Sumo status.
Synthesize gear on Mixer (18-23F) floors, and restock arrows on Baby Tank (23-49F) floors.
Narrow-escape Staff can be swung at a Hoppin' Slammer (50-99F) to warp to the stairs.
Hallways are only dark between 15-30F, and the remainder of the dungeon has visible hallways.
Monster Houses seem to be more common than some other dungeons, including single room MHs.
Items like Confusion Scroll and Blurry Incense are key to surviving them during Sumo status.
Throw Eradication Scrolls at Baby Tank (23-49F) → Pop Tanks (50-99F), or Scorpions (24-99F).
Prioritize Scorpions if you can't one-shot them and don't have a Cleansing Bracelet.
The monster table for the extension focuses on 4 main types of threats on 24-99F:
- Polygon Spinna family's Fullness / Max Fullness decrease.
- Polygon Shaka (24-49F, -5 Fullness) → Polygon Singa (50-99F, -7 Max Fullness).
- Scorpion family's Strength / Max Strength decrease.
- Vile Scorpion (24-49F, -2 Strength) → Terror Scorpion (50-99F, -1 Max Strength).
- Hoppin' Batter family's magic bullet & projectile reflect.
- Hoppin' Slugger (24-49F) → Hoppin' Slammer (50-99F).
- Monsters that can grill or rot Sumo Onigiri that aren't in pots.
- Sky Dragon (22-50F), Lv2-4 Tanks (50-99F), Detonachin (60-75F), Fire Ninja B (76-90F), etc.
Also, a fixed type of behemoth monster has a chance to appear every 5 floors between 21-95F.
The max number of behemoths is 3 per floor, aside from B-Soul Reaper which has a max of 2.
Consider hunting Mini Tanks (50-75F) for Silver Arrow drops to counter notorious Behemoths,
and don't forget that Wall-less Scroll can be used to instantly make all Behemoths vanish.
- 21-25F - Dragon
- 26-30F - Sky Dragon
- 31-35F - Porky
- 36-40F - Ghost Radish
- 41-45F - Death Reaper
- 46-50F - Porko
- 51-55F - Daze Radish
- 56-60F - Sleep Radish
- 61-65F - Hell Reaper
- 66-70F - Porkon
- 71-75F - Frenzy Radish
- 76-80F - Archdragon
- 81-85F - Abyss Dragon
- 86-90F - Porgon
- 91-95F - Soul Reaper
1-23F
Behemoth Gates have a chance of being generated on 21-23F.
Behemoths only includes Dragon (21-25F), so Behemoth Monsters are not a huge threat yet.
As for regular monsters, this floor range mostly follows a condensed version of Serpentcoil Island.
Hallways are only dark between 15-30F - The rest of the dungeon has visible hallways.
The strategy for the first clear can be used, but don't skip synthesizing with Mixers (18-23F).
Daze Radish (20-23F) overlaps with Mixer, so aim to synthesize
 Confusing into your weapon.
The extension goes until 99F, so don't eat all of your Sumo Onigiri near the end of this floor range.
Cleansing Bracelet is valuable in this dungeon thanks to the prevalence of Scorpion family monsters,
and watch for Preservation Pots, which can be used to prevent Sumo Onigiri from becoming grilled.
Don't forget to collect arrows on 6F since Bowboy family monsters and Bored Kappa overlap.
Depending on item luck, you might be able to restock arrows on Baby Tank (23-49F) floors too.
Some players like to linger on Minotaur (10-12F) floors for an Axe of the Minotaur drop,
but the weapon is quite rare, so don't expect it to drop even if you linger on all 3 floors.
Monster Stats (1-23F)
| Floor | Monster | HP | Atk | Def | Exp | Type |
|---|---|---|---|---|---|---|
| 1 | Mamel | 8 | 3 | 4 | 2 | Normal |
| 1 | Spearfish | 16 | 6 | 2 | 7 | Aquatic |
| 1 | Octopling | 14 | 4 | 6 | 4 | Aquatic |
| 2 | Chintala | 15 | 9 | 4 | 12 | Beast |
| 2 | Armordillo | 20 | 11 | 15 | 15 | Beast |
| 2 | Pit Mamel | 11 | 5 | 8 | 5 | Normal |
| 2 | Pumphantasm | 23 | 16 | 10 | 25 | Ghost/Floating |
| 3-4 | Scorpion | 37 | 14 | 14 | 33 | Draining |
| 3-4 | Tree Ninja D | 25 | 14 | 10 | 27 | Normal |
| 3-5 | Fire Ninja D | 28 | 18 | 5 | 30 | Normal |
| 3-5 | Earth Ninja D | 38 | 11 | 20 | 30 | Normal |
| 4-5 | Hoppin' Hitter | 32 | 22 | 15 | 34 | Normal |
| 4-5 | Metal Ninja D | 27 | 13 | 11 | 35 | Normal |
| 4-5 | Water Ninja D | 24 | 15 | 9 | 31 | Normal |
| 5-6 | Mid Chintala | 45 | 23 | 10 | 27 | Beast |
| 6 | Bowboy | 45 | 17 | 18 | 60 | Normal |
| 6 | Crossbowboy | 55 | 20 | 20 | 80 | Normal |
| 6 | Bored Kappa | 50 | 18 | 11 | 48 | Aquatic |
| 6 | Masked Samurai | 47 | 18 | 18 | 48 | Normal |
| 6-7 | Fresh Octopling | 60 | 19 | 14 | 55 | Aquatic |
| 7-8 | Mudkin | 70 | 5 | 9 | 53 | Draining/Aquatic |
| 7-8 | Lt. Spearfish | 60 | 24 | 17 | 55 | Aquatic |
| 7-9 | Metalhead | 66 | 30 | 19 | 61 | Cyclops |
| 7-9 | Floor Dragon | 55 | 25 | 20 | 80 | Dragon |
| 7-10 | Tiger Thrower | 68 | 26 | 22 | 77 | Beast |
| 10-11 | Egg Thing | 5 | 2 | 14 | 7 | Cyclops |
| 10-11 | Flamepuff | 50 | 25 | 20 | 175 | Dragon/Floating |
| 10-11 | Ghost Radish | 40 | 18 | 15 | 49 | Ghost |
| 10-11 | Hat Prankster | 70 | 15 | 6 | 50 | Cyclops |
| 10-12 | Minotaur | 70 | 31 | 20 | 90 | Beast |
| 10-12 | Master Hen | 70 | 33 | 21 | 400 | Beast |
| 10-12 | Pop Tank | 90 | 20 | 24 | 100 | Metal/Exploding |
| 10-12 | Okina Monk D | 70 | 25 | 25 | 80 | Normal |
| 10-12 | Kitsune Monk D | 75 | 22 | 24 | 80 | Normal |
| 10-13 | Okame Monk D | 60 | 19 | 23 | 75 | Normal |
| 10-13 | Thiefwalrus | 65 | 25 | 23 | 75 | Aquatic |
| 11-14 | Zapdon | 80 | 43 | 35 | 105 | Metal |
| 12-13 | Tengu Monk D | 80 | 24 | 20 | 85 | Normal |
| 12-13 | Hannya Monk D | 66 | 37 | 25 | 80 | Normal |
| 12-15 | N'dubba | 32 | 16 | 8 | 16 | Metal |
| 13-15 | Skull Wizard | 88 | 35 | 24 | 250 | Ghost |
| 14-15 | Tree Ninja C | 70 | 37 | 24 | 88 | Normal |
| 14-15 | Earth Ninja C | 85 | 21 | 28 | 90 | Normal |
| 14-17 | Fire Ninja C | 75 | 45 | 21 | 100 | Normal |
| 14-18 | Water Ninja C | 80 | 37 | 26 | 95 | Normal |
| 14-16 | Explochin | 120 | 25 | 22 | 55 | Exploding/Cyclops/Aquatic |
| 15-17 | Blazeous | 92 | 36 | 24 | 150 | Normal |
| 16-17 | Metal Ninja C | 85 | 42 | 29 | 93 | Normal |
| 16-17 | Skull Mage | 77 | 31 | 21 | 210 | Ghost |
| 16-18 | Super Gazer | 66 | 30 | 26 | 222 | Cyclops |
| 18-19 | Dark Owl | 90 | 16 | 25 | 120 | Normal |
| 18-19 | Capt. Spearfish | 100 | 39 | 30 | 410 | Aquatic |
| 18-19 | Famed Octopling | 99 | 25 | 30 | 420 | Aquatic |
| 18-21 | Porko | 65 | 36 | 18 | 840 | Beast |
| 18-21 | Corporal Ant | 100 | 40 | 20 | 220 | Normal |
| 18-21 | Pesky Kappa | 75 | 29 | 22 | 330 | Aquatic |
| 18-22 | N'dulu | 70 | 40 | 31 | 230 | Metal |
| 18-22 | Dartingfrog | 75 | 40 | 28 | 300 | Aquatic |
| 18-23 | Mixer | 78 | 39 | 29 | 280 | Normal |
| 19-23 | Menbell | 100 | 30 | 30 | 400 | Normal |
| 19-23 | Greenwalrus | 88 | 30 | 27 | 240 | Aquatic |
| 20-23 | Daze Radish | 80 | 37 | 27 | 400 | Ghost |
| 21-24 | Dragon | 120 | 45 | 40 | 1000 | Dragon |
| 22-50 | Sky Dragon | 140 | 55 | 50 | 1600 | Dragon |
| 23-49 | Baby Tank | 85 | 40 | 30 | 450 | Normal |
Behemoths (1-23F)
| Floor | Monster |
|---|---|
| 21-25 | Dragon |
24-49F
Behemoth Gates have a chance of being generated on 24-49F.
Notable Behemoths - Sky Dragon (26-30F), Death Reaper (41-45F), Porko (46-50F).
The regular monster lineup changes from Serpentcoil Island → Sumo Dungeon's 4 main threats,
which are Strength loss, Fullness loss, projectile reflection, and Sumo Onigiri destruction.
If you have an Eradication Scroll but lack a Cleansing Bracelet, throw the scroll at Vile Scorpion.
Hallways are only dark between 15-30F - The rest of the dungeon has visible hallways.
Dragon (21-24F) and Sky Dragon (22-50F) transform Sumo Onigiri into Grilled Onigiri.
Vile Scorpion (24-49F) lowers Strength by 2 when adjacent (countered by Cleansing Bracelet).
Polygon Shaka (24-49F) lowers Fullness by 5 when adjacent (countered by Reflective Incense).
Hoppin' Slugger (24-49F) has a 50% chance to reflect arrows, thrown items, and staff magic.
Baby Tank (23-49F) also spawns, providing a chance to restock Iron Arrows depending on items.
Monster Stats (24-49F)
| Floor | Monster | HP | Atk | Def | Exp | Type |
|---|---|---|---|---|---|---|
| 21-24 | Dragon | 120 | 45 | 40 | 1000 | Dragon |
| 22-50 | Sky Dragon | 140 | 55 | 50 | 1600 | Dragon |
| 23-49 | Baby Tank | 85 | 40 | 30 | 450 | Normal |
| 24-49 | Vile Scorpion | 108 | 45 | 33 | 500 | Draining |
| 24-49 | Polygon Shaka | 70 | 34 | 33 | 360 | Draining |
| 24-49 | Hoppin' Slugger | 72 | 39 | 31 | 400 | Normal |
Behemoths (24-49F)
| Floor | Monster |
|---|---|
| 21-25 | Dragon |
| 26-30 | Sky Dragon |
| 31-35 | Porky |
| 36-40 | Ghost Radish |
| 41-45 | Death Reaper |
| 46-50 | Porko |
50-69F
Behemoth Gates have a chance of being generated on 50-69F.
Notable Behemoths - Porko (46-50F), Sleep Radish (56-60F), Porkon (66-70F).
The regular monster lineup is now an upgraded version of Sumo Dungeon's 4 main threats,
including Max Strength loss, Max Fullness loss, projectile reflection, and Sumo Onigiri destruction.
Narrow-escape Staff can be swung at Hoppin' Slammer to warp to the stairs, but beware of Behemoths.
If you have an Eradication Scroll and a Cleansing Bracelet, throw the scroll at Ornery Tank,
otherwise, strongly consider keeping the Scorpion family eradicated.
Sky Dragon (22-50F), Ornery Tank (50-69F), and Detonachin (60-75F) can grill Sumo Onigiri.
Terror Scorpion (50-99F) lowers Max Strength by 1 when adjacent (countered by Cleansing Bracelet).
Polygon Singa (50-99F) lowers Max Fullness by 7 when adjacent (countered by Reflective Incense).
Hoppin' Slammer (50-99F) has a 100% chance to reflect arrows, thrown items, and staff magic.
Mini Tank (50-75F) also spawns, providing a chance to obtain Silver Arrows.
Monster Stats (50-69F)
| Floor | Monster | HP | Atk | Def | Exp | Type |
|---|---|---|---|---|---|---|
| 22-50 | Sky Dragon | 140 | 55 | 50 | 1600 | Dragon |
| 50-69 | Ornery Tank | 95 | 40 | 44 | 1500 | Metal/Exploding |
| 50-75 | Mini Tank | 100 | 55 | 40 | 800 | Normal |
| 50-99 | Polygon Singa | 129 | 40 | 40 | 445 | Draining |
| 50-99 | Hoppin' Slammer | 125 | 49 | 49 | 820 | Normal |
| 50-99 | Terror Scorpion | 185 | 55 | 45 | 900 | Draining |
| 60-75 | Detonachin | 260 | 55 | 37 | 1440 | Exploding/Cyclops/Aquatic |
Behemoths (50-69F)
| Floor | Monster |
|---|---|
| 46-50 | Porko |
| 51-55 | Daze Radish |
| 56-60 | Sleep Radish |
| 61-65 | Hell Reaper |
| 66-70 | Porkon |
70-75F
Behemoth Gates have a chance of being generated on 70-75F.
Notable Behemoths - Porkon (66-70F), Frenzy Radish (71-75F).
If you obtained Silver Arrows, don't hesitate to use them to snipe distant B-Frenzy Radishes.
The regular monster lineup is the same, but Ornery Tank → Adamant Tank (70-90F).
Adamant Tank has Swift 1 speed, and deals 40 damage per cannonball blast.
Monster Stats (70-75F)
| Floor | Monster | HP | Atk | Def | Exp | Type |
|---|---|---|---|---|---|---|
| 50-75 | Mini Tank | 100 | 55 | 40 | 800 | Normal |
| 50-99 | Polygon Singa | 129 | 40 | 40 | 445 | Draining |
| 50-99 | Hoppin' Slammer | 125 | 49 | 49 | 820 | Normal |
| 50-99 | Terror Scorpion | 185 | 55 | 45 | 900 | Draining |
| 60-75 | Detonachin | 260 | 55 | 37 | 1440 | Exploding/Cyclops/Aquatic |
| 70-90 | Adamant Tank | 100 | 60 | 54 | 2500 | Metal/Exploding |
Behemoths (70-75F)
| Floor | Monster |
|---|---|
| 66-70 | Porkon |
| 71-75 | Frenzy Radish |
76-90F
Behemoth Gates have a chance of being generated on 76-90F.
Notable Behemoths - Archdragon (76-80F), Abyss Dragon (81-85F), Porgon (86-90F).
The regular monster lineup is the same, but Mini Tank → Fire Ninja B & Water Ninja B (76-90F).
Detonachin is also no longer around.
Monster Stats (76-90F)
| Floor | Monster | HP | Atk | Def | Exp | Type |
|---|---|---|---|---|---|---|
| 50-99 | Polygon Singa | 129 | 40 | 40 | 445 | Draining |
| 50-99 | Hoppin' Slammer | 125 | 49 | 49 | 820 | Normal |
| 50-99 | Terror Scorpion | 185 | 55 | 45 | 900 | Draining |
| 70-90 | Adamant Tank | 100 | 60 | 54 | 2500 | Metal/Exploding |
| 76-90 | Fire Ninja B | 105 | 56 | 39 | 500 | Normal |
| 76-90 | Water Ninja B | 120 | 45 | 39 | 400 | Normal |
Behemoths (76-90F)
| Floor | Monster |
|---|---|
| 76-80 | Archdragon |
| 81-85 | Abyss Dragon |
| 86-90 | Porgon |
91-99F
Behemoth Gates have a chance of being generated on 91-95F.
Notable Behemoths - Soul Reaper (91-95F) - Beware of its wall-clip and Swift 1 speed!
The regular monster lineup is mostly the same, but Adamant Tank → Steadfast Tank (91-99F).
Steadfast Tank has Swift 2 speed, and deals 50 damage per cannonball blast.
Fire Ninja B and Water Ninja B are also no longer around.
Monster Stats (91-99F)
| Floor | Monster | HP | Atk | Def | Exp | Type |
|---|---|---|---|---|---|---|
| 50-99 | Polygon Singa | 129 | 40 | 40 | 445 | Draining |
| 50-99 | Hoppin' Slammer | 125 | 49 | 49 | 820 | Normal |
| 50-99 | Terror Scorpion | 185 | 55 | 45 | 900 | Draining |
| 91-99 | Steadfast Tank | 105 | 80 | 64 | 3500 | Metal/Exploding |
Behemoths (91-99F)
| Floor | Monster |
|---|---|
| 91-95 | Soul Reaper |
Monsters
See Monsters for individual monster details.
- F - Dark hallways
- S - Shop is possible
- M - Monster House is possible
- W - Wishing Shrine is possible
- B - Behemoth Gate is possible
Monster Colors = Mixer, Farming, Useful, Lowers Stats, Targets Items, Dangerous
Behemoths
Items
※ This section is currently incomplete.
Item Table Key
| ID | Explanation |
|---|---|
| F | Floor |
| S | Shop |
| P | Peddler |
| M | Monster drop |
| B | Buried |
| H | Thiefwalrus |
| I | Island |
| T | Transmutation Pot |
| U | Surprise Pot |
| W | Tunnel of Wishes |
 Weapon
| Weapon | ||||||||||
|---|---|---|---|---|---|---|---|---|---|---|
| Name | F | S | P | M | B | H | I | T | U | W |
| Wooden Sword | ||||||||||
| Bronze Sword | ||||||||||
| Katana | ||||||||||
| Doutanuki | ||||||||||
| Manji Kabura | ||||||||||
| Kajin Fuuma | ||||||||||
| Kabura Sutegi | ||||||||||
| Golden Sword | ||||||||||
| Kama Itachi | ||||||||||
| Axe of the Minotaur | ||||||||||
| Accurate Sword | ||||||||||
| Swift Sword | ||||||||||
| Watersplitter | X | |||||||||
| Primal Axe | X | |||||||||
| Dragonkiller | ||||||||||
| Crescent Blade | ||||||||||
| Sky Sword | ||||||||||
| Sickle of Salvation | ||||||||||
| Drain Slayer | X | |||||||||
| Cyclops Bane | ||||||||||
| Steel Severer | X | |||||||||
| Whopping Harisen | ||||||||||
| Healing Sword | ||||||||||
| Peach Club | ||||||||||
| Spender's Club | ||||||||||
| Ferrous Greatsword | ||||||||||
| Steak Knife | ||||||||||
| Jagged Sword | ||||||||||
| Quad-edge | ||||||||||
| Auspicious Kumade | ||||||||||
| Pickaxe | X | |||||||||
| Golden Pickaxe | ||||||||||
| Wooden Mallet | X | |||||||||
| Epic Hammer | ||||||||||
| Trapseeker | ||||||||||
| Bonito Block | ||||||||||
| Yamanba's Cleaver | ||||||||||
| Break-Off Blade | ||||||||||
 Shield
| Shield | ||||||||||
|---|---|---|---|---|---|---|---|---|---|---|
| Name | F | S | P | M | B | H | I | T | U | W |
| Wooden Shield | ||||||||||
| Bronze Shield | ||||||||||
| Iron Shield | X | |||||||||
| Wolfshead | ||||||||||
| Fuuma Shield | ||||||||||
| Rasen Fuuma | ||||||||||
| Golden Shield | ||||||||||
| Counter Shield | ||||||||||
| Watchful Shield | ||||||||||
| Dragon Shield | ||||||||||
| Blast Shield | ||||||||||
| Targe of the Minotaur | ||||||||||
| Walrus Stopper | ||||||||||
| Froggo Stopper | ||||||||||
| Hat Stopper | ||||||||||
| Nigiri Stopper | ||||||||||
| Spearscale Shield | X | |||||||||
| Kappa's Dish | ||||||||||
| Gazer Shield | ||||||||||
| Shield of Negation | ||||||||||
| Unmoving Wall | ||||||||||
| Zabuton | ||||||||||
| Spender's Shield | ||||||||||
| Ferrous Kite | ||||||||||
| Steak Plate | ||||||||||
| Gutsy Shield | ||||||||||
| Hunky-dory Shield | ||||||||||
| Bodhi Shield | ||||||||||
| Shield of Sating | ||||||||||
| Auspicious Omamori | ||||||||||
| Shield of Presage | ||||||||||
| Yamanba's Potlid | ||||||||||
| Break-Off Shield | X | |||||||||
 Bracelet
| Bracelet | ||||||||||
|---|---|---|---|---|---|---|---|---|---|---|
| Name | F | S | P | M | B | H | I | T | U | W |
| Healing Bracelet | ||||||||||
| Strength Bracelet | ||||||||||
| Bellyexpand Bracelet | ||||||||||
| Bellyshrink Bracelet | ||||||||||
| Fortune Bracelet | ||||||||||
| Cleansing Bracelet | ||||||||||
| Focusing Bracelet | ||||||||||
| Rousing Bracelet | ||||||||||
| Rustproof Bracelet | ||||||||||
| Cursebreak Bracelet | ||||||||||
| Affixing Bracelet | ||||||||||
| Far-throwing Bracelet | ||||||||||
| Bad-aim Bracelet | ||||||||||
| Sure-aim Bracelet | ||||||||||
| Bouncy Bracelet | ||||||||||
| Rapid-fire Bracelet | ||||||||||
| Daredevil Bracelet | ||||||||||
| Dreaded Bracelet | ||||||||||
| Leaping Bracelet | ||||||||||
| Blasting Bracelet | ||||||||||
| Clairvoyant Bracelet | ||||||||||
| Monster-find Bracelet | X | X | ||||||||
| Item-find Bracelet | ||||||||||
| Passage-find Bracelet | ||||||||||
| Waterwalk Bracelet | ||||||||||
| Floating Bracelet | ||||||||||
| Wallpass Bracelet | ||||||||||
| Tiptoe Bracelet | ||||||||||
| Passerby Bracelet | ||||||||||
| Item-losing Bracelet | ||||||||||
| Gitan-losing Bracelet | ||||||||||
| Monstercall Bracelet | ||||||||||
| Trapmore Bracelet | ||||||||||
| Haggling Bracelet | ||||||||||
| Trapper's Bracelet | ||||||||||
| Appraiser's Bracelet | ||||||||||
| Cannonboost Bracelet | ||||||||||

 Projectile
| Projectile | ||||||||||
|---|---|---|---|---|---|---|---|---|---|---|
| Name | F | S | P | M | B | H | I | T | U | W |
| Wooden Arrow | X | |||||||||
| Iron Arrow | ||||||||||
| Silver Arrow | ||||||||||
| Poison Arrow | ||||||||||
| Truestrike Arrow | ||||||||||
| Rock | ||||||||||
| Porky's Rock | ||||||||||
 Food
Food
| Food | ||||||||||
|---|---|---|---|---|---|---|---|---|---|---|
| Name | F | S | P | M | B | H | I | T | U | W |
| Onigiri | ||||||||||
| Large Onigiri | ||||||||||
| Huge Onigiri | ||||||||||
| Rotten Onigiri | ||||||||||
| Grilled Onigiri | ||||||||||
| Special Onigiri | ||||||||||
| Sumo Onigiri | X | X | X | |||||||
| Sweet Potato | ||||||||||
| Yakitori | ||||||||||
| Rotten Peach Bun | ||||||||||
 Grass
Grass
| Grass | ||||||||||
|---|---|---|---|---|---|---|---|---|---|---|
| Name | F | S | P | M | B | H | I | T | U | W |
| Weeds | ||||||||||
| Herb | ||||||||||
| Otogirisou | X | |||||||||
| Healing Grass | X | |||||||||
| Life Grass | X | |||||||||
| Fragrant Grass | ||||||||||
| Revival Grass | ||||||||||
| Bellyexpand Seed | ||||||||||
| Bellyshrink Seed | ||||||||||
| Dragon Grass | ||||||||||
| Leaping Grass | ||||||||||
| Antidote Grass | ||||||||||
| Strength Grass | X | |||||||||
| Poison Grass | ||||||||||
| Confusion Grass | ||||||||||
| Sedating Grass | ||||||||||
| Berserk Seed | ||||||||||
| Blinding Grass | X | |||||||||
| Seewell Grass | ||||||||||
| Swift Grass | ||||||||||
| Power-up Grass | ||||||||||
| Invincible Grass | ||||||||||
| Fortune Grass | X | |||||||||
| Angel Seed | ||||||||||
| Feeble Grass | ||||||||||
| Unlucky Seed | ||||||||||
| Ill-fated Seed | ||||||||||
 Scroll
| Scroll | ||||||||||
|---|---|---|---|---|---|---|---|---|---|---|
| Name | F | S | P | M | B | H | I | T | U | W |
| Confusion Scroll | ||||||||||
| Slumber Scroll | ||||||||||
| Jitters Scroll | ||||||||||
| Windblade Scroll | ||||||||||
| Expulsion Scroll | ||||||||||
| Exorcism Scroll | ||||||||||
| Identifier Scroll | X | |||||||||
| Heavenly Scroll | ||||||||||
| Earthly Scroll | X | |||||||||
| Plating Scroll | ||||||||||
| Slot-adding Scroll | ||||||||||
| Rune-eraser Scroll | ||||||||||
| Silver-seal Scroll | ||||||||||
| Silverpurge Scroll | ||||||||||
| Pot-upsize Scroll | ||||||||||
| Extraction Scroll | ||||||||||
| Onigiri Scroll | ||||||||||
| Curse Scroll | ||||||||||
| Mapping Scroll | ||||||||||
| Map-loss Scroll | ||||||||||
| Trap-eraser Scroll | ||||||||||
| Trap Scroll | ||||||||||
| Water-drain Scroll | ||||||||||
| Monstercall Scroll | ||||||||||
| Wall-less Scroll | ||||||||||
| Gathering Scroll | ||||||||||
| Collection Scroll | X | |||||||||
| Gambler's Scroll | ||||||||||
| Muzzle Scroll | ||||||||||
| Carry-ban Scroll | ||||||||||
| Swift Foe Scroll | ||||||||||
| Fixer Scroll | X | X | ||||||||
| Escape Scroll | ||||||||||
| Eradication Scroll | ||||||||||
| Sanctuary Scroll | ||||||||||
| Blank Scroll | ||||||||||
| Wet Scroll | ||||||||||
 Staff
Staff
| Staff | ||||||||||
|---|---|---|---|---|---|---|---|---|---|---|
| Name | F | S | P | M | B | H | I | T | U | W |
| Ordinary Staff | ||||||||||
| Paralyzing Staff | ||||||||||
| Sealing Staff | ||||||||||
| Disguising Staff | ||||||||||
| Empathetic Staff | ||||||||||
| Narrow-escape Staff | ||||||||||
| Knockback Staff | ||||||||||
| Switching Staff | ||||||||||
| Vaulting Staff | ||||||||||
| Skull Mage's Staff | ||||||||||
| Thunderbolt Staff | ||||||||||
| Burrowing Staff | X | |||||||||
| Earthmound Staff | ||||||||||
| Balance Staff | ||||||||||
| Guiding Staff | ||||||||||
| Swift Staff | ||||||||||
| Sluggish Staff | ||||||||||
| Fortune Staff | ||||||||||
| Unlucky Staff | ||||||||||
| Peach Staff | ||||||||||
 Pot
Pot
| Pot | ||||||||||
|---|---|---|---|---|---|---|---|---|---|---|
| Name | F | S | P | M | B | H | I | T | U | W |
| Preservation Pot | ||||||||||
| Identifier Pot | X | |||||||||
| Transmutation Pot | ||||||||||
| Cashing Pot | ||||||||||
| Synthesis Pot | ||||||||||
| Exorcism Pot | ||||||||||
| Curse Pot | ||||||||||
| Upgrading Pot | ||||||||||
| Degrading Pot | ||||||||||
| Bottomless Pot | ||||||||||
| Warehouse Pot | ||||||||||
| Handtrapper Pot | ||||||||||
| Unbreakable Pot | ||||||||||
| Ordinary Pot | ||||||||||
| Hiding Pot | ||||||||||
| Rejuvenation Pot | X | |||||||||
| Walrus Pot | ||||||||||
| Water Gun Pot | ||||||||||
| Hilarious Pot | ||||||||||
| Monster Pot | ||||||||||
| Surprise Pot | ||||||||||
 Incense
| Incense | ||||||||||
|---|---|---|---|---|---|---|---|---|---|---|
| Name | F | S | P | M | B | H | I | T | U | W |
| Heat-ban Incense | ||||||||||
| Evasive Incense | ||||||||||
| Cautious Incense | ||||||||||
| Reflective Incense | X | |||||||||
| Aggressive Incense | ||||||||||
| Defensive Incense | ||||||||||
| Blurry Incense | ||||||||||
| Weighted Incense | ||||||||||
| Unwanting Incense | ||||||||||

