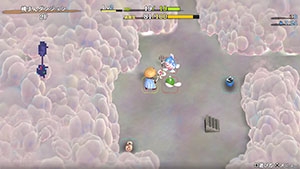
Peach Dungeon
Overview
| Unlock | Clear Serpentcoil Island → Progress Peach Bun related events. |
|---|---|
| Entrance | Shukuba Beach (Exit) |
| Floors | 25F / 99F (Sacred Tree) | ||
|---|---|---|---|
| Bring Items | No | Stairs | Ascending |
| Companions | Yes (Ver 1.1.0+) | Roamers | |
| Rescues | 3 | Starting Level | Lv1 |
| Starting Item | Peach Club, Large Onigiri | ||
| Unidentified | Equipment, Grass, Scrolls, Staves, Pots | ||
| Shops | Yes | Monster Houses | Yes (Regular, Sudden, Special) |
| Behemoths | Yes | Wishing Shrines | No |
| Kron's Challenge | Yes | Fever Time | No |
| Initial Enemies | 4~6 | Spawn Rate | 30 Turns |
| Wind (1st Gust) | 900 Turns | Reward | Peach Bun (Random) or Peach Club (Sacred) |
Postgame dungeon where the player begins the dungeon with a Peach Club equipped.
Peach Club is a weapon that has a chance to transform a defeated monster into a Peach Bun.
Eating a Peach Bun morphs Shiren into the corresponding monster, allowing usage of its abilities.
(Example: Eating a Pumphantasm Bun allows Shiren to traverse wall tiles)
Navigation
Strategy
Dungeon Characteristics
- This is one of the harder dungeons, despite the fancy aesthetic and lighthearted story.
- The in-game clear rate statistic rivals Yamakagashi Pass and Heart of Serpentcoil Island.
- Peach Buns are easy to obtain so hunger is often not an issue, but wind blows early (900 turns).
- This means you can't linger and farm experience points or items for a very long time.
- The dungeon's finer details seem to be primarily balanced around Peach Buns.
- Special Monster Houses can appear from 1F, which also includes reading a Monstercall Scroll.
- The only cannon that gets generated is the cannon which transforms a target into a Peach Bun.
- Traps which target food or monsters are common, weapons and shields with innate runes are rare.
- Gitan bags are lower in value, so strategies involving thrown Gitan are less reliable.
- It's difficult to clear this dungeon without learning at least the basics of Peach Bun mechanics.
- It's much easier once you learn the useful Peach Buns and how foes interact with Morphed status.
- Certain Peach Buns can be used to gain positive status conditions, or to farm items, etc.
- A Peach Bun can also be thrown to transform a stronger foe into a weaker monster.
- Shops can be generated, and Peach Buns can appear as merchandise.
- Merchandise can include powerful Peach Buns that are otherwise unobtainable in the dungeon.
- Peach Buns can also be found in wall tiles, on item islands, and as drops by defeated Chows.
- The chance for said souces to generate a Peach Bun is quite high, especially sparkling walls.
- These sources include Peach Buns that don't correlate to the current floor's monster table.
General Advice
- The initial monster spawn count at the start of each floor is low.
- It often feels surprisingly manageable even if there are scary monsters in the table.
- Hunger isn't a problem, so linger until the wind blows on early game floors.
- Nigiri Baby (2-4F) can be used to increase Max Fullness and activate Sumo status if desired.
- Once Sumo status is active, it can usually be maintained just by eating Peach Buns.
- Break-Off Blade and Break-Off Shield can be used without degrading during Morphed status.
- This is because equipment runes are nullified during Morphed status.
- Throw a Peach Bun at a monster or NPC to transform them into the corresponding monster.
- If you carry weak Peach Buns like Mamel Bun, you can instantly weaken a tough opponent.
- A way to steal from a shop is to read Wall-less Scroll → throw a Peach Bun at the Shopkeeper.
- Crossbowboy (5-7F) or Porky (8F) buns can be used to collect lots of arrows or Porky's Rocks.
- Collect Peach Buns of swift monsters like Death Reaper (2-4F) to have an easier time.
- Swift Peach Buns are also great for escaping from Monster Houses.
 Morphed Status
- Shiren's stats (HP, attack, and defense) remain the same during Morphed status.
- In other words, eating a Mamel Bun won't set your stats to be the same as a Mamel.
- Equipment runes and bracelet effects are nullified during Morphed status.
- Attack and defense increases from your equipped weapon and shield remain in effect.
- Reverting from Morphed status doesn't end the player's turn.
- All status conditions are cured when Shiren eats a Peach Bun or ends Morphed status.
- This includes both positive and negative status conditions.
Important Items (First Clear)
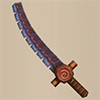
 Weapon & Shield
Break-Off Blade, Break-Off Shield
Easily the best equipment for the first clear when you're not aiming for Peach Bun drops.
The Dulling rune is nullified during Morphed status, so it can be used without upgrade value loss.
Create a Removal Trap using Karakuroid Bun before equipping it for the first time in case it's cursed.
Peach Club
Fighting monsters with this equipped is the primary method of obtaining Peach Buns.
It's not the strongest weapon around, so synthesize status inflicting runes using Mixers if possible.
(Blinding Grass → Blinding / Confusion Grass → Confusing / Sedating Grass → Sedating)
Axe of the Minotaur
Occasionally dropped by Minotaur (16-24F), and higher base value than a Peach Club.
The Critical rune makes it hard to control Explochin (20-22F)'s HP, but is otherwise fantastic.
Wolfshead
Secondary shield for when you're not using Break-Off Shield + Morphed status.
Watchful Shield, Counter Shield
Low base value, but viable if progressing with Peach Club while Sumo status is active.
If you also find a Wolfshead, synthesize these as runes instead of maining a weaker shield.
 Bracelets
Monster-find Bracelet
Incredibly useful bracelet that reveals enemy locations on the map.
However, keep in mind that bracelet effects are nullified during Morphed status.
Item-find Bracelet
Lets you easily locate items that are buried in wall tiles.
Also helpful for planning a more efficient route when exploring a floor for items.
Rapid-fire Bracelet
Boosts projectile accuracy (84% → 91%), and lets you shoot 2 projectiles in 1 turn.
Projectiles are trivial to collect in this dungeon, making this bracelet extremely powerful.
If you find it early on, be sure to linger on Crossbowboy (5-7F) or Karakuroid (4-6F) floors.

 Projectiles
Wooden Arrow, Iron Arrow
Eat a Bowboy or Crossbowboy bun or use an Evasive Incense to collect these easily.
As far as how many to collect, 2 stacks of arrows should be plenty for the first clear.
Poison Arrow
Useful when exploring without Morphed status, or when fighting a higher level monster.
Eat a Karakuroid Bun → create Poison Arrow Traps along walls → throw items onto the traps.
Porky's Rock
Porky's Rock one-shots a Ghost Samurai (7-12F) or Behemoth Monster (22-24F).
Regular Rocks can also be used, but Porky's Rocks are easier to collect.
 Grass
Grass
Revival Grass, Invincible Grass
Revival Grass is still easier to use as a revival option than Masked Samurai Bun.
Do your best to be pretty conservative when it comes to consuming these 2 items.
Sedating Grass, Confusion Grass, Blinding Grass
Synthesize into a weapon to add status inflicting runes, making non-Morphed status fights easier.
 Scrolls
Jitters Scroll, Onigiri Scroll
Synthesize into a shield to add payback runes, making non-Morphed status fights easier.
Heavenly Scroll, Earthly Scroll
Surprisingly common, making it more viable to upgrade gear even with bad Mixer spawn luck.
Some players even skip collecting gear with positive upgrade value as synthesis ingredients.
Blank Scroll
Monster Houses can be ruthless in this dungeon, making this scroll a key counter option.
Select Write to check the scroll's blessed / cursed state, and don't discard it even if it's cursed.
 Staves
Earthmound Staff
Can be used to cross water tiles, ensure safety when collecting projectiles,
or to have a one-sided fight when combined with certain Peach Bun abilities.
Disguising Staff
Create a high level monster and hunt it to level up during early game.
Fortune Staff can't be found in this dungeon, so don't hesitate to use charges for this purpose.
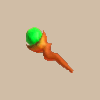
Peach Staff
Rare and powerful staff that transforms a target hit by the magic bullet into a Peach Bun.
Consider swinging it at Mixers to obtain Mixer Buns, which ensure safe synthesis.
 Pots & Incenses
Preservation Pot
Extremely important, as it lets you protect and carry more Peach Buns, along with other items.
If you encounter a Bouncy Wall Room, strongly consider duplicating Preservation Pots.
Blurry Incense
Always found identified, and can be used to counter a single room Monster House.
Evasive Incense
Simply lighting this incense lets you collect arrows or Porky's Rocks from monsters.
Also nice to have for Porko (24-25F) and Pesky Kappa (24-25F) floors.
 Peach Buns
Eating any non-rotten Peach Bun replenishes 25 fullness and cures all status conditions.
Peach Buns and Onigiri will rot if you enter water after eating an Aquatic type's Peach Bun.
Rotten Peach Bun
Obtained by entering water after eating a Spearfish Bun, stepping on a Rotting Trap, etc.
Inflicts 5 damage + a bad status when thrown, which can be used to create and hunt a Cave Mamel.
Possible status conditions include Weakened, Confused, Asleep, Blind, or Deluded status.
Useful Peach Buns (First Clear)
*1 - Shop, buried in a wall, or break a Walrus Pot.
Important Items (Sacred Tree Extension)
 Weapon & Shield
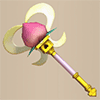
Peach Club
Starting item, but additional copies can be found within the dungeon.
Beware of Battler (66-79F) of course, and Mudster & Mudder (47-54F) if you're using it as a rune.
Only 2 rune slots by default, but sacred versions found in shops can have more slots.
Break-Off Blade, Break-Off Shield
Still usually the strongest option for trading normal attacks during Morphed status.
It's generally not worth synthesizing runes into this set.
Axe of the Minotaur
Occasionally dropped by Minotaur (16-24F) or Megataur (66-79F).
Linger for this weapon drop if you plan on focusing on a mainly non-Morphed status playstyle.
Keep a 2nd copy as a backup in case you lose the Critical rune on Mudster & Mudder (47-54F) floors,
and a Mixer Bun to synthesize it if you're not maining the axe (Mixers don't appear past 30F).
Regular Shield (Wolfshead, Fuuma Shield, etc.)
Work on upgrading a basic shield instead of only relying on Break-Off Shield + Morphed status.
Wolfshead or better is ideal, but it's fine to go with a weaker shield if you want more rune slots.
However, keep in mind that the shield rune selection is limited in this dungeon.
Weapon Runes
Shield Runes
 Bracelets
Monster-find Bracelet, Item-find Bracelet
Monster-find Bracelet is nice for dark hallway floors (11-12F, 14-29F, 51-69F).
Item-find Bracelet lets you locate shops and items buried in wall tiles at a glance.
Rapid-fire Bracelet
Boosts projectile accuracy (84% → 91%), and lets you shoot 2 projectiles in 1 turn.
Dark hallways are limited to select floor ranges, and projectiles are easy to obtain,
making this bracelet extremely useful - especially if you collect Poison Arrows.
Cleansing Bracelet
Counters Terror Scorpion (51-59F), and also helps against Sleep Radish (47-50F).
Not as essential, since you can also counter scorpions by eating a Scorpion family Peach Bun.
Also nice for Behemoth Sleep Radish & Behemoth Frenzy Radish (51-54F, 94-98F) floors.
Rousing Bracelet
Counters Sleep Radish (47-50F) and Behemoth Sleep Radish (51-54F, 94-98F).
Nullifies Skull Lord (66-79F)'s Asleep status inflicting magic bullet effect.

 Projectiles
Iron Arrow, Poison Arrow
Use these to conserve better items, or to weaken a foe before finishing them off with Peach Club.
Collect at least 2 stacks, and keep a Baby Tank or Karakuroid bun on hand to restock later on.
Porky's Rock
Porky's Rock one-shots a Ghost Samurai (7-12F) or Behemoth Monster (22-24F, 31-39F, 51-54F, 94-98F).
That said, avoid getting in range of B-Sleep Radish and B-Frenzy Radish (51-54F, 94-98F).
Collect 1 stack on Porky (8F) or Porko (24-27F) floors.
 Staves
Narrow-escape Staff, Guiding Staff
Pair with Monster-find Bracelet to quickly locate the stairs on dangerous floors.
Peach Staff
Rare and powerful staff that transforms a target hit by the magic bullet into a Peach Bun.
Swing it at a valuable monster like Mixer when you want to guarantee obtaining a Peach Bun.
Paralyzing Staff, Sealing Staff
Single-target options for disabling threats that have a dangerous special attack.
Examples: Polygon Singa (31-39F), Sleep Radish (47-50F), Nigiri Boss (60-65F), Skull Lord (66-79F), etc.
 Scrolls
Confusion Scroll, Slumber Scroll
Keep at least 1 copy on hand in case you encounter a Monster House.
Slumber Scroll plays well with a Peach Bun that grants swift speed (ex: Dragon Pit Bun).
Blank Scroll
Found on the ground, or by making a Behemoth Gate (22-24F and 31-39F are safer) vanish.
Good eradication targets: Lv2-4 Pop Tanks (40-46F), Skull Lord (66-79F), Archdragon (80-99F).
The first 2 require an incense or Hoppin' Batter family Peach Bun, and the latter has no counter,
since Blast Shield, Shield of Negation, and Dragon Shield can't be found in this dungeon.
Sanctuary Scroll
Found on the ground, and can be used on Battler (66-79F) floors to collect bracelets.
However, you'll want to eradicate Skull Lord (66-79F) before eating the Battler Bun.
 Grass
Grass
Invincible Grass
Nice for situations where you're surrounded, and plays well with Sumo status.
Side note, but Sweet Potato cannot be found in this dungeon.
Sedating Grass
Throw it at a monster to disable them for a bit, but don't forget that thrown items can miss.
Can be collected by eating a Sleep Radish Bun (47-50F) and using its ability.

 Pots & Incenses
Preservation Pot
Extremely important, as it lets you protect and carry more Peach Buns, along with other items.
If you encounter a Bouncy Wall Room, strongly consider duplicating Preservation Pots.
It's good to store Mixer Buns so that you can synthesize past 30F if needed.
Synthesis Pot
Obtained by making a Behemoth Gate (22-24F and 31-39F are safer) vanish.
Carrying it on Pesky Kappa (24-27F) or Vexing Kappa (55-59F) floors is asking for it to go to waste.
Evasive Incense, Heat-ban Incense, Reflective Incense
Evasive Incense is excellent for Sleep Radish (47-50F) floors.
Heat-ban Incense is nice for both Lv2-4 Pop Tank (40-46F) and Archdragon (80-99F) floors.
Reflective Incense counters Skull Lord (66-79F), but you'd need a few to cover the entire range.
Don't forget to rely on specific Peach Buns to counter the above threats too, not just incenses.
Blurry Incense
Great for countering single room Monster Houses when Sumo status is active.
Can also be paired with Guiding Staff to quickly and safely reach the stairs.
 Peach Buns
Eating any non-rotten Peach Bun replenishes 25 fullness and cures all status conditions.
Peach Buns and Onigiri will rot if you enter water after eating an Aquatic type's Peach Bun.
Rotten Peach Bun
Obtained by entering water after eating a Spearfish Bun, stepping on a Rotting Trap, etc.
Inflicts 5 damage + a bad status when thrown, which can be used to create and hunt a Cave Mamel.
Possible status conditions include Weakened, Confused, Asleep, Blind, or Deluded status.
Useful Peach Buns (Sacred Tree Extension)
See Useful Peach Buns (First Clear) for a list of valuable Peach Buns between 1-25F.
Travel Companions
Travel companions only appear in this dungeon on game version 1.1.0 or later.
Companions can be used to shield the player character from Scorpion's Strength lowering attack,
Polygon Spinna's Fullness depleting dance, and generally increase player-side damage output.
 Seki
Seki
Seki has Swift action speed and takes 1 step back after using a normal attack against an enemy,
so she safely solos most normal speed monsters that lack a ranged attack, given enough space.
This includes Cave Mamel, powered-up Mixers, foes leveled up via Ghost Samurai, etc.
 Porky the Pirate
Far lower Max HP than other companions, but throws Porky's Rocks to support the player from afar.
20 damage is significant during early game, but it falls off sharply once tougher monsters show up.
Let Porky the Pirate deal with Ghost Samurai and Behemoth Monsters.
 Tugai
Tugai
Strong companion who fights with high innate stats and a chance for critical hits.
Throw a Metalhead Bun or swift speed monster's Peach Bun at him to boost his offense.
His ability to take a hit for the player also acts as a bit of insurance.
 Hibiki
Reliable companion who supports the player or attacks monsters from a distance.
Her support effects include granting Swift status, inflicting a status, and restoring HP.
Helps with consistency before finding Break-Off Shield or activating Sumo status.
Farming Techniques
 Cave Mamel Hunting (1-2F, 7-12F)
Rotten Peach Bun Method (1-2F)
Obtain lots of Peach Buns → eat Spearfish Bun → obtain Rotten Peach Buns by entering water.
Throw Rotten Peach Buns at Pit Mamels (1-3F) until one of them gets Blind status.
Let Pit Mamel slay something to level up → throw Rotten Peach Bun to one-shot Cave Mamel.
Ghost Samurai Method (7-12F)
Obtain lots of Pit Mamel Buns on 1-3F → progress to Masked Samurai (7-12F) floors.
Throw a Pit Mamel Bun at a non-Masked Samurai monster → slay a Masked Samurai.
Have the resulting Ghost Samurai possess the Pit Mamel, leveling it up into a Cave Mamel.
Defeat the Cave Mamel for 2,000 experience points.
 Nigiri Morph Factory (2-4F)
Nigiri Baby (2-4F) can be used to turn unneeded items into Large Onigiri if you find a shield.
Another option is to eat a Nigiri Baby Bun and transform monsters into Onigiri (1/6 chance).
Increasing Max Fullness to 150+ activates Sumo status, which can be quite helpful.
 Armordillo Bun (3-4F)
Use ability for a chance to make a monster trip and drop a random item.
Only 1 item per monster, and tackling also deals 5 damage + 2 tiles of knockback.
 Karakuroid Bun - Removal Trap (4-6F)
Create Removal Traps → safely check unidentified weapons, shields, and bracelets for curses.
 Karakuroid Bun - Poison Arrows (4-6F)
Create Poison Arrow Traps → throw rocks onto traps to collect Poison Arrows.
If you don't have rocks, create traps along a wall, then throw items at the wall.
 Crossbowboy Bun (5-7F)
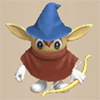
Shoot Iron Arrows at a wall → pick up Iron Arrows (aim for 2 or more stacks of arrows).
 Linger for Mixers (5-30F)
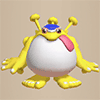
This one isn't really a farming technique, but more of a reminder to linger if you want to see Mixers.
Mixer (5-25F, or 5-30F in the extension) is the only floor range where you can synthesize items.
However, it's possible to stock up on Mixer Buns to allow for synthesis between 31-99F too.
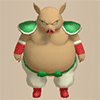 Porky Bun (8F, 24-25F), Porko Bun (24-27F)
Throw Porky's Rocks on the ground → pick up Porky's Rocks (1 stack of rocks is plenty).
 Hat Prankster Bun (16-17F)
Steal staff or grass category items from monsters (100% success rate, 1 item per monster).
 Minotaur Hunting (16-24F)
Hunt Minotaur (16-24F) in hopes of obtaining an Axe of the Minotaur as a synthesis ingredient.
Axe of the Minotaur is quite rare, though, so don't expect it to drop even if you linger.
 Battler Bun (66-79F)
Can be used to obtain Break-Off Blade / Shield, along with Monster-find and Item-find bracelets.
You'll want to eradicate Skull Lords → place a Sanctuary Scroll on the ground before farming.
Floor Guide
First Clear
General Advice
Many farming techniques can be performed, but most are unnecessary for the 25F first clear.
Special Monster Houses can appear on any floor, so always keep items that counter MHs on hand.
Break-Off Blade & Break-Off Shield + Morphed status can carry you through most floors.
1-2F
Enemies aren't tough, so identify items and linger for experience points and Peach Buns.
Pit Mamel Bun (1-3F) can be converted to 2,000 exp each on 7-12F using Masked Samurai.
The best Peach Buns to save are Pit Mamel Bun > Death Reaper Bun > Others.
If you're feeling adventurous, feel free to attempt the Cave Mamel Hunting (1-2F) strategy.
That said, going to that much effort is not necessary at all for the first clear.
Monster Stats (1-2F)
| Floor | Monster | HP | Atk | Def | Exp | Type |
|---|---|---|---|---|---|---|
| 1-2 | Mamel | 8 | 3 | 4 | 2 | Normal |
| 1-2 | Spearfish | 16 | 6 | 2 | 7 | Aquatic |
| 1-3 | Pit Mamel | 11 | 5 | 8 | 5 | Normal |
| 2-4 | Nigiri Baby | 17 | 8 | 2 | 11 | Normal |
| 2-4 | Death Reaper | 22 | 6 | 5 | 9 | Ghost/Floating |
3F
Nigiri Baby (2-4F) appears, so perform Nigiri Morph Factory if you want Sumo status.
If you don't have a shield yet, consider saving a Nigiri Baby Bun until you find a shield,
then equip the shield → throw the Nigiri Baby Bun at a monster and perform Nigiri Morph Factory.
Another option is to eat a Nigiri Baby Bun and transform monsters into Onigiri (1/6 chance).
You'll need to increase Max Fullness to a minimum of 150 to activate Sumo status.
Armordillo Bun (3-4F) can be used to collect extra items from monsters by making them trip.
If your inventory becomes full, go ahead and eat all Onigiri since Peach Buns are so common.
Pumphantasm (3-4F) is somewhat tough if you didn't linger to level up on 1-2F.
Monster Stats (3F)
| Floor | Monster | HP | Atk | Def | Exp | Type |
|---|---|---|---|---|---|---|
| 1-3 | Pit Mamel | 11 | 5 | 8 | 5 | Normal |
| 2-4 | Nigiri Baby | 17 | 8 | 2 | 11 | Normal |
| 2-4 | Death Reaper | 22 | 6 | 5 | 9 | Ghost/Floating |
| 3-4 | Chintala | 15 | 9 | 4 | 12 | Beast |
| 3-4 | Armordillo | 20 | 11 | 15 | 15 | Beast |
| 3-4 | Pumphantasm | 23 | 16 | 10 | 25 | Ghost/Floating |
4F
Karakuroid (4-6F) doesn't spawn often, but has Swift 1 speed - beware when entering rooms.
If you don't have staves, just throw a weaker monster's Peach Bun (ex: Mamel Bun) at Karakuroid.
Karakuroid always spawns with Napping status, and only wakes when Shiren enters or exits the room,
so you can linger without encountering Karakuroids as long as you stay in the same room.
Continue collecting items using Armordillo Bun while staying in the stairs room to avoid Karakuroids.
Scorpions (4-7F) can't lower your strength during Morphed status - they inflict Weakened status instead.
In fact, Scorpion Bun makes you gain Empowered status whenever you get stung by a Scorpion,
and using its ability lowers an enemy's attack power, serving as a Karakuroid counter.
If you're feeling adventurous, feel free to attempt the Karakuroid Bun - Poison Arrows (4-6F) strategy.
That said, going to that much effort is not necessary at all for the first clear.
Monster Stats (4F)
| Floor | Monster | HP | Atk | Def | Exp | Type |
|---|---|---|---|---|---|---|
| 2-4 | Nigiri Baby | 17 | 8 | 2 | 11 | Normal |
| 2-4 | Death Reaper | 22 | 6 | 5 | 9 | Ghost/Floating |
| 3-4 | Chintala | 15 | 9 | 4 | 12 | Beast |
| 3-4 | Armordillo | 20 | 11 | 15 | 15 | Beast |
| 3-4 | Pumphantasm | 23 | 16 | 10 | 25 | Ghost/Floating |
| 4-6 | Karakuroid | 40 | 20 | 13 | 30 | Metal |
| 4-7 | Scorpion | 37 | 14 | 14 | 33 | Draining |
5-6F
The difficulty of the dungeon quickly ramps up starting from this floor range.
Threats on 5-6F include Karakuroid, Bowboy, Crossbowboy, Fresh Octopling, Mixer, and Scorpion.
Expect to see Karakuroid (4-6F) with its Swift 1 speed in any new room you step into.
Use Scorpion Bun (4-7F) or arrows to deal with them, and stock up on Karakuroid Buns if possible.
Collect 1~2 stacks of Iron Arrows using Crossbowboy Bun (5-7F) - shoot arrows at a wall.
Mixer (5-25F) and Fresh Octopling (5-13F) are both very tough when encountered this early.
Take them on using Morphed status if you have a Break-Off Blade and/or Break-Off Shield.
Otherwise, use Karakuroid Bun, Death Reaper Bun, or Pumphantasm Bun to ensure safety.
It might be best to skip synthesis using Mixers until a bit later.
Monster Stats (5-6F)
| Floor | Monster | HP | Atk | Def | Exp | Type |
|---|---|---|---|---|---|---|
| 4-6 | Karakuroid | 40 | 20 | 13 | 30 | Metal |
| 4-7 | Scorpion | 37 | 14 | 14 | 33 | Draining |
| 5-6 | Bowboy | 45 | 17 | 18 | 60 | Normal |
| 5-7 | Crossbowboy | 55 | 20 | 20 | 80 | Normal |
| 5-13 | Fresh Octopling | 60 | 19 | 14 | 55 | Aquatic |
| 5-25 | Mixer | 78 | 39 | 29 | 280 | Normal |
7-12F
Masked Samurai (7-12F) revives as Ghost Samurai and tries to level up another monster when slain.
If a monster levels up, you can throw a Peach Bun at it to transform it back into a weaker enemy.
If you eat a Masked Samurai Bun and collapse during Morphed status, you'll revive as Ghost Samurai.
Throw Pit Mamel Bun at a non-Masked Samurai foe, then slay a Masked Samurai to make a Cave Mamel,
which can be defeated using items like Rock or Knockback Staff for 2,000 experience points.
Nashagga Bun (7F) lets you perform 2 consecutive attacks in 1 turn.
Porky (8F) appears, so transform it into a Porky Bun, then eat it to collect Porky's Rocks.
A single Porky's Rock can be thrown to instantly defeat Ghost Samurai, provided it doesn't miss.
Later on, a single Porky's Rock can also one-shot a Behemoth Monster, or Chow for an item drop.
Save 2~4 Hoppin' Hitter Buns (9F) to counter Skull Wizard's magic bullets later on if desired.
Hallways are dark on 11-12F, so there's some risk of getting hit by surprise attacks.
Monster Stats (7-12F)
| Floor | Monster | HP | Atk | Def | Exp | Type |
|---|---|---|---|---|---|---|
| 4-7 | Scorpion | 37 | 14 | 14 | 33 | Draining |
| 5-7 | Crossbowboy | 55 | 20 | 20 | 80 | Normal |
| 5-13 | Fresh Octopling | 60 | 19 | 14 | 55 | Aquatic |
| 5-25 | Mixer | 78 | 39 | 29 | 280 | Normal |
| 7 | Nashagga | 70 | 21 | 20 | 60 | Dragon |
| 7-12 | Masked Samurai | 47 | 18 | 18 | 48 | Normal |
| 8 | Porky | 30 | 17 | 12 | 40 | Beast |
| 8-10 | Mid Chintala | 45 | 23 | 10 | 27 | Beast |
| 9 | Earth Ninja D | 38 | 11 | 20 | 30 | Normal |
| 9 | Metal Ninja D | 27 | 13 | 11 | 35 | Normal |
| 9 | Water Ninja D | 24 | 15 | 9 | 31 | Normal |
| 9 | Hoppin' Hitter | 32 | 22 | 15 | 34 | Normal |
| 10-11 | Lt. Spearfish | 60 | 24 | 17 | 55 | Aquatic |
| 10-12 | Bored Kappa | 50 | 18 | 11 | 48 | Aquatic |
| 10-15 | Floor Dragon | 55 | 25 | 20 | 80 | Dragon |
| 11-15 | Metalhead | 66 | 30 | 19 | 61 | Cyclops |
| 11-15 | Tiger Thrower | 68 | 26 | 22 | 77 | Beast |
| 12-13 | Skull Mage | 77 | 31 | 21 | 210 | Ghost |
13-14F
Hallways remain dark from 14F until the end of the dungeon during the first clear.
Mostly power type monsters, so Break-Off Shield + Morphed status makes exploration trivial.
Master Hen Bun (13-18F) can be thrown at other monsters to increase the amount of exp you earn.
Chow appears next, so try to finish synthesizing gear and performing farming techniques now.
Monster Stats (13-14F)
| Floor | Monster | HP | Atk | Def | Exp | Type |
|---|---|---|---|---|---|---|
| 5-13 | Fresh Octopling | 60 | 19 | 14 | 55 | Aquatic |
| 5-25 | Mixer | 78 | 39 | 29 | 280 | Normal |
| 10-15 | Floor Dragon | 55 | 25 | 20 | 80 | Dragon |
| 11-15 | Metalhead | 66 | 30 | 19 | 61 | Cyclops |
| 11-15 | Tiger Thrower | 68 | 26 | 22 | 77 | Beast |
| 12-13 | Skull Mage | 77 | 31 | 21 | 210 | Ghost |
| 13-14 | Lt. Spearfish | 60 | 24 | 17 | 55 | Aquatic |
| 13-18 | Master Hen | 70 | 33 | 21 | 400 | Beast |
15-18F
Other monsters will prioritize attacking Chow (15-25F) instead of the player when it's in view.
A monster that slays a Chow will level up, so be ready to throw a Peach Bun of a weaker monster.
All 5 types of monks appear between 16-18F, so consider rushing to the stairs on those floors.
Tengu Monk D Bun can be used to give you and your travel companions Swift status.
Again, Break-Off Shield + Morphed status is excellent when exploring.
If you have Poison Arrows, consider lingering and hunting Minotaurs for an Axe of the Minotaur.
Poison Arrows should let you withstand attacks from even Megataur or Great Hen to some degree.
That said, trying for Axe of the Minotaur is likely not worth the effort during the first clear.
Monster Stats (15-18F)
| Floor | Monster | HP | Atk | Def | Exp | Type |
|---|---|---|---|---|---|---|
| 5-25 | Mixer | 78 | 39 | 29 | 280 | Normal |
| 10-15 | Floor Dragon | 55 | 25 | 20 | 80 | Dragon |
| 11-15 | Metalhead | 66 | 30 | 19 | 61 | Cyclops |
| 11-15 | Tiger Thrower | 68 | 26 | 22 | 77 | Beast |
| 13-18 | Master Hen | 70 | 33 | 21 | 400 | Beast |
| 15-25 | Chow | 20 | 1 | 1 | 5 | Floating |
| 16-17 | Ghost Radish | 40 | 18 | 15 | 49 | Ghost |
| 16-17 | Hat Prankster | 70 | 15 | 6 | 50 | Cyclops |
| 16-18 | Okina Monk D | 70 | 25 | 25 | 80 | Normal |
| 16-18 | Okame Monk D | 60 | 19 | 23 | 75 | Normal |
| 16-18 | Tengu Monk D | 80 | 24 | 20 | 85 | Normal |
| 16-18 | Hannya Monk D | 66 | 37 | 25 | 80 | Normal |
| 16-18 | Kitsune Monk D | 75 | 22 | 24 | 80 | Normal |
| 16-18 | Pop Tank | 90 | 20 | 24 | 100 | Metal/Exploding |
| 16-20 | Zapdon | 80 | 43 | 35 | 105 | Metal |
| 16-24 | Minotaur | 70 | 31 | 20 | 90 | Beast |
| 18-20 | Flamepuff | 50 | 25 | 20 | 175 | Dragon/Floating |
19-23F
Behemoth Gates have a chance of being generated on 22-24F.
Beware of Skull Wizard (19-23F)'s Narrow-escape effect which makes you a sitting duck for Behemoths.
If you see a message saying a Skull Wizard became a Skullmancer, simply hurry to the stairs.
Skull Wizard's magic can be countered by eating a Hoppin' Hitter Bun, if you saved some from 9F.
Prioritize eating Hoppin' Hitter Buns on 22-23F if you don't have enough to cover all 4 floors.
Blazeous (20-23F) is immune to projectiles that lack piercing properties, including thrown Peach Buns.
This ability becomes yours if you eat a Blazeous Bun, which is great for Porko floors near the end.
Explochin (20-22F) turns red after 60 damage, and explodes when damage received reaches 96+ damage.
Super Gazer (20-24F) hypnotizes you when adjacent, forcing either item usage or a random attack.
Super Gazer Bun can be used to inflict Confused status on an adjacent enemy.
Monster Stats (19-23F)
| Floor | Monster | HP | Atk | Def | Exp | Type |
|---|---|---|---|---|---|---|
| 5-25 | Mixer | 78 | 39 | 29 | 280 | Normal |
| 15-25 | Chow | 20 | 1 | 1 | 5 | Floating |
| 16-20 | Zapdon | 80 | 43 | 35 | 105 | Metal |
| 16-24 | Minotaur | 70 | 31 | 20 | 90 | Beast |
| 18-20 | Flamepuff | 50 | 25 | 20 | 175 | Dragon/Floating |
| 19-23 | Skull Wizard | 88 | 35 | 24 | 250 | Ghost |
| 20-22 | Explochin | 120 | 25 | 22 | 55 | Exploding/Cyclops/Aquatic |
| 20-23 | Blazeous | 92 | 36 | 24 | 150 | Normal |
| 20-25 | Running Egg | 6 | 3 | 15 | 8 | Cyclops |
| 22-24 | Super Gazer | 66 | 30 | 26 | 222 | Cyclops |
| 23 | Skull Mage | 77 | 31 | 21 | 210 | Ghost |
24-25F
Behemoth Gates have a chance of being generated on 22-24F.
Don't hesitate to use items that increase action speed or let you traverse multiple tiles in 1 turn.
Dark Owl Bun (25F) can be eaten to reveal the map, similar to reading a Mapping Scroll.
There's no reason to linger unless you're aiming for 100% Adventure Log completion.
Porko (24-25F) is the final threat - beware if it defeats a Chow and levels up into a Porkon.
Lv2 Porko has 36 attack + 5 tile rock radius, while Lv3 Porkon has 75 attack + 8 tile rock radius.
Eating Masked Samurai Bun won't help against Porky's Rocks, since you have 4 HP after reviving.
Blazeous Bun or Pesky Kappa Bun (24-25F) can be eaten to counter Porky's Rocks aimed at you,
but getting hit by Capt. Spearfish (24-25F)'s water as a Blazeous makes you instantly collapse.
Capt. Spearfish only shoots water (up to 3 tiles ahead) when it's on a water tile.
Monster Stats (24-25F)
| Floor | Monster | HP | Atk | Def | Exp | Type |
|---|---|---|---|---|---|---|
| 5-25 | Mixer | 78 | 39 | 29 | 280 | Normal |
| 15-25 | Chow | 20 | 1 | 1 | 5 | Floating |
| 16-24 | Minotaur | 70 | 31 | 20 | 90 | Beast |
| 20-25 | Running Egg | 6 | 3 | 15 | 8 | Cyclops |
| 22-24 | Super Gazer | 66 | 30 | 26 | 222 | Cyclops |
| 24-25 | Porky | 30 | 17 | 12 | 40 | Beast |
| 24-25 | Porko | 65 | 36 | 18 | 840 | Beast |
| 24-25 | Dartingfrog | 75 | 40 | 28 | 300 | Aquatic |
| 24-25 | Corporal Ant | 100 | 40 | 20 | 220 | Normal |
| 24-25 | Pesky Kappa | 75 | 29 | 22 | 330 | Aquatic |
| 24-25 | Capt. Spearfish | 100 | 39 | 30 | 410 | Aquatic |
| 24-25 | Famed Octopling | 99 | 25 | 30 | 420 | Aquatic |
| 25 | Dark Owl | 90 | 16 | 25 | 120 | Normal |
Sacred Tree Extension
General Advice
Overall, this 99F extension is similar to Heart of Serpentcoil Island or Kiki Island,
but with some limitations in exchange for the player being guaranteed a Peach Club.
In particular, Mixer family monsters only appear on 5-30F, making it tricky to upgrade gear.
Chow appears on 15-79F but mostly drops Peach Buns, making it less useful as a source for items.
Strength Grass is also rare, to the point where having 8 Max Strength even late game is common.
All Travel Companions can appear, though Asuka hasn't been sighted earlier than 26F.
These characters boost consistency early game, but can get in the way of farming later on.
The monster table has some notable differences from Heart of Serpentcoil Island:
- Behemoth Gates can appear on 22-24F, 31-39F, 51-54F, 94-98F.
- Behemoth Monster table is similar to Kiki Island's 99F sacred tree extension.
- B-Sleep Radish, B-Frenzy Radish, and B-Death Reaper are major threats on 51-54F and 94-98F.
- Hoppin' Slugger (30F) only appears on 1 floor, so the Tank Zone (40-46F) is hard to counter.
- Polygon Singa (31-39F) appears for a longer time, but can be countered using Morphed status.
- Lv3 Ninjas spawn on 35-39F instead of 65F (Ninjas no longer appear on 65F).
- Mini Tank (40-44F) appears, making it even harder to protect Travel Companions.
- Sleep Radish (47-50F) appears, but can be countered with Igneous Bun (43-50F).
- The first Lv3 Monk floor range was shortened from 51-59F → 51-55F.
- Thiefwalrus, Greenwalrus, and Ironwalrus no longer appear.
- Lv4 Hat Rascal on 60-65F has been leveled down to Lv3 Hat Brat.
- Lashagga's floor range was changed from 47-54F → 66-79F.
Overall, the idea is to farm useful Peach Buns to supplement and/or make up for a lack of items.
Sumo status is a big help on late game (66-99F) floors, since it's hard to keep up even with Break-Off gear.
There are also fewer initial enemies per floor, and quite a few floor ranges have visible hallways,
including 1-10F, 13F, 30-50F, and 70-99F (So dark hallways = 11-12F, 14-29F, and 51-69F).
1-25F
Behemoth Gates have a chance of being generated on 22-24F.
The strategy for the first clear can be used as a reference, but don't skip farming techniques.
Early game is among the most dangerous floor ranges, so prioritize staying alive in tricky situations.
Projectiles are trivial to collect - Get at least 1 stack of Poison Arrows, Iron Arrows, and Porky's Rocks.
The above projectiles can be sourced from Karakuroid (4-6F), Crossbowboy (5-7F), and Porky (8F).
Synthesize weapon runes and shield runes that are useful - Mixers only appear until 30F.
The selection of possible runes is limited, but many of them excel at aiding combat past 50F.
Upgrade value is hard to increase significantly, so
 Critical + status inflicting runes are key.
If you want the Critical rune, aim for Axe of the Minotaur on 16-24F instead of 66-79F.
Monster Stats (1-25F)
| Floor | Monster | HP | Atk | Def | Exp | Type |
|---|---|---|---|---|---|---|
| 1-2 | Mamel | 8 | 3 | 4 | 2 | Normal |
| 1-2 | Spearfish | 16 | 6 | 2 | 7 | Aquatic |
| 1-3 | Pit Mamel | 11 | 5 | 8 | 5 | Normal |
| 2-4 | Nigiri Baby | 17 | 8 | 2 | 11 | Normal |
| 2-4 | Death Reaper | 22 | 6 | 5 | 9 | Ghost/Floating |
| 3-4 | Chintala | 15 | 9 | 4 | 12 | Beast |
| 3-4 | Armordillo | 20 | 11 | 15 | 15 | Beast |
| 3-4 | Pumphantasm | 23 | 16 | 10 | 25 | Ghost/Floating |
| 4-6 | Karakuroid | 40 | 20 | 13 | 30 | Metal |
| 4-7 | Scorpion | 37 | 14 | 14 | 33 | Draining |
| 5-6 | Bowboy | 45 | 17 | 18 | 60 | Normal |
| 5-7 | Crossbowboy | 55 | 20 | 20 | 80 | Normal |
| 5-13 | Fresh Octopling | 60 | 19 | 14 | 55 | Aquatic |
| 5-30 | Mixer | 78 | 39 | 29 | 280 | Normal |
| 7 | Nashagga | 70 | 21 | 20 | 60 | Dragon |
| 7-12 | Masked Samurai | 47 | 18 | 18 | 48 | Normal |
| 8 | Porky | 30 | 17 | 12 | 40 | Beast |
| 8-10 | Mid Chintala | 45 | 23 | 10 | 27 | Beast |
| 9 | Earth Ninja D | 38 | 11 | 20 | 30 | Normal |
| 9 | Metal Ninja D | 27 | 13 | 11 | 35 | Normal |
| 9 | Water Ninja D | 24 | 15 | 9 | 31 | Normal |
| 9 | Hoppin' Hitter | 32 | 22 | 15 | 34 | Normal |
| 10-11 13-14 | Lt. Spearfish | 60 | 24 | 17 | 55 | Aquatic |
| 10-12 | Bored Kappa | 50 | 18 | 11 | 48 | Aquatic |
| 10-15 | Floor Dragon | 55 | 25 | 20 | 80 | Dragon |
| 11-15 | Metalhead | 66 | 30 | 19 | 61 | Cyclops |
| 11-15 | Tiger Thrower | 68 | 26 | 22 | 77 | Beast |
| 12-13 | Skull Mage | 77 | 31 | 21 | 210 | Ghost |
| 13-18 | Master Hen | 70 | 33 | 21 | 400 | Beast |
| 15-79 | Chow | 20 | 1 | 1 | 5 | Floating |
| 16-17 | Ghost Radish | 40 | 18 | 15 | 49 | Ghost |
| 16-17 | Hat Prankster | 70 | 15 | 6 | 50 | Cyclops |
| 16-18 | Okina Monk D | 70 | 25 | 25 | 80 | Normal |
| 16-18 | Okame Monk D | 60 | 19 | 23 | 75 | Normal |
| 16-18 | Tengu Monk D | 80 | 24 | 20 | 85 | Normal |
| 16-18 | Hannya Monk D | 66 | 37 | 25 | 80 | Normal |
| 16-18 | Kitsune Monk D | 75 | 22 | 24 | 80 | Normal |
| 16-18 | Pop Tank | 90 | 20 | 24 | 100 | Metal/Exploding |
| 16-20 | Zapdon | 80 | 43 | 35 | 105 | Metal |
| 16-24 | Minotaur | 70 | 31 | 20 | 90 | Beast |
| 18-20 | Flamepuff | 50 | 25 | 20 | 175 | Dragon/Floating |
| 19-23 | Skull Wizard | 88 | 35 | 24 | 250 | Ghost |
| 20-22 | Explochin | 120 | 25 | 22 | 55 | Exploding/Cyclops/Aquatic |
| 20-23 | Blazeous | 92 | 36 | 24 | 150 | Normal |
| 20-29 | Running Egg | 6 | 3 | 15 | 8 | Cyclops |
| 22-24 | Super Gazer | 66 | 30 | 26 | 222 | Cyclops |
| 23 | Skull Mage | 77 | 31 | 21 | 210 | Ghost |
| 24-25 | Porky | 30 | 17 | 12 | 40 | Beast |
| 24-25 | Capt. Spearfish | 100 | 39 | 30 | 410 | Aquatic |
| 24-25 | Famed Octopling | 99 | 25 | 30 | 420 | Aquatic |
| 24-27 | Porko | 65 | 36 | 18 | 840 | Beast |
| 24-27 | Corporal Ant | 100 | 40 | 20 | 220 | Normal |
| 24-27 | Pesky Kappa | 75 | 29 | 22 | 330 | Aquatic |
| 24-28 | Dartingfrog | 75 | 40 | 28 | 300 | Aquatic |
| 25-99 | Dark Owl | 90 | 16 | 25 | 120 | Normal |
26-30F
Porko (24-27F) and Pesky Kappa (24-27F) are still around - restock Porky's Rocks if needed.
Again, Mixer only appears until 30F - Stock up on Mixer Buns if you want to synthesize past 30F.
Lingering here isn't as rewarding since Greenwalrus was removed from this floor range,
but Chow drops random Peach Buns, and Dragon family monsters provide decent exp.
Eat a Daze Radish Bun (26-29F) to obtain Confusion Grass for synthesis purposes.
If your weapon is weak or you're mainly using Rapid-fire Bracelet instead of normal attacks,
stock up on Baby Tank Buns (29-30F) so that you can replenish Iron Arrows as needed.
It's more space efficient to store Baby Tank Buns in pots instead of stacks of arrows.
Daze Radish Bun or Vile Scorpion Bun = Empowered status when stung by Vile Scorpion (30F).
Collect Hoppin' Slugger Buns (30F) as a Tank Zone (40-46F) counter if you lack a Blank Scroll.
That said, the next floor range has other options to serve as a counter to Pop Tank family monsters,
so it's fine to skip this if you just can't make it work in terms of inventory space.
Monster Stats (26-30F)
| Floor | Monster | HP | Atk | Def | Exp | Type |
|---|---|---|---|---|---|---|
| 5-30 | Mixer | 78 | 39 | 29 | 280 | Normal |
| 15-79 | Chow | 20 | 1 | 1 | 5 | Floating |
| 20-29 | Running Egg | 6 | 3 | 15 | 8 | Cyclops |
| 24-27 | Porko | 65 | 36 | 18 | 840 | Beast |
| 24-27 | Corporal Ant | 100 | 40 | 20 | 220 | Normal |
| 24-27 | Pesky Kappa | 75 | 29 | 22 | 330 | Aquatic |
| 24-28 | Dartingfrog | 75 | 40 | 28 | 300 | Aquatic |
| 25-99 | Dark Owl | 90 | 16 | 25 | 120 | Normal |
| 26-29 | Daze Radish | 80 | 37 | 27 | 400 | Ghost |
| 27-30 | Dragon | 120 | 45 | 40 | 1000 | Dragon |
| 28-30 | Sky Dragon | 140 | 55 | 50 | 1600 | Dragon |
| 29-30 | Baby Tank | 85 | 40 | 30 | 450 | Normal |
| 30 | Vile Scorpion | 108 | 45 | 33 | 500 | Draining |
| 30 | Polygon Shaka | 70 | 34 | 33 | 360 | Draining |
| 30 | Hoppin' Slugger | 72 | 39 | 31 | 400 | Normal |
31-39F
Behemoth Gates have a chance of being generated on 31-39F.
Behemoth Monsters aren't threatening here aside from B-Bowboy, so feel free to explore.
Polygon Singa (31-39F) deals ratio damage instead of lowering Max Fullness during Morphed status.
Soul Reaper (31-39F) has Swift 2 speed, wall-clips, and detects you from anywhere on the floor,
but it shouldn't be too bad thanks to fewer initial enemies and fully visible hallways.
Soul Reaper Bun is fantastic for evasive play, so obtain as many as you can.
Lv3 Ninjas appear on 35-39F, including Water Ninja B who can rust equipment or rot Peach Buns.
Fire Ninja B can also potentially burn up a reward item left behind by a Behemoth Gate.
Water Ninja B Bun can be used similarly to a Water Gun Pot against Pop Tank monsters,
so stock up for the upcoming Tank Zone (40-46F) if you don't have other counters.
Monster Stats (31-39F)
| Floor | Monster | HP | Atk | Def | Exp | Type |
|---|---|---|---|---|---|---|
| 15-79 | Chow | 20 | 1 | 1 | 5 | Floating |
| 25-99 | Dark Owl | 90 | 16 | 25 | 120 | Normal |
| 31-34 | Floppy Hani | 85 | 39 | 39 | 390 | Draining |
| 31-39 | Pumplich | 100 | 50 | 30 | 800 | Ghost/Floating |
| 31-39 | Soul Reaper | 75 | 40 | 40 | 555 | Ghost/Floating |
| 31-39 | Polygon Singa | 129 | 40 | 40 | 445 | Draining |
| 35/37/39 | Cave Mamel | 5 | 100 | 100 | 2000 | Normal |
| 35-39 | Fire Ninja B | 105 | 56 | 39 | 500 | Normal |
| 35-39 | Tree Ninja B | 145 | 47 | 43 | 688 | Normal |
| 35-39 | Earth Ninja B | 155 | 52 | 38 | 780 | Normal |
| 35-39 | Metal Ninja B | 125 | 50 | 40 | 444 | Normal |
| 35-39 | Water Ninja B | 120 | 45 | 39 | 400 | Normal |
40-50F
Tank Zone which includes Lv2-4 Pop Tank family monsters (40-46F) + Mini Tank (40-44F).
Blast Shield can't be found, so Adamant Tank (40-44F) and Steadfast Tank (40-46F) are dangerous.
The best route is to throw an Eradication Scroll at a Pop Tank type → Slay Mini Tanks in hallways.
If that isn't an option, eat a Hoppin' Slugger Bun to deflect or reflect incoming cannonballs,
or use a Water Gun Pot, Capt. Spearfish Bun, or Water Ninja B Bun to cripple Pop Tank types.
The 2nd half isn't a pushover either, featuring Sleep Radish (47-50F) and Mudster & Mudder (47-54F).
You can become immune to Sleep Radish's Sedating Grass throw by eating an Igneous Bun (43-50F).
Otherwise, throw a weaker monster's Peach Bun at Sleep Radish from outside its 3 tile range.
If you saved a Mixer Bun from earlier, feel free to collect a Sedating Grass for synthesis purposes.
Mudster & Mudder are the bigger problem, since you likely won't be able to recover lost runes.
Use a 100% accuracy option like a staff or scroll to disable any that become adjacent to you,
or utilize Morphed status to prevent its special attack from affecting your equipped gear.
Dragon Pit Bun (45-50F) is fantastic for evasive play, so obtain as many as you can.
It has Swift speed similar to Soul Reaper Bun, but its ability lets you burrow underground.
Monster Stats (40-50F)
| Floor | Monster | HP | Atk | Def | Exp | Type |
|---|---|---|---|---|---|---|
| 15-79 | Chow | 20 | 1 | 1 | 5 | Floating |
| 25-99 | Dark Owl | 90 | 16 | 25 | 120 | Normal |
| 40-44 | Mini Tank | 100 | 55 | 40 | 800 | Normal |
| 40-44 | Ornery Tank | 95 | 40 | 44 | 1500 | Metal/Exploding |
| 40-44 | Adamant Tank | 100 | 60 | 54 | 2500 | Metal/Exploding |
| 40-46 | Steadfast Tank | 105 | 80 | 64 | 3500 | Metal/Exploding |
| 43-50 | Igneous | 165 | 56 | 45 | 999 | Normal |
| 45-50 | Blazepuff | 135 | 55 | 35 | 1050 | Dragon/Floating |
| 45-50 | Dragon Pit | 130 | 54 | 40 | 960 | Dragon |
| 47-50 | Sleep Radish | 135 | 47 | 38 | 900 | Ghost |
| 47-54 | Mudster | 140 | 35 | 43 | 460 | Draining/Aquatic |
| 47-54 | Mudder | 145 | 45 | 53 | 920 | Draining/Aquatic |
51-59F
Behemoth Gates have a chance of being generated on 51-54F.
Possible Behemoths now include B-Sleep Radish, B-Frenzy Radish, B-Death Reaper, etc.
The first 2 Behemoth Monsters can be countered using Igneous Bun or Hoppin' Slammer Bun (51-59F).
Lv3 Monks (51-55F) overlap with Behemoth Gate floors, so beware of swift speed Behemoths.
Quick reminder that hallways are also dark between 51-69F.
Regular foes include Mudster & Mudder (47-54F), Terror Scorpion (51-59F), and Vexing Kappa (55-59F).
Sleep Radish Bun or Terror Scorpion Bun = Empowered status when stung by Terror Scorpion.
Hoppin' Slammer Bun is useful on 55-59F and 66-79F as well, so try to obtain some if possible.
Lingering on 55-59F isn't rewarding at all since Ironwalrus was removed from this floor range,
so just use an Evasive Incense or such to dodge items thrown by Vexing Kappa and hurry to the stairs.
Don't eat Peach Buns of Ghost type monsters on Vexing Kappa floors - Life Grass will one-shot you,
and avoid water and air tiles while Morphed in case a Vexing Kappa throws a Hiding Pot.
Monster Stats (51-59F)
| Floor | Monster | HP | Atk | Def | Exp | Type |
|---|---|---|---|---|---|---|
| 15-79 | Chow | 20 | 1 | 1 | 5 | Floating |
| 25-99 | Dark Owl | 90 | 16 | 25 | 120 | Normal |
| 47-54 | Mudster | 140 | 35 | 43 | 460 | Draining/Aquatic |
| 47-54 | Mudder | 145 | 45 | 53 | 920 | Draining/Aquatic |
| 51-55 | Okina Monk B | 170 | 56 | 50 | 1200 | Normal |
| 51-55 | Tengu Monk B | 180 | 55 | 47 | 1200 | Normal |
| 51-55 | Okame Monk B | 160 | 50 | 51 | 1200 | Normal |
| 51-55 | Hannya Monk B | 166 | 57 | 45 | 1200 | Normal |
| 51-55 | Kitsune Monk B | 175 | 53 | 48 | 1180 | Normal |
| 51-59 | Terror Scorpion | 185 | 55 | 45 | 900 | Draining |
| 51-59 | Hoppin' Slammer | 125 | 49 | 49 | 820 | Normal |
| 55-59 | Fleefrog | 125 | 60 | 45 | 900 | Aquatic |
| 55-59 | Vexing Kappa | 175 | 49 | 33 | 960 | Aquatic |
| 55-59 | Superb Octopling | 199 | 64 | 48 | 1260 | Aquatic |
| 55-59 | Admiral Spearfish | 200 | 59 | 50 | 1410 | Aquatic |
60-65F
The Item Destruction zone spans from 60-65F, but it has Hat Brat (Lv3) instead of Hat Rascal (Lv4).
There are fewer initial enemies per floor than Heart of Serpentcoil Island, so it's a bit easier here.
However, there's still no reason to linger and farm enemies, so it's best to hurry to the stairs.
Hyper Gazer, Curse Matron, Bag Knave, Hat Brat, and Nigiri Boss all appear between 60-65F.
Hyper Gazer hypnotizes Shiren, forcing him to either attack in a random direction or use an item.
Curse Matron curses up to 2 of your equipped weapon, shield, or bracelets in a single turn.
Bag Knave throws Weeds to knock inventory items away, and turns items on the ground into Weeds.
Hat Brat steals and tosses away a staff, grass, or food category item from your inventory.
Nigiri Boss inflicts Onigiri status instead of transforming inventory items into Large Onigiri.
Onigiri status prevents item usage and nullifies the effects of any equipped items for 10 turns.
Nigiri Boss Bun makes it so that getting hit by Nigiri Boss's ability grants Empowered status.
Bag Knave can be countered using Igneous Bun, Hoppin' Slammer Bun, or Vexing Kappa Bun.
If you don't have any of the above Peach Buns, just use staves or scrolls when adjacent.
Hyper Gazer Bun can be used to inflict Confused status on an adjacent enemy.
Curse Matron's ability inflicts Sealed status during Morphed status.
Monster Stats (60-65F)
| Floor | Monster | HP | Atk | Def | Exp | Type |
|---|---|---|---|---|---|---|
| 15-79 | Chow | 20 | 1 | 1 | 5 | Floating |
| 25-99 | Dark Owl | 90 | 16 | 25 | 120 | Normal |
| 60-65 | Hat Brat | 125 | 45 | 9 | 880 | Cyclops |
| 60-65 | Bag Knave | 95 | 40 | 35 | 600 | Normal |
| 60-65 | Nigiri Boss | 133 | 45 | 42 | 555 | Normal |
| 60-65 | Hyper Gazer | 126 | 55 | 45 | 922 | Cyclops |
| 60-65 | Curse Matron | 145 | 53 | 48 | 1060 | Normal |
66-79F
Power types + Lashagga appear, but unlike other dungeons with a similar table, Behemoths don't spawn.
Lashagga & Miracle Hen (66-79F) deal massive damage during Morphed status with a weak shield,
so be very careful with your decision making if you're running low on items that restore HP.
If you have Poison Arrows or a shield with payback runes, consider staying in base form.
Lv3 Monks appear on 70-75F, and hallways are visible on 70-99F.
Eradication Scroll should be thrown at Skull Lord (66-79F), since there are few ways to block magic.
Hoppin' Slammer Bun reflects magic, but it's tricky to stay in Morphed status with power types around,
and it's not realistic to stock enough Reflective Incenses to cover the entire Skull Lord floor range.
Miracle Hen hits extremely hard, but it can be significantly weakened with Poison Arrows.
Battler (66-79F) can be dealt with using Morphed status or projectiles from a distance.
If you don't have Poison Arrows, a shield with runes, or useful items, rely on Miracle Hen Buns.
Clapdon Bun (66-79F) can be used to replenish Fullness, or thrown at a monster to instantly weaken it.
However, never eat Bellthoven Bun (66-79F) since you'll immediately summon enemies.
Monster Stats (66-79F)
| Floor | Monster | HP | Atk | Def | Exp | Type |
|---|---|---|---|---|---|---|
| 15-79 | Chow | 20 | 1 | 1 | 5 | Floating |
| 25-99 | Dark Owl | 90 | 16 | 25 | 120 | Normal |
| 66-79 | Lashagga | 99 | 43 | 34 | 500 | Dragon |
| 66-79 | Miracle Hen | 220 | 82 | 60 | 1600 | Beast |
| 66-79 | Great Samurai | 149 | 58 | 40 | 840 | Normal |
| 66-79 | Skull Lord | 188 | 55 | 55 | 1250 | Ghost |
| 66-79 | Battler | 200 | 69 | 50 | 1200 | Normal |
| 66-79 | Megataur | 170 | 55 | 42 | 790 | Beast |
| 66-79 | Megahead | 182 | 65 | 48 | 1350 | Cyclops |
| 66-79 | Clapdon | 195 | 73 | 55 | 1888 | Metal |
| 66-79 | Bellthoven | 150 | 45 | 45 | 1111 | Normal |
| 66-79 | Pumplord | 185 | 75 | 35 | 1850 | Ghost/Floating |
| 70-75 | Okina Monk B | 170 | 56 | 50 | 1200 | Normal |
| 70-75 | Tengu Monk B | 180 | 55 | 47 | 1200 | Normal |
| 70-75 | Okame Monk B | 160 | 50 | 51 | 1200 | Normal |
| 70-75 | Hannya Monk B | 166 | 57 | 45 | 1200 | Normal |
| 70-75 | Kitsune Monk B | 175 | 53 | 48 | 1180 | Normal |
80-99F
Behemoth Gates have a chance of being generated on 94-98F.
It's best to act like any nearby Behemoth icons are B-Frenzy Radishes to try and stay safe.
Rush to the stairs using items like Mapping Scroll, Dark Owl Bun (25-99F), Narrow-escape Staff, etc.
Wall-less Scroll can be read to make all Behemoth Monsters vanish if you're absolutely cornered.
Hallways are visible on 70-99F, so Behemoth floors hopefully shouldn't be too bad.
Eradication Scroll targets include Archdragon (80-99F) and King Reaper (80-99F).
Archdragon is best, as Infernous Bun (80-99F) is tough to obtain without stacking status runes.
King Reaper isn't as hard to deal with thanks to Poison Arrows and Swift status granting Peach Buns.
Electroid Bun (80-99F) can be used to collect more Poison Arrows if you run out and are desperate.
Not eradicating King Reaper also means you have a chance at obtaining King Reaper Buns,
which make exploration trivial with Swift speed, wall-clip, and trap avoidance.
Don't stay in Morphed status if you're not morphed as a monster that grants a meaningful ability.
Instead, use staves or Sumo status to make short work of foes - but beware of Fulminachin (80-99F).
Fulminachin turns red after 100 damage, and explodes when damage received reaches 160+ damage.
If you're struggling to keep up even with Sumo status, focus on Swift Peach Bun evasive play.
Fluffy Bunny Bun (80-99F)'s healing also might help if you're out of other ideas.
Monster Stats (80-99F)
| Floor | Monster | HP | Atk | Def | Exp | Type |
|---|---|---|---|---|---|---|
| 25-99 | Dark Owl | 90 | 16 | 25 | 120 | Normal |
| 80-89 | Crow Tengu | 5 | 1 | 1 | 1 | Floating |
| 80-99 | Electroid | 150 | 56 | 53 | 1333 | Metal |
| 80-99 | Infernous | 285 | 69 | 55 | 1999 | Normal |
| 80-99 | Archdragon | 200 | 65 | 60 | 2200 | Dragon |
| 80-99 | Captain Ant | 110 | 55 | 39 | 440 | Normal |
| 80-99 | King Reaper | 225 | 65 | 50 | 1555 | Ghost/Floating |
| 80-99 | Fulminachin | 200 | 45 | 32 | 440 | Exploding/Cyclops/Aquatic |
| 80-99 | Grampadillo | 175 | 71 | 56 | 1400 | Beast |
| 80-99 | Fluffy Bunny | 10 | 10 | 50 | 50 | Beast |
| 80-99 | Tiger Chucker | 155 | 60 | 55 | 1800 | Beast |
| 80-99 | Hiding Dragon | 230 | 70 | 60 | 1500 | Dragon |
Monsters
See Monsters for individual monster details.
- F - Dark hallways
- S - Shop is possible
- M - Monster House is possible
- B - Behemoth Gate is possible
Monster Colors = Mixer, Farming, Useful, Lowers Stats, Targets Items, Dangerous
Behemoths
Items
※ This section is currently incomplete.
Item Table Key
| ID | Explanation |
|---|---|
| F | Floor |
| S | Shop |
| P | Peddler |
| M | Monster drop |
| B | Buried |
| H | Thiefwalrus |
| I | Island |
| T | Transmutation Pot |
| U | Surprise Pot |
| W | Tunnel of Wishes |
 Weapon
| Weapon | ||||||||||
|---|---|---|---|---|---|---|---|---|---|---|
| Name | F | S | P | M | B | H | I | T | U | W |
| Wooden Sword | ||||||||||
| Bronze Sword | ||||||||||
| Katana | ||||||||||
| Doutanuki | ||||||||||
| Manji Kabura | ||||||||||
| Kajin Fuuma | ||||||||||
| Kabura Sutegi | ||||||||||
| Golden Sword | ||||||||||
| Kama Itachi | ||||||||||
| Axe of the Minotaur | ||||||||||
| Accurate Sword | ||||||||||
| Swift Sword | ||||||||||
| Watersplitter | ||||||||||
| Primal Axe | ||||||||||
| Dragonkiller | ||||||||||
| Crescent Blade | ||||||||||
| Sky Sword | ||||||||||
| Sickle of Salvation | ||||||||||
| Drain Slayer | ||||||||||
| Cyclops Bane | ||||||||||
| Steel Severer | ||||||||||
| Whopping Harisen | ||||||||||
| Healing Sword | ||||||||||
| Peach Club | ||||||||||
| Spender's Club | ||||||||||
| Ferrous Greatsword | ||||||||||
| Steak Knife | ||||||||||
| Jagged Sword | ||||||||||
| Quad-edge | ||||||||||
| Auspicious Kumade | ||||||||||
| Pickaxe | ||||||||||
| Golden Pickaxe | ||||||||||
| Wooden Mallet | ||||||||||
| Epic Hammer | ||||||||||
| Trapseeker | ||||||||||
| Bonito Block | ||||||||||
| Yamanba's Cleaver | ||||||||||
| Break-Off Blade | ||||||||||
 Shield
| Shield | ||||||||||
|---|---|---|---|---|---|---|---|---|---|---|
| Name | F | S | P | M | B | H | I | T | U | W |
| Wooden Shield | ||||||||||
| Bronze Shield | ||||||||||
| Iron Shield | ||||||||||
| Wolfshead | ||||||||||
| Fuuma Shield | ||||||||||
| Rasen Fuuma | ||||||||||
| Golden Shield | ||||||||||
| Counter Shield | ||||||||||
| Watchful Shield | ||||||||||
| Dragon Shield | ||||||||||
| Blast Shield | ||||||||||
| Targe of the Minotaur | ||||||||||
| Walrus Stopper | ||||||||||
| Froggo Stopper | ||||||||||
| Hat Stopper | ||||||||||
| Nigiri Stopper | ||||||||||
| Spearscale Shield | ||||||||||
| Kappa's Dish | ||||||||||
| Gazer Shield | ||||||||||
| Shield of Negation | ||||||||||
| Unmoving Wall | ||||||||||
| Zabuton | ||||||||||
| Spender's Shield | ||||||||||
| Ferrous Kite | ||||||||||
| Steak Plate | ||||||||||
| Gutsy Shield | ||||||||||
| Hunky-dory Shield | ||||||||||
| Bodhi Shield | ||||||||||
| Shield of Sating | ||||||||||
| Auspicious Omamori | ||||||||||
| Shield of Presage | ||||||||||
| Yamanba's Potlid | ||||||||||
| Break-Off Shield | ||||||||||
 Bracelet
| Bracelet | ||||||||||
|---|---|---|---|---|---|---|---|---|---|---|
| Name | F | S | P | M | B | H | I | T | U | W |
| Healing Bracelet | ||||||||||
| Strength Bracelet | ||||||||||
| Bellyexpand Bracelet | ||||||||||
| Bellyshrink Bracelet | ||||||||||
| Fortune Bracelet | ||||||||||
| Cleansing Bracelet | ||||||||||
| Focusing Bracelet | ||||||||||
| Rousing Bracelet | ||||||||||
| Rustproof Bracelet | ||||||||||
| Cursebreak Bracelet | ||||||||||
| Affixing Bracelet | ||||||||||
| Far-throwing Bracelet | ||||||||||
| Bad-aim Bracelet | ||||||||||
| Sure-aim Bracelet | ||||||||||
| Bouncy Bracelet | ||||||||||
| Rapid-fire Bracelet | ||||||||||
| Daredevil Bracelet | ||||||||||
| Dreaded Bracelet | ||||||||||
| Leaping Bracelet | ||||||||||
| Blasting Bracelet | ||||||||||
| Clairvoyant Bracelet | ||||||||||
| Monster-find Bracelet | ||||||||||
| Item-find Bracelet | ||||||||||
| Passage-find Bracelet | ||||||||||
| Waterwalk Bracelet | ||||||||||
| Floating Bracelet | ||||||||||
| Wallpass Bracelet | ||||||||||
| Tiptoe Bracelet | ||||||||||
| Passerby Bracelet | ||||||||||
| Item-losing Bracelet | ||||||||||
| Gitan-losing Bracelet | ||||||||||
| Monstercall Bracelet | ||||||||||
| Trapmore Bracelet | ||||||||||
| Haggling Bracelet | ||||||||||
| Trapper's Bracelet | ||||||||||
| Appraiser's Bracelet | ||||||||||
| Cannonboost Bracelet | ||||||||||

 Projectile
| Projectile | ||||||||||
|---|---|---|---|---|---|---|---|---|---|---|
| Name | F | S | P | M | B | H | I | T | U | W |
| Wooden Arrow | ||||||||||
| Iron Arrow | ||||||||||
| Silver Arrow | ||||||||||
| Poison Arrow | ||||||||||
| Truestrike Arrow | ||||||||||
| Rock | ||||||||||
| Porky's Rock | ||||||||||
 Food
Food
| Food | ||||||||||
|---|---|---|---|---|---|---|---|---|---|---|
| Name | F | S | P | M | B | H | I | T | U | W |
| Onigiri | ||||||||||
| Large Onigiri | ||||||||||
| Huge Onigiri | ||||||||||
| Rotten Onigiri | ||||||||||
| Grilled Onigiri | ||||||||||
| Special Onigiri | ||||||||||
| Sumo Onigiri | ||||||||||
| Sweet Potato | ||||||||||
| Yakitori | ||||||||||
| Rotten Peach Bun | ||||||||||
 Grass
Grass
| Grass | ||||||||||
|---|---|---|---|---|---|---|---|---|---|---|
| Name | F | S | P | M | B | H | I | T | U | W |
| Weeds | ||||||||||
| Herb | ||||||||||
| Otogirisou | ||||||||||
| Healing Grass | ||||||||||
| Life Grass | ||||||||||
| Fragrant Grass | ||||||||||
| Revival Grass | ||||||||||
| Bellyexpand Seed | ||||||||||
| Bellyshrink Seed | ||||||||||
| Dragon Grass | ||||||||||
| Leaping Grass | ||||||||||
| Antidote Grass | ||||||||||
| Strength Grass | ||||||||||
| Poison Grass | ||||||||||
| Confusion Grass | ||||||||||
| Sedating Grass | ||||||||||
| Berserk Seed | ||||||||||
| Blinding Grass | ||||||||||
| Seewell Grass | ||||||||||
| Swift Grass | ||||||||||
| Power-up Grass | ||||||||||
| Invincible Grass | ||||||||||
| Fortune Grass | ||||||||||
| Angel Seed | ||||||||||
| Feeble Grass | ||||||||||
| Unlucky Seed | ||||||||||
| Ill-fated Seed | ||||||||||
 Scroll
| Scroll | ||||||||||
|---|---|---|---|---|---|---|---|---|---|---|
| Name | F | S | P | M | B | H | I | T | U | W |
| Confusion Scroll | ||||||||||
| Slumber Scroll | ||||||||||
| Jitters Scroll | ||||||||||
| Windblade Scroll | ||||||||||
| Expulsion Scroll | ||||||||||
| Exorcism Scroll | ||||||||||
| Identifier Scroll | ||||||||||
| Heavenly Scroll | ||||||||||
| Earthly Scroll | ||||||||||
| Plating Scroll | ||||||||||
| Slot-adding Scroll | ||||||||||
| Rune-eraser Scroll | ||||||||||
| Silver-seal Scroll | ||||||||||
| Silverpurge Scroll | ||||||||||
| Pot-upsize Scroll | ||||||||||
| Extraction Scroll | ||||||||||
| Onigiri Scroll | ||||||||||
| Curse Scroll | ||||||||||
| Mapping Scroll | ||||||||||
| Map-loss Scroll | ||||||||||
| Trap-eraser Scroll | ||||||||||
| Trap Scroll | ||||||||||
| Water-drain Scroll | ||||||||||
| Monstercall Scroll | ||||||||||
| Wall-less Scroll | ||||||||||
| Gathering Scroll | ||||||||||
| Collection Scroll | ||||||||||
| Gambler's Scroll | ||||||||||
| Muzzle Scroll | ||||||||||
| Carry-ban Scroll | ||||||||||
| Swift Foe Scroll | ||||||||||
| Fixer Scroll | ||||||||||
| Escape Scroll | ||||||||||
| Eradication Scroll | ||||||||||
| Sanctuary Scroll | ||||||||||
| Blank Scroll | ||||||||||
| Wet Scroll | ||||||||||
 Staff
Staff
| Staff | ||||||||||
|---|---|---|---|---|---|---|---|---|---|---|
| Name | F | S | P | M | B | H | I | T | U | W |
| Ordinary Staff | ||||||||||
| Paralyzing Staff | ||||||||||
| Sealing Staff | ||||||||||
| Disguising Staff | ||||||||||
| Empathetic Staff | ||||||||||
| Narrow-escape Staff | ||||||||||
| Knockback Staff | ||||||||||
| Switching Staff | ||||||||||
| Vaulting Staff | ||||||||||
| Skull Mage's Staff | ||||||||||
| Thunderbolt Staff | ||||||||||
| Burrowing Staff | ||||||||||
| Earthmound Staff | ||||||||||
| Balance Staff | ||||||||||
| Guiding Staff | ||||||||||
| Swift Staff | ||||||||||
| Sluggish Staff | ||||||||||
| Fortune Staff | ||||||||||
| Unlucky Staff | ||||||||||
| Peach Staff | ||||||||||
 Pot
Pot
| Pot | ||||||||||
|---|---|---|---|---|---|---|---|---|---|---|
| Name | F | S | P | M | B | H | I | T | U | W |
| Preservation Pot | ||||||||||
| Identifier Pot | ||||||||||
| Transmutation Pot | ||||||||||
| Cashing Pot | ||||||||||
| Synthesis Pot | ||||||||||
| Exorcism Pot | ||||||||||
| Curse Pot | ||||||||||
| Upgrading Pot | ||||||||||
| Degrading Pot | ||||||||||
| Bottomless Pot | ||||||||||
| Warehouse Pot | ||||||||||
| Handtrapper Pot | ||||||||||
| Unbreakable Pot | ||||||||||
| Ordinary Pot | ||||||||||
| Hiding Pot | ||||||||||
| Rejuvenation Pot | ||||||||||
| Walrus Pot | ||||||||||
| Water Gun Pot | ||||||||||
| Hilarious Pot | ||||||||||
| Monster Pot | ||||||||||
| Surprise Pot | ||||||||||
 Incense
| Incense | ||||||||||
|---|---|---|---|---|---|---|---|---|---|---|
| Name | F | S | P | M | B | H | I | T | U | W |
| Heat-ban Incense | ||||||||||
| Evasive Incense | ||||||||||
| Cautious Incense | ||||||||||
| Reflective Incense | ||||||||||
| Aggressive Incense | ||||||||||
| Defensive Incense | ||||||||||
| Blurry Incense | ||||||||||
| Weighted Incense | ||||||||||
| Unwanting Incense | ||||||||||

