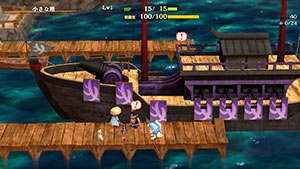
Kiki Island
Overview
| Unlock | Attempt Training Path of Inference once → View all pirate related events. ・Unlocking Synthesis is also part of the requirement. |
|---|---|
| Entrance | Small Harbor (From the docks). |
| Floors | 25F / 99F (Sacred Tree) | ||
|---|---|---|---|
| Bring Items | No | Stairs | Ascending |
| Companions | Yes | Roamers | Yes |
| Rescues | 3 | Starting Level | Lv1 |
| Starting Item | Large Onigiri | ||
| Unidentified | Equipment, Grass, Scrolls, Staves, Pots | ||
| Shops | Yes | Monster Houses | Yes |
| Behemoths | No (99F: Yes) | Wishing Shrines | No |
| Kron's Challenge | No | Fever Time | No |
| Initial Enemies | 6~7 | Spawn Rate | 30 Turns |
| Wind (1st Gust) | 1700 Turns | Reward | Can unlock Escape Scroll. (Event in Small Harbor after clearing) |
Postgame dungeon that's a bite-sized version of a classical unidentified items dungeon.
That sentence may sound similar to Yamakagashi Pass, but this dungeon is generally far easier.
Unidentified items are auto-narrowed down to 3 options, similar to Training Path of Inference,
but the number of items generated on the ground per floor isn't as plentiful in Kiki Island.
Overall, it's a nice place to visit to get some practice before going to Heart of Serpentcoil Island.
Navigation
Strategy
General Advice (First Clear)
Kiki Island (25F) is an easier dungeon that doesn't have a boss fight, and Wishing Shrines don't appear.
The rate at which the monster table swaps out stronger foes isn't vastly different from Serpentcoil Island,
but there are some rare encounters that aim to cause accidents like Mixer, Chow, and Cave Mamel.
Despite the events that play while progressing through the dungeon, there's no boss at the end,
so rushing to the stairs near the end won't come back to bite you unlike Yamakagashi Pass.
Companions like Asuka and Seki can also appear as Roamers, significantly lowering the difficulty.
Kiki Island can be explored to register Monstercall, Slot-adding, and Rune-eraser scrolls in your notebook.
 Inference Mechanic
New gameplay mechanic introduced in Shiren 6 that is enabled only in certain dungeons.
Check an unidentified item's description to view 3 possibilities as to what the item could be,
then choose how to best use the item based on the list of possibilities.
Example:
| Item Name |
|---|
| Herb |
| Dragon Grass |
| Sedating Grass |
So in this case, you wouldn't want to risk using it when an enemy is adjacent due to Sedating Grass.
Both Sedating Grass and Dragon Grass are good when thrown, and throwing an Herb is harmless
if the target is already at full HP, so you might want to lean towards throwing this grass item.
Unfortunately, item names assigned by the player are not reflected in the list of possibilities.
If a possibility has already been fully identified, the possibility will be greyed-out.
General Advice (Sacred Tree Extension)
The 99F Sacred Tree Mode extension is like a remixed and harder version of Heart of Serpentcoil Island.
The dungeon's rules and item table are the same as the first clear, but there are various pros and cons
when it comes to things that impact the player compared to Heart of Serpentcoil Island.
Pros
- Inference-Style Identification
- Unidentified items are narrowed down to 3 possibilities, meaning item waste is less common.
- This also makes it easier to identify trickier categories like bracelets and pots.
- Travel Companions and Roamers Appear
- Travel Companions are a significant help for early~mid game consistency in particular.
- Asuka can be harder to use when playing as Normal Shiren since upgrading Shiren is a priority.
- Fewer Initial Monsters on Deeper Floors
- It's not as common to start in a room with a number of enemies that rival a Monster House.
- Being rushed by 3~4 King Reapers at the start of a floor is less common on end game floors.
Cons
- Farming Floors can Differ (1-25F)
- Monsters like Nigiri Baby (1-3F) and Masked Samurai (6-9, 12F) appear earlier than in Heart.
- Ascending Stairs
- Pitfall Traps can't be used to advance floors if a dungeon has ascending stairs.
- Bottomless Pot is strictly a negative item, and you have fewer options for stealing from shops.
- Floor-exiting Trap appears, so you can still accidentally skip a floor by stepping on a trap.
- Harder To Upgrade Equipment
- Kron's Challenge, Wishing Shrines, and Fever Times are never generated.
- Upgrading Pots are extremely rare.
- Preservation Pots are rare.
- Mixer family monsters have a very low spawn rate, and Mixerdon doesn't appear.
- Sacred weapons and shields are rare.
- Blank Scrolls are Rare
- The monster table is similar to Heart of Serpentcoil Island so Eradication Scrolls are useful,
but you'll likely have to face some Eradication Scroll-level threats without banishing them. - You probably won't have extra Blank Scrolls to use as Slot-adding or Silverpurge scrolls.
- The monster table is similar to Heart of Serpentcoil Island so Eradication Scrolls are useful,
- Mini Tank added to Tank Zone
- Heart of Serpentcoil Island 40-41F turned into a bonus area when Pop Tank was eradicated,
but in Kiki Island, you'll just end up with a swarm of Mini Tanks that shoot Silver Arrows.
- Heart of Serpentcoil Island 40-41F turned into a bonus area when Pop Tank was eradicated,
- Behemoth Frenzy Radish on Deeper Floors
- Counters include Silver Arrows, Evasive Incense, Wall-less Scroll, and Revival Grass.
Frenzy Radish is included in the Behemoth Table on 51-54F, 75-79F, and 95-98F.
- Counters include Silver Arrows, Evasive Incense, Wall-less Scroll, and Revival Grass.
All said, 66F and beyond end up being harder thanks to the difficulty in upgrading equipment.
You can still have an easy time with good item luck, but go in with the mindset that this dungeon
is going to be harder than a normal playthrough of Heart of Serpentcoil Island.
Important Items (First Clear)

 Weapon & Shield
High Base Value Gear
Monsters with higher attack like Karakuroid (5-7F) or swift speed like Hell Reaper (8-10F) appear early,
so shield strength is important - Play carefully if you find the Doutanuki set or a Fuuma Shield.
Whopping Harisen
Weapon that grants a 50% chance to deal 1 tile of knockback when your normal attack connects.
Can also be used to one-shot Ghost Samurai if the knockback is triggered against a wall.
Powerful, but beware of monsters that have ranged attacks or swift action speed.
Shield of Negation
Reduces the chance of Skull Mage (19-21F) or Skull Wizard (22-23F) separating party members.
Spender's Set, Ferrous Set
Tricky for Shiren to wield, but Asuka (Travel Companion) can equip these without any drawbacks.
The 1st clear is only 25F, so Ferrous Greatsword is great if you perform Nigiri Morph Factory on 1-3F.
 Bracelets
Monster-find Bracelet
Reveals the locations of monsters on the map, and lets you see incoming enemies in dark hallways.
Spot shops, Monster Houses, and Roamers (including companions) at a glance.
Rustproof Bracelet
Equipping a weapon boosts efficiency when hunting Mudsters and Mudders for exp on 8-9F.
Companions temporarily lose attack power and defense when hit by Mudkin (8-14F)'s special attack,
so having this bracelet lets you avoid that by letting Shiren take the hit from Mudkin instead.

 Miscellaneous
Rock, Porky's Rock, Thunderbolt Staff, Knockback Staff
Items with the capability of instantly defeating Cave Mamel (6-79F) and Chow (15-79F).
Porky's Rock and Thunderbolt Staff are best, since those can also deal with Gitan Mamel.
Pickaxe, Burrowing Staff, Wall-less Scroll
Items that can be used to enter buried shops or Gitan vaults.
Revival Grass
This dungeon has the inference mechanic enabled, so save grasses that might be Revival Grass.
It's best to use Identifier Pot, Identifier Scroll, or price identification to confirm what the grass is.
Water-drain Scroll
Counters floors with flowing water, which can be annoying when you have companions.
Not very notable if you're playing as Normal Shiren without companions.
Earthmound Staff
Makes collecting arrows more efficient, especially when you have companions.
Fortune Staff
Bouncy Wall Rooms can be generated, so it can be worthwhile to save this for leveling up Shiren.
Level up a Mixer to synthesize more items, or pair it with a Peach Staff to obtain a better Peach Bun.
Peach Staff
Instantly defeats a target monster by turning the enemy into a Peach Bun.
Can be swung at a Mixer family monster to obtain a Mixer Bun, making synthesis safer.
Blurry Incense, Evasive Incense
Incenses that are more helpful when you're adventuring alone.
Blurry - Lets you safely skip past most Monster Houses or rooms with lots of monsters in general.
Evasive - Nice for Porko (24-27F) floors, makes it easier to collect arrows from Crossbowboy (10-12F).
Aggressive Incense, Weighted Incense, Heat-ban Incense
Incenses that are more helpful when you're adventuring with companions.
Aggressive - Work with a companion to slay foes in 1 turn, but beware of surprise attacks in hallways.
Weighted - Nullifies warp effects, mainly for Skull Mage (19-21F) and Skull Wizard (22-23F) floors.
Heat-ban - Prevents Explochin (20-22F)'s explosion from reducing companion HP to 1.
Important Items (Sacred Tree Extension)
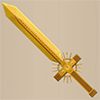
 Weapon & Shield
Sacred Items
Rune slot count is key especially for weapons, so main a sacred item with lots of rune slots if possible.
Don't be too concerned about activating a resonance effect.
Golden Sword, Golden Shield
Both Golden Sword and Golden Shield have 10 rune slots, rivaling some sacred items.
However, Base Value is low, so you might need an Upgrading Pot to compete with end game threats.
Mudster and Mudder can't erase the innate Rustproof rune, so different runes can be erased right away.
Crescent Blade, Steel Severer, Blast Shield
Backup options for the Tank Zone (40-44F) in case you don't find a Blank Scroll in time.
Blast Shield is worth synthesizing into your main shield, if you get the chance to do so.
Weapon Runes
Shield Runes
 Bracelets
Monster-find Bracelet, Item-find Bracelet
It's hard to upgrade equipment, so monster and item detection is very helpful from 40F onwards.
Monster-find Bracelet lets you see and chip away at incoming enemies in hallways,
and Item-find Bracelet is nice for planning efficient routes and locating buried shops.
Rustproof Bracelet, Cleansing Bracelet, Affixing Bracelet
Counters for Mudster & Mudder (47-54F), Terror Scorpion (51-59F), and Battler (66-79F).
Without these, you'll want to either rush to the stairs, or write Eradication Scroll on a Blank Scroll
and throw it at the applicable monster that you don't have a corresponding protective bracelet for.

 Projectiles
Wooden Arrow, Iron Arrow, Poison Arrow
Upgrading gear comes down to luck a bit, so stock up on arrows for mid~late game as a backup.
Silver Arrow
Occasionally dropped by Mini Tank (40-44F), and counters Behemoth Frenzy Radish.
Rock, Porky's Rock
Great for Masked Samurai (6-9F, 12F), Cave Mamel (6-79F), and Behemoth Monster floors.
 Staves
Burrowing Staff
Grants entry into buried shops without having to activate Sumo status.
Peach Staff, Fortune Staff, Disguising Staff
Level up a Mixer family monster and turn it into a Peach Bun to safely synthesize more items.
If a companion interferes, feel free to inflict Paralyzed status on the companion or such.
 Scrolls
Blank Scroll
This scroll seems to appear less frequently than in Heart of Serpentcoil Island.
Consider duplicating it in Bouncy Wall Rooms, but some players prefer to duplicate Preservation Pots.
Probably best used as Eradication Scroll instead of Slot-adding Scroll or other upgrade options.
Plating Scroll
Use it to reapply the Rustproof rune if Mudster or Mudder (47-54F) erases the rune.
Wall-less Scroll
Can be found on the ground, unlike Heart of Serpentcoil Island.
Read it to instantly make a Behemoth Gate + all Behemoths on the floor vanish, or to steal from a shop.
There are fewer initial enemies per floor compared to Heart, so it's not as risky to read it right away.
Onigiri Scroll, Jitters Scroll
Throw a shield + one of these scrolls at a Mixer family monster to synthesize a payback rune.
Make it a priority to synthesize Onigiri Payback and Jitter Payback before other runes.
Sanctuary Scroll
Somewhat common, and can be used to ensure safety when leveling up a Mixer.
Also can be handy on Masked Samurai (6-9F, 12F) floors.
 Grass
Grass
Revival Grass
You'll almost always collapse when you get hit by a Behemoth Frenzy Radish's Berserk Seed,
so save every single Revival Grass you come across for late game Behemoth Gate floors.
Beware of N'dama (47-59F) and N'daloon (60-69F) disguised as Revival Grass.
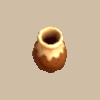 Pots
Pots
Preservation Pot
Pretty rare, so it's recommended to duplicate it using Bouncy Wall Rooms.
Ordinary Pot and Identifier Pot should be used as extra storage.
Identifier Pot
The inference mechanic being enabled in this dungeon lowers the value of this pot,
so it's probably best to use it as extra storage instead of its original purpose of identifying items.
Can be used to check for curses on Revival Grass or synthesis ingredients.
Synthesis Pot, Upgrading Pot
Rare compared to other dungeons, so do your best not to let any pot capacity go to waste.
While most insert equipment into Upgrading Pots, remember that staves can be a powerful option too.
Warehouse Pot, Bottomless Pot
Kiki Island has ascending stairs, so Pitfall Traps can't be used to advance floors.
This means these 2 pots are strictly negative items that simply make inserted items vanish.
Travel Companions
Companions can be used to shield the player character from Scorpion's Strength lowering attack,
Polygon Spinna's Fullness depleting dance, and generally increase player-side damage output.
 Asuka
Asuka
Her ability to equip a weapon and shield means you can customize her build depending on your needs.
She can wield equipment like Ferrous Greatsword or Spender's Shield without the boosts or drawbacks.
Any weapon or shield she equips is auto-identified, and she can unequip cursed gear without issues.
However, bringing her along means she competes with the player for upgrade/synthesis opportunities.
 Seki
Seki
Seki has Swift action speed and takes 1 step back after using a normal attack against an enemy,
so she safely solos most normal speed monsters that lack a ranged attack, given enough space.
This applies to the likes of Cave Mamel, powered-up Mixers, and foes leveled up via Ghost Samurai.
 Porky the Pirate
Far lower Max HP than other companions, but throws Porky's Rocks to support the player from afar.
20 damage is significant during early game, but it falls off sharply once tougher monsters show up.
 Tugai (Second Clear)
Cannot be recruited during the first clear, similar to Hibiki.
Strong companion who fights with high innate stats, unlike Asuka who requires gear to shine.
His ability to take a hit for the player acts as insurance against Cave Mamel in dark hallways.
 Hibiki (Second Clear)
Cannot be recruited during the first clear, similar to Tugai.
Her support effects include granting Swift status, inflicting a status, and restoring HP.
Makes it safer to intentionally step on a Blast Trap to grill onigiri.
Farming Techniques
 Nigiri Morph Factory (1-3F)
Nigiri Baby (1-3F) can be used to turn unneeded items into Large Onigiri if you find a shield.
If you find arrows, turn individual arrows into Large Onigiri instead of the entire stack.
You can do so by stepping on single arrows and exchanging them with inventory items.
It's worth trying Nigiri Morph Factory even if you don't have a shield - walk around in a large room.
Increasing Max Fullness to 150+ activates Sumo status, which can be quite helpful.
Keep 3~4 Large Onigiri on hand for the journey after increasing Max Fullness.

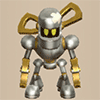 Armordillo Bun (3-4F), Karakuroid Bun (5-7F)
If you lucked out and found a Peach Staff, swing it at either monster to collect extra items.
Armordillo Bun grants a chance to collect 1 random item from each enemy monster you encounter,
and Karakuroid Bun can be used to create Poison Arrow Traps along a wall to collect Poison Arrows.
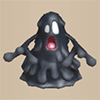
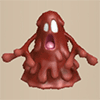 Mudster / Mudder Hunting (8-9F)
Mudkin (8-14F) and Masked Samurai (6-9F, 12F) overlap, so you can hunt Lv3-4 Mudkins to level up.
Crossbowboy often significantly interferes if attempted on 12F, so the best floor range is 8-9F.
Water Ninja D or Metal Ninja D can still interfere on 8-9F, but they aren't as likely to level up.
As always, unequip your gear and stand on the stairs when punching Lv3-4 Mudkins for exp.
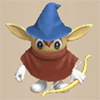
 Iron Arrows (10-12F)
Crossbowboy (10-12F) appears alongside Bored Kappa (10-12F), so use the combo to collect arrows.
The exact setup can vary, but the idea is to position a Bored Kappa between you and a Crossbowboy.
You can hold ZR and press A to quickly pick up arrows instead of opening the menu every time.
Picking up items doesn't regen HP, so don't forget to walk or step in place to heal as needed.
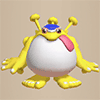

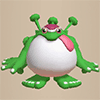 Linger for Mixer Monsters (10-29F, 40-49F, 50-75F)
Mixer (10-29F), Mixermon (40-49F), and Mixergon (50-75F) have a very low spawn rate.
This one isn't really a farming technique, but more of a reminder to linger if you want to see Mixers.
The best time to linger is when you have plenty of food and aren't struggling against other monsters.
That said, the first clear of Kiki Island can be done without synthesizing with Mixers.

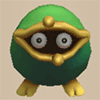
 Thiefwalrus / Greenwalrus Hunting (16-19F, 25-29F)
Have Travel Companions fight Thiefwalrus (16-19F) or Greenwalrus (25-29F) for extra items.
Thiefwalrus family monsters never steal from Travel Companions, so item drops are guaranteed.
However, Thiefwalrus will steal a Porky's Rock thrown by Porky the Pirate if it misses.
 Item Drop Hunting (4F, 16-19F, 25-29F)
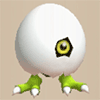
Hunt Froggo (4F), Egg Thing (16-17F), Minotaur (16-18F), and Running Egg (20-29F) for items.
Froggo drops Gitan, Egg Thing family drops various onigiri, and Minotaur drops Axe of the Minotaur.
Axe of the Minotaur is quite rare, though, so don't expect it to drop even if you linger.
Floor Guide
First Clear
1-4F
Check every room for items, and quickly identify what you can so you have options for tricky situations.
Nigiri Baby (1-3F) can be used to obtain Large Onigiri and raise Max Fullness or activate Sumo status,
but going all out on the latter isn't recommended, since the first clear is only 25 floors.
If you find an arrow trap, it'd be good to throw rocks onto the trap to collect some arrows.
Pumphantasm (3-4F) hits hard and passes through walls, so throw Gitan or use items as needed.
Polygon Spinna (4-6F) has the same attack stat as Pumphantasm, but has higher HP and defense.
If you're in a room and it's a 1 vs 1 situation, repeatedly retreat 1 step to safely regen HP during the fight.
Froggo (4F) can be hunted for Gitan bags to be used as projectiles if you're low on other items.
Travel Companion Tips #1
It's possible to recruit a maximum of 3 companions during an adventure.
Pumphantasm and Polygon Spinna can be tricky to deal with on 3-6F when you have companions,
so consider lingering in the stairs room and hunting foes for exp instead of roaming around a lot.
Monster Stats (1-4F)
| Floor | Monster | HP | Atk | Def | Exp | Type |
|---|---|---|---|---|---|---|
| 1-2 | Mamel | 8 | 3 | 4 | 2 | Normal |
| 1-3 | Pit Mamel | 11 | 5 | 8 | 5 | Normal |
| 1-3 | Nigiri Baby | 17 | 8 | 2 | 11 | Normal |
| 2 | Octopling | 14 | 4 | 6 | 4 | Aquatic |
| 3-4 | Chintala | 15 | 9 | 4 | 12 | Beast |
| 3-4 | Pumphantasm | 23 | 16 | 10 | 25 | Ghost/Floating |
| 3-4 | Armordillo | 20 | 11 | 15 | 15 | Beast |
| 4 | Froggo | 23 | 10 | 13 | 18 | Normal |
| 4-6 | Polygon Spinna | 33 | 16 | 17 | 28 | Draining |
5-9F
Monster attack stats are higher, so there's risk of collapsing if you don't manage resources well.
5F is dangerous - The table only has 3 monsters, so you might get swarmed by Karakuroid (5-7F).
If you haven't found decent gear yet, consider advancing to 6F quickly instead of exploring.
Karakuroid has Swift 1 action speed, so it moves 2 times per turn and attacks 1 time.
Masked Samurai (6-9F) revives as Ghost Samurai and levels up another enemy when slain.
Ghost Samurai (4 HP) only takes 1 damage from most attacks, but a rock will one-shot it.
Hoppin' Hitter (7-9F) nullifies or reflects projectiles and staff magic, so use scrolls when in danger.
Scorpion (5-7F) lowers strength by 1, but companions only receive a temporary drop in attack power.
Fire Ninja D (8F) can be utilized to grill Rotten Onigiri.
Hell Reaper (8-10F) has Swift 2 speed, meaning it acts 2 times per turn, including attacking twice.
Otherwise, it's possible to hunt Lv3 Mudsters between 8-9F using Masked Samurai and Mudkin,
and remember that Cave Mamel (6-25F) is a rare spawn - beware of surprise attacks in hallways.
If you encounter a Cave Mamel in a hallway, use a staff or scroll since those have 100% accuracy.
Travel Companion Tips #2
Have companions fight Scorpions and Polygon Spinnas on 5-7F to avoid losing stats yourself.
If you have arrows and strong companions, consider lingering in a room on Masked Samurai floors
and hunting Lv3 monsters generated by Ghost Samurais for lots of experience points.
However, beware of Soul Reaper and Gitan Mamel - Be ready to quickly use the stairs if needed.
Porky the Pirate's 20 damage Porky's Rocks are advantageous for hunting Mudsters.
Monster Stats (5-9F)
| Floor | Monster | HP | Atk | Def | Exp | Type |
|---|---|---|---|---|---|---|
| 4-6 | Polygon Spinna | 33 | 16 | 17 | 28 | Draining |
| 5-7 | Karakuroid | 40 | 20 | 13 | 30 | Metal |
| 5-7 | Scorpion | 37 | 14 | 14 | 33 | Draining |
| 6-9 | Masked Samurai | 47 | 18 | 18 | 48 | Normal |
| 6-25 | Cave Mamel | 5 | 100 | 100 | 2000 | Normal |
| 7-9 | Hoppin' Hitter | 32 | 22 | 15 | 34 | Normal |
| 7-13 | Fresh Octopling | 60 | 19 | 14 | 55 | Aquatic |
| 8 | Fire Ninja D | 28 | 18 | 5 | 30 | Normal |
| 8-9 | Earth Ninja D | 38 | 11 | 20 | 30 | Normal |
| 8-9 | Metal Ninja D | 27 | 13 | 11 | 35 | Normal |
| 8-9 | Water Ninja D | 24 | 15 | 9 | 31 | Normal |
| 8-10 | Mid Chintala | 45 | 23 | 10 | 27 | Beast |
| 8-10 | Hell Reaper | 45 | 12 | 15 | 30 | Ghost/Floating |
| 8-14 | Mudkin | 70 | 5 | 9 | 53 | Draining/Aquatic |
10-14F
Bowboy (10-11F), Crossbowboy (10-12F), and Bored Kappa (10-12F) appear, so collect arrows.
Earthmound Staff or Evasive Incense can be used to significantly speed up arrow collection.
The dungeon is only 25F though, so don't go overboard - 1~2 stacks of arrows is plenty.
Enemies with higher attack power like Metalhead (13-15F) and Master Hen (13-18F) appear.
It can be rough at first if you haven't leveled up much, but try to conserve items if possible.
Masked Samurai (12F) returns for 1 floor only - don't let Ghost Samurai roam around.
Something else to watch out for is that Mixer (10-25F) can show up as a rare encounter.
It's the equivalent of a strong 25F monster in Serpentcoil Island showing up as early as 10F.
If you try to synthesize without a Sluggish Staff or Knockback Staff + arrows, you'll likely collapse.
Don't forget that thrown items (non-piercing) are ineffective until the Mixer has eaten 2 items,
and in this game, all of Mixer's negative status conditions get cured when it eats an item.
Travel Companion Tips #3
Protect companions from ranged attackers like Bowboy family monsters by using items as needed.
If the companion has low HP, shield them from arrows by blocking the line of sight with your body.
A Mixer that has eaten items can potentially one-shot a companion, so don't let them fight if possible.
It might seem smart to team up to slay the Mixer in 1 turn, but if a player-side normal attack misses,
that could simply be the end of you having a companion during the current adventure.
Monster Stats (10-14F)
| Floor | Monster | HP | Atk | Def | Exp | Type |
|---|---|---|---|---|---|---|
| 6-25 | Cave Mamel | 5 | 100 | 100 | 2000 | Normal |
| 7-13 | Fresh Octopling | 60 | 19 | 14 | 55 | Aquatic |
| 8-10 | Mid Chintala | 45 | 23 | 10 | 27 | Beast |
| 8-10 | Hell Reaper | 45 | 12 | 15 | 30 | Ghost/Floating |
| 8-14 | Mudkin | 70 | 5 | 9 | 53 | Draining/Aquatic |
| 10-11 13-14 | Lt. Spearfish | 60 | 24 | 17 | 55 | Aquatic |
| 10-11 | Bowboy | 45 | 17 | 18 | 60 | Normal |
| 10-12 | Crossbowboy | 55 | 20 | 20 | 80 | Normal |
| 10-12 | Bored Kappa | 50 | 18 | 11 | 48 | Aquatic |
| 10-15 | Floor Dragon | 55 | 25 | 20 | 80 | Dragon |
| 10-25 | Mixer | 78 | 39 | 29 | 280 | Normal |
| 12 | Masked Samurai | 47 | 18 | 18 | 48 | Normal |
| 13-15 | Metalhead | 66 | 30 | 19 | 61 | Cyclops |
| 13-15 | Tiger Thrower | 68 | 26 | 22 | 77 | Beast |
| 13-18 | Master Hen | 70 | 33 | 21 | 400 | Beast |
15-19F
Monsters are similar to Kibanuma Marsh and Firespew Mountain, but with the addition of Chow.
Chow (15-25F) gets targeted by other enemies, and a monster that defeats a Chow will level up.
This can result in dangerous foes like Great Hen, Gitan Mamel, or Ornery Tank being created.
If that happens, step in place in a room and use items to deal with the leveled up monster when it
approaches instead of risking a surprise encounter with the leveled up monster in a dark hallway.
Chow always drops an item when slain by the player - Shoot an arrow or throw a Porky's Rock.
Thiefwalrus (16-19F) has higher HP in this game, so just focus on not getting items stolen.
However, hunt them for item drops if you have a companion, Walrus Stopper, or Cautious Incense.
It's easy to forget, but Thiefwalrus has 25 attack power, so sealing it can be somewhat risky.
Pop Tank (16-18F) can be utilized to grill Rotten Onigiri if needed.
If you still haven't reached Lv20, linger and hunt Master Hen (13-18F), as they provide 400 exp each.
Ghost Radish (16-17F) throws Poison Grass 2 tiles ahead and uses its ability more often at a distance.
If there's a gap and the choice is between shooting an arrow vs. stepping into it → using a normal attack,
it's actually best to step toward Ghost Radish to reduce the chance of getting hit by Poison Grass.
Travel Companion Tips #4
Theifwalrus can't steal from companions, so linger and hunt them for item drops if you have food.
Skull Mage (19-21F)'s magic includes knockback and warp effects which separate you from companions,
so consider using staves or other items to disable Skull Mage whenever you encounter one.
Monster Stats (15-19F)
| Floor | Monster | HP | Atk | Def | Exp | Type |
|---|---|---|---|---|---|---|
| 6-25 | Cave Mamel | 5 | 100 | 100 | 2000 | Normal |
| 10-15 | Floor Dragon | 55 | 25 | 20 | 80 | Dragon |
| 10-25 | Mixer | 78 | 39 | 29 | 280 | Normal |
| 13-15 | Metalhead | 66 | 30 | 19 | 61 | Cyclops |
| 13-15 | Tiger Thrower | 68 | 26 | 22 | 77 | Beast |
| 13-18 | Master Hen | 70 | 33 | 21 | 400 | Beast |
| 15-25 | Chow | 20 | 1 | 1 | 5 | Floating |
| 16-17 | Egg Thing | 5 | 2 | 14 | 7 | Cyclops |
| 16-17 | Ghost Radish | 40 | 18 | 15 | 49 | Ghost |
| 16-17 | Hat Prankster | 70 | 15 | 6 | 50 | Cyclops |
| 16-18 | Minotaur | 70 | 31 | 20 | 90 | Beast |
| 16-18 | Pop Tank | 90 | 20 | 24 | 100 | Metal/Exploding |
| 16-19 | Thiefwalrus | 65 | 25 | 23 | 75 | Aquatic |
| 17-20 | Zapdon | 80 | 43 | 35 | 105 | Metal |
| 18-20 | Flamepuff | 50 | 25 | 20 | 175 | Dragon/Floating |
| 18-21 | N'dubba | 32 | 16 | 8 | 16 | Metal |
| 19-21 | Skull Mage | 77 | 31 | 21 | 210 | Ghost |
20-25F
It's recommended to rush to the stairs from this point until you clear the dungeon.
Explochin (20-22F) explodes when its HP gets low, but otherwise it's mostly Lv2 Ninjas until 21F.
Things get trickier with Skull Wizard (22-23F) and Super Gazer (22-24F) appearing from 22F,
followed by ranged attackers Porko (24-25F), Dartingfrog (24-25F), and Pesky Kappa (24-25F) on 24F.
Explochin turns red when HP ≤ 50%, and explodes when HP ≤ 24 (96+ damage dealt).
Skull Wizard can inflict Confused status from a distance, so don't forget to Look Around in rooms.
Super Gazer hypnotizes Shiren, forcing him to either attack in a random direction or use an item.
Dartingfrog pulls you closer from up to 5 tiles ahead and attacks on the same turn.
Porko and Pesky Kappa both have a 5 tile radius throwing range for their special attacks.
Evasive Incense or Pesky Kappa Bun can be used to dodge rocks if a Porko levels up from a Chow.
Corporal Ant (24-25F)'s habit of digging out wall tiles can lead to surprise attacks in dark hallways,
and also makes it somewhat difficult to figure out whether a hallway actually leads to a room.
There's no reason to linger unless you're aiming to 100% the Kiki Island adventure log.
Travel Companion Tips #5
Skull Wizard and Dartingfrog are the biggest threats to companions on these floors.
It's possible to hunt Greenwalrus (25F) for items, but you're right before the goal so don't bother.
Monster Stats (20-25F)
| Floor | Monster | HP | Atk | Def | Exp | Type |
|---|---|---|---|---|---|---|
| 6-25 | Cave Mamel | 5 | 100 | 100 | 2000 | Normal |
| 10-25 | Mixer | 78 | 39 | 29 | 280 | Normal |
| 15-25 | Chow | 20 | 1 | 1 | 5 | Floating |
| 17-20 | Zapdon | 80 | 43 | 35 | 105 | Metal |
| 18-20 | Flamepuff | 50 | 25 | 20 | 175 | Dragon/Floating |
| 18-21 | N'dubba | 32 | 16 | 8 | 16 | Metal |
| 19-21 | Skull Mage | 77 | 31 | 21 | 210 | Ghost |
| 20-21 | Tree Ninja C | 70 | 37 | 24 | 88 | Normal |
| 20-21 | Earth Ninja C | 85 | 21 | 28 | 90 | Normal |
| 20-22 | Explochin | 120 | 25 | 22 | 55 | Exploding/Cyclops/Aquatic |
| 20-23 | Fire Ninja C | 75 | 45 | 21 | 100 | Normal |
| 20-25 | Running Egg | 6 | 3 | 15 | 8 | Cyclops |
| 21-23 | Blazeous | 92 | 36 | 24 | 150 | Normal |
| 22-23 | Skull Wizard | 88 | 35 | 24 | 250 | Ghost |
| 22-23 | Metal Ninja C | 85 | 42 | 29 | 93 | Normal |
| 22-23 | Water Ninja C | 80 | 37 | 26 | 95 | Normal |
| 22-24 | Super Gazer | 66 | 30 | 26 | 222 | Cyclops |
| 24-25 | Capt. Spearfish | 100 | 39 | 30 | 410 | Aquatic |
| 24-25 | Famed Octopling | 99 | 25 | 30 | 420 | Aquatic |
| 24-25 | Porko | 65 | 36 | 18 | 840 | Beast |
| 24-25 | Corporal Ant | 100 | 40 | 20 | 220 | Normal |
| 24-25 | Pesky Kappa | 75 | 29 | 22 | 330 | Aquatic |
| 24-25 | N'dulu | 70 | 40 | 31 | 230 | Metal |
| 24-25 | Dartingfrog | 75 | 40 | 28 | 300 | Aquatic |
| 25 | Greenwalrus | 88 | 30 | 27 | 240 | Aquatic |
| 25 | Dark Owl | 90 | 16 | 25 | 120 | Normal |
Sacred Tree Extension
1-24F
The same strategy that was used for the first clear can be utilized for this floor range,
but it's best to perform more farming techniques to improve your chances of reaching 99F.
For synthesis, aim for Sedating, Paralyzing, Blinding, Confusing, Onigiri Payback, and Jitter Payback first.
Travel companions increase consistency and make it easy to hunt Thiefwalrus monsters for items.
The best travel companions to recruit for this dungeon are probably Seki, Hibiki, and Tugai.
- 1-3F - Have Nigiri Baby transform unneeded items into Large Onigiri.
- 3-4F - Swing a Peach Staff at Armordillo → collect items from other monsters.
- 5-7F - Swing a Peach Staff at Karakuroid → create Poison Arrow Traps → collect arrows.
- 8-9F - Create a Mudster using Ghost Samurais → hunt Mudsters until you reach Lv20.
- 10-12F - Crossbowboy + Bored Kappa appears, so collect Iron Arrows.
- 10-29F - Mixer appears as a rare spawn.
- 16-17F, 20-29F - Hunt Egg Thing and Running Egg for onigiri drops.
- 16-18F - Hunt Minotaurs in hopes of obtaining an Axe of the Minotaur.
- 16-19F - Hunt Thiefwalrus with companions for guaranteed item drops.
Monster Stats (1-24F)
| Floor | Monster | HP | Atk | Def | Exp | Type |
|---|---|---|---|---|---|---|
| 1-2 | Mamel | 8 | 3 | 4 | 2 | Normal |
| 1-3 | Pit Mamel | 11 | 5 | 8 | 5 | Normal |
| 1-3 | Nigiri Baby | 17 | 8 | 2 | 11 | Normal |
| 2 | Octopling | 14 | 4 | 6 | 4 | Aquatic |
| 3-4 | Chintala | 15 | 9 | 4 | 12 | Beast |
| 3-4 | Pumphantasm | 23 | 16 | 10 | 25 | Ghost/Floating |
| 3-4 | Armordillo | 20 | 11 | 15 | 15 | Beast |
| 4 | Froggo | 23 | 10 | 13 | 18 | Normal |
| 4-6 | Polygon Spinna | 33 | 16 | 17 | 28 | Draining |
| 5-7 | Karakuroid | 40 | 20 | 13 | 30 | Metal |
| 5-7 | Scorpion | 37 | 14 | 14 | 33 | Draining |
| 6-9 | Masked Samurai | 47 | 18 | 18 | 48 | Normal |
| 6-79 | Cave Mamel | 5 | 100 | 100 | 2000 | Normal |
| 7-9 | Hoppin' Hitter | 32 | 22 | 15 | 34 | Normal |
| 7-13 | Fresh Octopling | 60 | 19 | 14 | 55 | Aquatic |
| 8 | Fire Ninja D | 28 | 18 | 5 | 30 | Normal |
| 8-9 | Earth Ninja D | 38 | 11 | 20 | 30 | Normal |
| 8-9 | Metal Ninja D | 27 | 13 | 11 | 35 | Normal |
| 8-9 | Water Ninja D | 24 | 15 | 9 | 31 | Normal |
| 8-10 | Mid Chintala | 45 | 23 | 10 | 27 | Beast |
| 8-10 | Hell Reaper | 45 | 12 | 15 | 30 | Ghost/Floating |
| 8-14 | Mudkin | 70 | 5 | 9 | 53 | Draining/Aquatic |
| 10-11 13-14 | Lt. Spearfish | 60 | 24 | 17 | 55 | Aquatic |
| 10-11 | Bowboy | 45 | 17 | 18 | 60 | Normal |
| 10-12 | Crossbowboy | 55 | 20 | 20 | 80 | Normal |
| 10-12 | Bored Kappa | 50 | 18 | 11 | 48 | Aquatic |
| 10-15 | Floor Dragon | 55 | 25 | 20 | 80 | Dragon |
| 10-29 | Mixer | 78 | 39 | 29 | 280 | Normal |
| 12 | Masked Samurai | 47 | 18 | 18 | 48 | Normal |
| 13-15 | Metalhead | 66 | 30 | 19 | 61 | Cyclops |
| 13-15 | Tiger Thrower | 68 | 26 | 22 | 77 | Beast |
| 13-18 | Master Hen | 70 | 33 | 21 | 400 | Beast |
| 15-79 | Chow | 20 | 1 | 1 | 5 | Floating |
| 16-17 | Egg Thing | 5 | 2 | 14 | 7 | Cyclops |
| 16-17 | Ghost Radish | 40 | 18 | 15 | 49 | Ghost |
| 16-17 | Hat Prankster | 70 | 15 | 6 | 50 | Cyclops |
| 16-18 | Minotaur | 70 | 31 | 20 | 90 | Beast |
| 16-18 | Pop Tank | 90 | 20 | 24 | 100 | Metal/Exploding |
| 16-19 | Thiefwalrus | 65 | 25 | 23 | 75 | Aquatic |
| 17-20 | Zapdon | 80 | 43 | 35 | 105 | Metal |
| 18-20 | Flamepuff | 50 | 25 | 20 | 175 | Dragon/Floating |
| 18-21 | N'dubba | 32 | 16 | 8 | 16 | Metal |
| 19-21 | Skull Mage | 77 | 31 | 21 | 210 | Ghost |
| 20-21 | Tree Ninja C | 70 | 37 | 24 | 88 | Normal |
| 20-21 | Earth Ninja C | 85 | 21 | 28 | 90 | Normal |
| 20-22 | Explochin | 120 | 25 | 22 | 55 | Exploding/Cyclops/Aquatic |
| 20-23 | Fire Ninja C | 75 | 45 | 21 | 100 | Normal |
| 20-29 | Running Egg | 6 | 3 | 15 | 8 | Cyclops |
| 21-23 | Blazeous | 92 | 36 | 24 | 150 | Normal |
| 22-23 | Skull Wizard | 88 | 35 | 24 | 250 | Ghost |
| 22-23 | Metal Ninja C | 85 | 42 | 29 | 93 | Normal |
| 22-23 | Water Ninja C | 80 | 37 | 26 | 95 | Normal |
| 22-24 | Super Gazer | 66 | 30 | 26 | 222 | Cyclops |
| 24-25 | Capt. Spearfish | 100 | 39 | 30 | 410 | Aquatic |
| 24-25 | Famed Octopling | 99 | 25 | 30 | 420 | Aquatic |
| 24-27 | Porko | 65 | 36 | 18 | 840 | Beast |
| 24-27 | Corporal Ant | 100 | 40 | 20 | 220 | Normal |
| 24-27 | Pesky Kappa | 75 | 29 | 22 | 330 | Aquatic |
| 24-28 | N'dulu | 70 | 40 | 31 | 230 | Metal |
| 24-28 | Dartingfrog | 75 | 40 | 28 | 300 | Aquatic |
25-29F
Greenwalrus (25-29F) is a bonus monster that always drops an item if you have a companion.
Daze Radish (26-29F)'s Confusion Grass can result in being attacked by a companion.
Porko (24-27F) can be utilized to collect Porky's Rocks in preparation for Behemoth Gate floors.
If you have an Earthmound Staff, it'd be good to collect Iron Arrows from Baby Tank (29-30F).
Mixer (10-29F) exits the table after 29F, so prepare to switch to a faster playstyle for a while.
Monster Stats (25-29F)
| Floor | Monster | HP | Atk | Def | Exp | Type |
|---|---|---|---|---|---|---|
| 6-79 | Cave Mamel | 5 | 100 | 100 | 2000 | Normal |
| 10-29 | Mixer | 78 | 39 | 29 | 280 | Normal |
| 15-79 | Chow | 20 | 1 | 1 | 5 | Floating |
| 20-29 | Running Egg | 6 | 3 | 15 | 8 | Cyclops |
| 24-25 | Capt. Spearfish | 100 | 39 | 30 | 410 | Aquatic |
| 24-25 | Famed Octopling | 99 | 25 | 30 | 420 | Aquatic |
| 24-27 | Porko | 65 | 36 | 18 | 840 | Beast |
| 24-27 | Corporal Ant | 100 | 40 | 20 | 220 | Normal |
| 24-27 | Pesky Kappa | 75 | 29 | 22 | 330 | Aquatic |
| 24-28 | N'dulu | 70 | 40 | 31 | 230 | Metal |
| 24-28 | Dartingfrog | 75 | 40 | 28 | 300 | Aquatic |
| 25-29 | Greenwalrus | 88 | 30 | 27 | 240 | Aquatic |
| 25-99 | Dark Owl | 90 | 16 | 25 | 120 | Normal |
| 26-29 | Daze Radish | 80 | 37 | 27 | 400 | Ghost |
| 27-30 | Dragon | 120 | 45 | 40 | 1000 | Dragon |
| 28-30 | Sky Dragon | 140 | 55 | 50 | 1600 | Dragon |
| 29-30 | Baby Tank | 85 | 40 | 30 | 450 | Normal |
30-39F
Behemoth Gates have a chance of being generated on 31-39F.
Behemoths include Mamel, Bowboy, Pop Tank, Porky, Ghost Radish, and Explochin.
Otherwise, these floors feature lots of troublesome Draining and Ghost type monsters.
Monster-find Bracelet + Iron Arrows, Reflective Incense, Sumo status + Critical or Anti-Draining,
and other such item combinations are a significant help.
Polygon Singa (31-35F) lowers Max Fullness by 7 - use items to stop it from acting when adjacent.
Soul Reaper (31-39F) has Swift 2 speed, can wall-clip, and detects you from anywhere on the floor.
Step in place in the starting room to lure Soul Reapers instead of immediately entering a hallway.
Floppy Hani (31-39F) lowers level by 1 when adjacent which can be annoying, but it's not lethal.
Don't expect your companions to survive past this floor range without playing very defensively.
Monster Stats (30-39F)
| Floor | Monster | HP | Atk | Def | Exp | Type |
|---|---|---|---|---|---|---|
| 6-79 | Cave Mamel | 5 | 100 | 100 | 2000 | Normal |
| 15-79 | Chow | 20 | 1 | 1 | 5 | Floating |
| 25-99 | Dark Owl | 90 | 16 | 25 | 120 | Normal |
| 27-30 | Dragon | 120 | 45 | 40 | 1000 | Dragon |
| 28-30 | Sky Dragon | 140 | 55 | 50 | 1600 | Dragon |
| 29-30 | Baby Tank | 85 | 40 | 30 | 450 | Normal |
| 30 | Vile Scorpion | 108 | 45 | 33 | 500 | Draining |
| 30 | Polygon Shaka | 70 | 34 | 33 | 360 | Draining |
| 30 | Hoppin' Slugger | 72 | 39 | 31 | 400 | Normal |
| 31-35 | Polygon Singa | 129 | 40 | 40 | 445 | Draining |
| 31-39 | Pumplich | 100 | 50 | 30 | 800 | Ghost/Floating |
| 31-39 | Soul Reaper | 75 | 40 | 40 | 555 | Ghost/Floating |
| 31-39 | Floppy Hani | 85 | 39 | 39 | 390 | Draining |
40-50F
The Tank Zone spans from 40-46F, but Mini Tank (40-44F) is included as a surprise twist.
It's best to not worry about companions collapsing at all, and just focus on your own survival.
Don't risk synthesis unless you've eradicated Pop Tank monsters or read a Mapping Scroll,
since there's a chance of gear getting destroyed by a Pop Tank monster's cannonball blast.
Expect lots of Mini Tanks to spawn if you throw an Eradication Scroll at a Pop Tank family monster,
instead of the floor turning into a bonus zone full of Mixermon (40-49F) and Chow (15-79F).
Igneous (43-50F) multiplies from explosions, so beware if there are Pop Tank monsters nearby.
Steadfast Tank (40-46F) is the only Pop Tank family monster that appears once you go past 44F,
so if you don't have items to deal with various tank monsters, rush stairs until you reach 45F.
Said items include Heat-ban Incense, Eradication Scroll, Blast Shield, and so on.
Other major threats include Mudster (47-54F), Mudder (47-54F), and N'dama (47-59F).
If you have plenty of items, it's probably best to ignore items on floors where N'dama can spawn.
The Rustproof rune doesn't protect against Mudster/Mudder's rune-erasing special attack.
Monster Stats (40-50F)
| Floor | Monster | HP | Atk | Def | Exp | Type |
|---|---|---|---|---|---|---|
| 6-79 | Cave Mamel | 5 | 100 | 100 | 2000 | Normal |
| 15-79 | Chow | 20 | 1 | 1 | 5 | Floating |
| 25-99 | Dark Owl | 90 | 16 | 25 | 120 | Normal |
| 40-44 | Mini Tank | 100 | 55 | 40 | 800 | Normal |
| 40-44 | Ornery Tank | 95 | 40 | 44 | 1500 | Metal/Exploding |
| 40-44 | Adamant Tank | 100 | 60 | 54 | 2500 | Metal/Exploding |
| 40-46 | Steadfast Tank | 105 | 80 | 64 | 3500 | Metal/Exploding |
| 40-49 | Mixermon | 98 | 50 | 35 | 580 | Normal |
| 43-50 | Igneous | 165 | 56 | 45 | 999 | Normal |
| 45-50 | Blazepuff | 135 | 55 | 35 | 1050 | Dragon/Floating |
| 45-50 | Dragon Pit | 130 | 54 | 40 | 960 | Dragon |
| 47-54 | Mudster | 140 | 35 | 43 | 460 | Draining/Aquatic |
| 47-54 | Mudder | 145 | 45 | 53 | 920 | Draining/Aquatic |
| 47-59 | N'dama | 135 | 50 | 35 | 650 | Metal |
| 50-75 | Mixergon | 118 | 68 | 40 | 880 | Normal |
51-59F
Behemoth Gates have a chance of being generated on 51-54F.
Behemoths include Death Reaper, Sleep Radish, Frenzy Radish, Nigiri Boss, Curse Matron, and Battler.
B-Frenzy Radish throws Berserk Seeds within a 5 tile radius from its barrier instead of its center,
meaning it throws grass from outside of the player's field of view (visible on-screen area).
Counters include Wall-less Scroll, Evasive Incense, Silver Arrow, Mapping Scroll, Dark Owl Bun,
Revival Grass, or Monster-find Bracelet (Rocks are risky, since you're within range of its ability).
Mudster (47-54F), Mudder (47-54F), and N'dama (47-59F) are still around for a little while.
Lv3 Monks and Terror Scorpion also appear on 51-59F, so rush stairs if you lack a Cleansing Bracelet.
Otherwise, Vexing Kappa (55-59F) throws any non-Gitan item on the ground within a 10 tile radius,
and Ironwalrus (55-59F) can steal an inventory item if you don't have the Walrusproof rune.
You can swing a Narrow-escape Staff at a Hoppin' Slammer (51-59F) to warp to the stairs,
but only do so if you have at least 1 Revival Grass and are willing to risk losing it.
Mixergon (50-75F) eats up to 4 thrown items and synthesizes them in its stomach.
It's probably best to skip synthesis on this floor range and instead wait until 65F though,
since Okina Monk B, Tengu Monk B, and Behemoths can cause accidents during synthesis.
Monster Stats (51-59F)
| Floor | Monster | HP | Atk | Def | Exp | Type |
|---|---|---|---|---|---|---|
| 6-79 | Cave Mamel | 5 | 100 | 100 | 2000 | Normal |
| 15-79 | Chow | 20 | 1 | 1 | 5 | Floating |
| 25-99 | Dark Owl | 90 | 16 | 25 | 120 | Normal |
| 47-54 | Mudster | 140 | 35 | 43 | 460 | Draining/Aquatic |
| 47-54 | Mudder | 145 | 45 | 53 | 920 | Draining/Aquatic |
| 47-59 | N'dama | 135 | 50 | 35 | 650 | Metal |
| 50-75 | Mixergon | 118 | 68 | 40 | 880 | Normal |
| 51-59 | Terror Scorpion | 185 | 55 | 45 | 900 | Draining |
| 51-59 | Okina Monk B | 170 | 56 | 50 | 1200 | Normal |
| 51-59 | Tengu Monk B | 180 | 55 | 47 | 1200 | Normal |
| 51-59 | Okame Monk B | 160 | 50 | 51 | 1200 | Normal |
| 51-59 | Hannya Monk B | 166 | 57 | 45 | 1200 | Normal |
| 51-59 | Kitsune Monk B | 175 | 53 | 48 | 1180 | Normal |
| 51-59 | Hoppin' Slammer | 125 | 49 | 49 | 820 | Normal |
| 55-59 | Fleefrog | 125 | 60 | 45 | 900 | Aquatic |
| 55-59 | Ironwalrus | 138 | 35 | 55 | 860 | Aquatic |
| 55-59 | Vexing Kappa | 175 | 49 | 33 | 960 | Aquatic |
| 55-59 | Superb Octopling | 199 | 64 | 48 | 1260 | Aquatic |
| 55-59 | Admiral Spearfish | 200 | 59 | 50 | 1410 | Aquatic |
60-65F
The Item Destruction zone spans from 60-64F, but it has Hat Brat (Lv3) instead of Hat Rascal (Lv4).
There are fewer initial enemies per floor than Heart of Serpentcoil Island, so it's a bit easier here.
However, there's still no reason to linger and farm enemies, so it's best to hurry to the stairs.
Hyper Gazer, Curse Matron, Bag Knave, Hat Brat, and Nigiri Boss all appear between 60-64F.
Hyper Gazer hypnotizes Shiren, forcing him to either attack in a random direction or use an item.
Curse Matron curses up to 2 of your equipped weapon, shield, or bracelets in a single turn.
Bag Knave throws Weeds to knock inventory items away, and turns items on the ground into Weeds.
Hat Brat steals and tosses away a staff, grass, or food category item from your inventory.
Nigiri Boss inflicts Onigiri status instead of transforming inventory items into Large Onigiri.
Onigiri status prevents item usage and nullifies the effects of any equipped items for 10 turns.
Mostly Lv3 Ninjas appear on 65F, making it a safer floor to linger for Mixergon (50-75F).
Aim to finish synthesizing your weapon and shield before advancing to the next floor range.
Otherwise, N'daloon (60-69F) has the ability of either N'dubba, N'dulu, or N'dama when generated,
so it might be best to ignore items on the ground unless your inventory is looking sparse.
Monster Stats (60-65F)
| Floor | Monster | HP | Atk | Def | Exp | Type |
|---|---|---|---|---|---|---|
| 6-79 | Cave Mamel | 5 | 100 | 100 | 2000 | Normal |
| 15-79 | Chow | 20 | 1 | 1 | 5 | Floating |
| 25-99 | Dark Owl | 90 | 16 | 25 | 120 | Normal |
| 50-75 | Mixergon | 118 | 68 | 40 | 880 | Normal |
| 60-64 | Hat Brat | 125 | 45 | 9 | 880 | Cyclops |
| 60-64 | Bag Knave | 95 | 40 | 35 | 600 | Normal |
| 60-64 | Nigiri Boss | 133 | 45 | 42 | 555 | Normal |
| 60-64 | Hyper Gazer | 126 | 55 | 45 | 922 | Cyclops |
| 60-64 | Curse Matron | 145 | 53 | 48 | 1060 | Normal |
| 60-69 | N'daloon | 205 | 65 | 45 | 1250 | Metal |
| 65 | Fire Ninja B | 105 | 56 | 39 | 500 | Normal |
| 65 | Tree Ninja B | 145 | 47 | 43 | 688 | Normal |
| 65 | Earth Ninja B | 155 | 52 | 38 | 780 | Normal |
| 65 | Metal Ninja B | 125 | 50 | 40 | 444 | Normal |
| 65 | Water Ninja B | 120 | 45 | 39 | 400 | Normal |
66-79F
Behemoth Gates have a chance of being generated on 75-79F.
Behemoths include Death Reaper, Sleep Radish, Frenzy Radish, Nigiri Boss, Curse Matron, and Battler.
Major non-Behemoth threats include Miracle Hen (66-79F), Skull Lord (66-79F), and Battler (66-79F).
Secondary threats include Bellthoven (66-79F), Pumplord (66-79F), and various power type monsters.
Special mention goes to Lashagga (66-79F) if you're playing as Kokatsu Shiren or Tatsumi Shiren,
as its ability to perform 3 consecutive attacks in 1 turn can be somewhat brutal without a shield.
Otherwise, Lv3 Monks (70-75F) return for a little while, and can overlap with Behemoths on 75F.
Miracle Hen has Swift 2 speed and very high attack power - Poison Arrows are fantastic.
Skull Lord shoots a magic bullet that randomly inflicts Asleep, Blind, level-3, or 40 damage.
Battler knocks away an equipped weapon, shield, or bracelet, sending it flying behind you.
Shield of Negation blocks Skull Lord's magic, and Affixing Bracelet protects you from Battler.
Bellthoven summons 1~3 monsters in a single turn even at a distance, so prioritize it in rooms.
Pumplord passes through walls, and Megahead (66-79F) attacks from up to 4 tiles ahead.
Monster Stats (66-79F)
| Floor | Monster | HP | Atk | Def | Exp | Type |
|---|---|---|---|---|---|---|
| 6-79 | Cave Mamel | 5 | 100 | 100 | 2000 | Normal |
| 15-79 | Chow | 20 | 1 | 1 | 5 | Floating |
| 25-99 | Dark Owl | 90 | 16 | 25 | 120 | Normal |
| 50-75 | Mixergon | 118 | 68 | 40 | 880 | Normal |
| 60-69 | N'daloon | 205 | 65 | 45 | 1250 | Metal |
| 66-79 | Lashagga | 99 | 43 | 34 | 500 | Dragon |
| 66-79 | Miracle Hen | 220 | 82 | 60 | 1600 | Beast |
| 66-79 | Great Samurai | 149 | 58 | 40 | 840 | Normal |
| 66-79 | Skull Lord | 188 | 55 | 55 | 1250 | Ghost |
| 66-79 | Battler | 200 | 69 | 50 | 1200 | Normal |
| 66-79 | Megataur | 170 | 55 | 42 | 790 | Beast |
| 66-79 | Megahead | 182 | 65 | 48 | 1350 | Cyclops |
| 66-79 | Clapdon | 195 | 73 | 55 | 1888 | Metal |
| 66-79 | Bellthoven | 150 | 45 | 45 | 1111 | Normal |
| 66-79 | Pumplord | 185 | 75 | 35 | 1850 | Ghost/Floating |
| 70-75 | Okina Monk B | 170 | 56 | 50 | 1200 | Normal |
| 70-75 | Tengu Monk B | 180 | 55 | 47 | 1200 | Normal |
| 70-75 | Okame Monk B | 160 | 50 | 51 | 1200 | Normal |
| 70-75 | Hannya Monk B | 166 | 57 | 45 | 1200 | Normal |
| 70-75 | Kitsune Monk B | 175 | 53 | 48 | 1180 | Normal |
80-99F
Behemoth Gates have a chance of being generated on 95-98F.
Behemoths include Death Reaper, Sleep Radish, Frenzy Radish, Nigiri Boss, Curse Matron, and Battler.
The final stretch, featuring Archdragon (80-99F) and King Reaper (80-99F) as major threats.
Archdragon spews a 30 damage flame from anywhere, and King Reaper wall-clips with Swift 2 speed.
Kiki Island has fewer initial enemies per floor so it isn't as bad as Heart of Serpentcoil Island,
but shield runes like Anti-Dragon, Keen, Retribution, and Onigiri/Jitter Payback are still very helpful.
Many players prefer throwing Eradication Scroll at King Reaper if they have Anti-Dragon.
Fulminachin (80-99F) turns red when HP ≤ 50%, and explodes when HP ≤ 40 (160+ damage dealt).
It's best to save items that help with rushing to the stairs until 95-98F to reduce the risk of
encountering Behemoth Sleep Radish or Behemoth Frenzy Radish if a Behemoth Gate spawns.
Said items include Mapping Scroll, Guiding Staff, or Monster-find Bracelet + Narrow-escape Staff.
Don't forget that Wall-less Scroll can be read to instantly make all Behemoths vanish, too.
Monster Stats (80-99F)
| Floor | Monster | HP | Atk | Def | Exp | Type |
|---|---|---|---|---|---|---|
| 25-99 | Dark Owl | 90 | 16 | 25 | 120 | Normal |
| 80-89 | Crow Tengu | 5 | 1 | 1 | 1 | Floating |
| 80-99 | Electroid | 150 | 56 | 53 | 1333 | Metal |
| 80-99 | Infernous | 285 | 69 | 55 | 1999 | Normal |
| 80-99 | Archdragon | 200 | 65 | 60 | 2200 | Dragon |
| 80-99 | Captain Ant | 110 | 55 | 39 | 440 | Normal |
| 80-99 | King Reaper | 225 | 65 | 50 | 1555 | Ghost/Floating |
| 80-99 | Fulminachin | 200 | 45 | 32 | 440 | Exploding/Cyclops/Aquatic |
| 80-99 | Grampadillo | 175 | 71 | 56 | 1400 | Beast |
| 80-99 | Fluffy Bunny | 10 | 10 | 50 | 50 | Beast |
| 80-99 | Tiger Chucker | 155 | 60 | 55 | 1800 | Beast |
| 80-99 | Hiding Dragon | 230 | 70 | 60 | 1500 | Dragon |
Monsters
See Monsters for individual monster details.
- F - Dark hallways
- S - Shop is possible
- M - Monster House is possible
- B - Behemoth Gate is possible
Monster Colors = Farming, Useful, Lowers Stats, Targets Items, Dangerous
Behemoths
| F | Behemoth Monsters | |||||||
|---|---|---|---|---|---|---|---|---|
| 31-39 |
 Mamel
Mamel |
 Bowboy
 |
 Pop Tank
 |
 Porky
Porky |
 Ghost Radish
 |
 Explochin
 |
||
| 51-54 75-79 95-98 |
 Death Reaper
 |
 Sleep Radish
 |
 Frenzy Radish
 |
 Nigiri Boss
 |
 Curse Matron
 |
 Battler
 |
||
Items
※ This section is currently incomplete.
Item Table Key
| ID | Explanation |
|---|---|
| F | Floor |
| S | Shop |
| P | Peddler |
| M | Monster drop |
| B | Buried |
| H | Thiefwalrus |
| I | Island |
| T | Transmutation Pot |
| U | Surprise Pot |
| W | Tunnel of Wishes |
 Weapon
| Weapon | ||||||||||
|---|---|---|---|---|---|---|---|---|---|---|
| Name | F | S | P | M | B | H | I | T | U | W |
| Wooden Sword | ||||||||||
| Bronze Sword | ||||||||||
| Katana | ||||||||||
| Doutanuki | ||||||||||
| Manji Kabura | ||||||||||
| Kajin Fuuma | ||||||||||
| Kabura Sutegi | ||||||||||
| Golden Sword | ||||||||||
| Kama Itachi | ||||||||||
| Axe of the Minotaur | ||||||||||
| Accurate Sword | ||||||||||
| Swift Sword | ||||||||||
| Watersplitter | ||||||||||
| Primal Axe | ||||||||||
| Dragonkiller | ||||||||||
| Crescent Blade | ||||||||||
| Sky Sword | ||||||||||
| Sickle of Salvation | ||||||||||
| Drain Slayer | ||||||||||
| Cyclops Bane | ||||||||||
| Steel Severer | ||||||||||
| Whopping Harisen | ||||||||||
| Healing Sword | X | |||||||||
| Peach Club | ||||||||||
| Spender's Club | ||||||||||
| Ferrous Greatsword | ||||||||||
| Steak Knife | ||||||||||
| Jagged Sword | ||||||||||
| Quad-edge | ||||||||||
| Auspicious Kumade | ||||||||||
| Pickaxe | ||||||||||
| Golden Pickaxe | ||||||||||
| Wooden Mallet | ||||||||||
| Epic Hammer | ||||||||||
| Trapseeker | ||||||||||
| Bonito Block | ||||||||||
| Yamanba's Cleaver | ||||||||||
| Break-Off Blade | ||||||||||
 Shield
| Shield | ||||||||||
|---|---|---|---|---|---|---|---|---|---|---|
| Name | F | S | P | M | B | H | I | T | U | W |
| Wooden Shield | ||||||||||
| Bronze Shield | ||||||||||
| Iron Shield | ||||||||||
| Wolfshead | ||||||||||
| Fuuma Shield | ||||||||||
| Rasen Fuuma | ||||||||||
| Golden Shield | ||||||||||
| Counter Shield | ||||||||||
| Watchful Shield | ||||||||||
| Dragon Shield | ||||||||||
| Blast Shield | ||||||||||
| Targe of the Minotaur | ||||||||||
| Walrus Stopper | ||||||||||
| Froggo Stopper | ||||||||||
| Hat Stopper | ||||||||||
| Nigiri Stopper | ||||||||||
| Spearscale Shield | ||||||||||
| Kappa's Dish | ||||||||||
| Gazer Shield | ||||||||||
| Shield of Negation | ||||||||||
| Unmoving Wall | ||||||||||
| Zabuton | ||||||||||
| Spender's Shield | ||||||||||
| Ferrous Kite | ||||||||||
| Steak Plate | ||||||||||
| Gutsy Shield | ||||||||||
| Hunky-dory Shield | X | |||||||||
| Bodhi Shield | ||||||||||
| Shield of Sating | ||||||||||
| Auspicious Omamori | ||||||||||
| Shield of Presage | ||||||||||
| Yamanba's Potlid | ||||||||||
| Break-Off Shield | ||||||||||
 Bracelet
| Bracelet | ||||||||||
|---|---|---|---|---|---|---|---|---|---|---|
| Name | F | S | P | M | B | H | I | T | U | W |
| Healing Bracelet | ||||||||||
| Strength Bracelet | ||||||||||
| Bellyexpand Bracelet | ||||||||||
| Bellyshrink Bracelet | ||||||||||
| Fortune Bracelet | ||||||||||
| Cleansing Bracelet | ||||||||||
| Focusing Bracelet | ||||||||||
| Rousing Bracelet | ||||||||||
| Rustproof Bracelet | ||||||||||
| Cursebreak Bracelet | ||||||||||
| Affixing Bracelet | ||||||||||
| Far-throwing Bracelet | ||||||||||
| Bad-aim Bracelet | ||||||||||
| Sure-aim Bracelet | ||||||||||
| Bouncy Bracelet | ||||||||||
| Rapid-fire Bracelet | ||||||||||
| Daredevil Bracelet | ||||||||||
| Dreaded Bracelet | ||||||||||
| Leaping Bracelet | ||||||||||
| Blasting Bracelet | ||||||||||
| Clairvoyant Bracelet | ||||||||||
| Monster-find Bracelet | ||||||||||
| Item-find Bracelet | ||||||||||
| Passage-find Bracelet | ||||||||||
| Waterwalk Bracelet | ||||||||||
| Floating Bracelet | ||||||||||
| Wallpass Bracelet | ||||||||||
| Tiptoe Bracelet | ||||||||||
| Passerby Bracelet | ||||||||||
| Item-losing Bracelet | ||||||||||
| Gitan-losing Bracelet | ||||||||||
| Monstercall Bracelet | ||||||||||
| Trapmore Bracelet | ||||||||||
| Haggling Bracelet | ||||||||||
| Trapper's Bracelet | ||||||||||
| Appraiser's Bracelet | ||||||||||
| Cannonboost Bracelet | ||||||||||

 Projectile
| Projectile | ||||||||||
|---|---|---|---|---|---|---|---|---|---|---|
| Name | F | S | P | M | B | H | I | T | U | W |
| Wooden Arrow | ||||||||||
| Iron Arrow | ||||||||||
| Silver Arrow | ||||||||||
| Poison Arrow | ||||||||||
| Truestrike Arrow | ||||||||||
| Rock | ||||||||||
| Porky's Rock | ||||||||||
 Food
Food
| Food | ||||||||||
|---|---|---|---|---|---|---|---|---|---|---|
| Name | F | S | P | M | B | H | I | T | U | W |
| Onigiri | ||||||||||
| Large Onigiri | ||||||||||
| Huge Onigiri | ||||||||||
| Rotten Onigiri | ||||||||||
| Grilled Onigiri | ||||||||||
| Special Onigiri | ||||||||||
| Sumo Onigiri | ||||||||||
| Sweet Potato | ||||||||||
| Yakitori | ||||||||||
| Rotten Peach Bun | ||||||||||
 Grass
Grass
| Grass | ||||||||||
|---|---|---|---|---|---|---|---|---|---|---|
| Name | F | S | P | M | B | H | I | T | U | W |
| Weeds | ||||||||||
| Herb | ||||||||||
| Otogirisou | ||||||||||
| Healing Grass | ||||||||||
| Life Grass | ||||||||||
| Fragrant Grass | ||||||||||
| Revival Grass | ||||||||||
| Bellyexpand Seed | ||||||||||
| Bellyshrink Seed | ||||||||||
| Dragon Grass | ||||||||||
| Leaping Grass | ||||||||||
| Antidote Grass | ||||||||||
| Strength Grass | ||||||||||
| Poison Grass | ||||||||||
| Confusion Grass | ||||||||||
| Sedating Grass | ||||||||||
| Berserk Seed | ||||||||||
| Blinding Grass | ||||||||||
| Seewell Grass | ||||||||||
| Swift Grass | ||||||||||
| Power-up Grass | ||||||||||
| Invincible Grass | ||||||||||
| Fortune Grass | ||||||||||
| Angel Seed | ||||||||||
| Feeble Grass | ||||||||||
| Unlucky Seed | ||||||||||
| Ill-fated Seed | ||||||||||
 Scroll
| Scroll | ||||||||||
|---|---|---|---|---|---|---|---|---|---|---|
| Name | F | S | P | M | B | H | I | T | U | W |
| Confusion Scroll | ||||||||||
| Slumber Scroll | ||||||||||
| Jitters Scroll | ||||||||||
| Windblade Scroll | ||||||||||
| Expulsion Scroll | ||||||||||
| Exorcism Scroll | ||||||||||
| Identifier Scroll | ||||||||||
| Heavenly Scroll | ||||||||||
| Earthly Scroll | ||||||||||
| Plating Scroll | ||||||||||
| Slot-adding Scroll | ||||||||||
| Rune-eraser Scroll | ||||||||||
| Silver-seal Scroll | ||||||||||
| Silverpurge Scroll | ||||||||||
| Pot-upsize Scroll | ||||||||||
| Extraction Scroll | ||||||||||
| Onigiri Scroll | ||||||||||
| Curse Scroll | ||||||||||
| Mapping Scroll | ||||||||||
| Map-loss Scroll | ||||||||||
| Trap-eraser Scroll | ||||||||||
| Trap Scroll | ||||||||||
| Water-drain Scroll | ||||||||||
| Monstercall Scroll | ||||||||||
| Wall-less Scroll | ||||||||||
| Gathering Scroll | ||||||||||
| Collection Scroll | ||||||||||
| Gambler's Scroll | ||||||||||
| Muzzle Scroll | ||||||||||
| Carry-ban Scroll | ||||||||||
| Swift Foe Scroll | ||||||||||
| Fixer Scroll | ||||||||||
| Escape Scroll | ||||||||||
| Eradication Scroll | ||||||||||
| Sanctuary Scroll | ||||||||||
| Blank Scroll | ||||||||||
| Wet Scroll | ||||||||||
 Staff
Staff
| Staff | ||||||||||
|---|---|---|---|---|---|---|---|---|---|---|
| Name | F | S | P | M | B | H | I | T | U | W |
| Ordinary Staff | ||||||||||
| Paralyzing Staff | ||||||||||
| Sealing Staff | ||||||||||
| Disguising Staff | ||||||||||
| Empathetic Staff | ||||||||||
| Narrow-escape Staff | ||||||||||
| Knockback Staff | ||||||||||
| Switching Staff | ||||||||||
| Vaulting Staff | ||||||||||
| Skull Mage's Staff | ||||||||||
| Thunderbolt Staff | ||||||||||
| Burrowing Staff | ||||||||||
| Earthmound Staff | ||||||||||
| Balance Staff | ||||||||||
| Guiding Staff | ||||||||||
| Swift Staff | ||||||||||
| Sluggish Staff | ||||||||||
| Fortune Staff | ||||||||||
| Unlucky Staff | ||||||||||
| Peach Staff | ||||||||||
 Pot
Pot
| Pot | ||||||||||
|---|---|---|---|---|---|---|---|---|---|---|
| Name | F | S | P | M | B | H | I | T | U | W |
| Preservation Pot | ||||||||||
| Identifier Pot | ||||||||||
| Transmutation Pot | ||||||||||
| Cashing Pot | ||||||||||
| Synthesis Pot | ||||||||||
| Exorcism Pot | ||||||||||
| Curse Pot | ||||||||||
| Upgrading Pot | ||||||||||
| Degrading Pot | ||||||||||
| Bottomless Pot | ||||||||||
| Warehouse Pot | ||||||||||
| Handtrapper Pot | ||||||||||
| Unbreakable Pot | ||||||||||
| Ordinary Pot | ||||||||||
| Hiding Pot | ||||||||||
| Rejuvenation Pot | ||||||||||
| Walrus Pot | ||||||||||
| Water Gun Pot | ||||||||||
| Hilarious Pot | ||||||||||
| Monster Pot | ||||||||||
| Surprise Pot | ||||||||||
 Incense
| Incense | ||||||||||
|---|---|---|---|---|---|---|---|---|---|---|
| Name | F | S | P | M | B | H | I | T | U | W |
| Heat-ban Incense | ||||||||||
| Evasive Incense | ||||||||||
| Cautious Incense | ||||||||||
| Reflective Incense | ||||||||||
| Aggressive Incense | ||||||||||
| Defensive Incense | ||||||||||
| Blurry Incense | ||||||||||
| Weighted Incense | ||||||||||
| Unwanting Incense | ||||||||||
