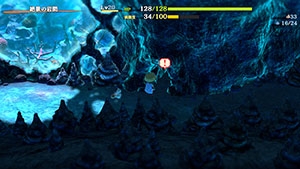
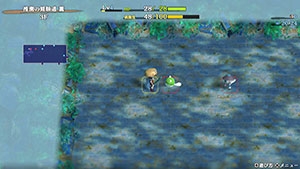
Training Path of Extra Inference
Overview
| Unlock | Clear Training Path of Inference. |
|---|---|
| Entrance | Rocky Viewpoint (Cave to the right) |
| Floors | 20F / 50F (Sacred Tree) | ||
|---|---|---|---|
| Bring Items | No | Stairs | Descending |
| Companions | No | Roamers | No |
| Rescues | 0 | Starting Level | Lv1 |
| Starting Item | Large Onigiri | ||
| Unidentified | All categories | ||
| Shops | Yes | Monster Houses | |
| Behemoths | No | Wishing Shrines | No |
| Kron's Challenge | No | Fever Time | No |
| Initial Enemies | 5 | Spawn Rate | 30 Turns |
| Wind (1st Gust) | 900 Turns | Reward | Last item identified. |
Postgame dungeon where the goal is to identify 50 items, and the reward is the last item identified.
This dungeon utilizes an inference mechanic which narrows down unidentified items to 3 possibilities.
The last item identified by the player doesn't have to be inside the inventory to be received as a reward.
Most runs of this dungeon can be cleared around 9~12F if you identify items as you pick them up.
Overall, it's a great place to visit to fill out some of the rarer item entries in the notebook.
Navigation
Strategy
Dungeon Characteristics
Changes from Training Path of Inference
The rules are similar to Training Path of Inference, but with the following differences:
- The dungeon is cleared as soon as the player has identified 50 items (average: ~10F).
- It's also possible to clear the dungeon by descending the stairs on 20F.
- The message "You have N items left to identify!" is displayed after identifying an item.
- The last item identified becomes the reward, and the quantity depends on the clear depth.
- If the last item was a pot, the contents of the pot are not included in the reward.
- Fully ID'ing your inventory with a lucky roll of Identifier Scroll still only rewards 1 type of item.
- Identifying a disguised N'dulu as the last item results in receiving a real item, not a N'dulu.
- Weapons, shields, projectiles, food, and Blank Scrolls cannot be obtained as a reward.
- It's been said that descending the stairs without ID'ing any items rewards you with
the last item identified during a previous adventure.
- One random unidentified item gets auto-identified when the player advances to the next floor.
- Items in pots are excluded, so if you want to save a specific item for last, keep it in a pot.
- Safe = Preservation, Ordinary, Exorcism, Synthesis, Upgrading, Degrading, or Walrus.
- Unsafe = Identifier, Transmutation, Cashing, Unbreakable, or Curse (if ID'ing via usage).
- An item will not get auto-identified when you descend stairs on a final floor.
- Final floors = 20F (First Clear), or 50F (Sacred Tree Extension).
- Identifier Scroll can be used to take home a bracelet, staff, or pot found on a final floor.
- For other categories, either use the item or insert the item into an Identifier Pot.
- Items in pots are excluded, so if you want to save a specific item for last, keep it in a pot.
- Writing Escape Scroll on a Blank Scroll and reading it results in the effect being blocked.
- Hallways are dark on all floors.
- There's greater risk of being hit by a surprise attack from Gazer, Nigiri Morph, etc.
- The item table features more items, including rarer finds like Appraiser's Bracelet.
- Appraiser's Bracelet in particular can only be found from 13F onwards.
- In Sacred Tree Mode, Appraiser's Bracelet has a very high chance of being found on 50F.
- It's assumed to be a 100% chance, but it hasn't actually been datamined as of now.
- This was the premier spot where Appraiser's Bracelet could be found in the base game,
but this bracelet can now be found in other dungeons that were added via updates.
- The monster table has been remixed, though it's still pretty similar overall.
- N'dubba (8-11F) is removed, N'dulu (17-20F) is added.
- Dragon (15-20F) appears earlier in the first clear, instead of only appearing on 20F.
- Super Gazer, Nigiri Boss, and Pesky Kappa no longer appear on 20F.
- Nashagga (7-14F), Brodillo (10-14F), and other foes have adjusted spawn floors.
- In the original dungeon, Nashagga was 7-13F, and Brodillo was 10-20F.
- The monster table from 21F onwards in Sacred Tree Mode also differs.
- Rescue requests are not allowed, Roamer NPCs don't appear, and the floor BGM is different.
- This dungeon cannot be selected in Monster Trial Mode.
 Inference Mechanic
New gameplay mechanic introduced in Shiren 6 that is enabled only in certain dungeons.
Check an unidentified item's description to view 3 possibilities as to what the item could be,
then choose how to best use the item based on the list of possibilities.
Example:
| Item Name |
|---|
| Herb |
| Dragon Grass |
| Sedating Grass |
So in this case, you wouldn't want to risk using it when an enemy is adjacent due to Sedating Grass.
Both Sedating Grass and Dragon Grass are good when thrown, and throwing an Herb is harmless
if the target is already at full HP, so you might want to lean towards throwing this grass item.
Unfortunately, item names assigned by the player are not reflected in the list of possibilities.
If a possibility has already been fully identified, the possibility will be greyed-out.
Note About Item Variety
Clairvoyant Bracelet, Sure-aim Bracelet, Appraiser's Bracelet, Upgrading Pot, Monstercall Scroll,
and other uncommon or outright rare items appear - the item table rivals Heart of Serpentcoil Island.
Most bracelets, scrolls, and pots can be found, so it's a great place for filling out notebook entries.
All said, the only item categories that notably lack in variety here are weapons and shields.
Reward Quantity Based on Clear Depth
| Floor | Qty |
|---|---|
| 1~5F | 5 |
| 6~7F | 4 |
| 8~9F | 3 |
| 10~11F | 2 |
| 12~50F | 1 |
Strategy #1 - Quick Clear
If you're only interested in clearing the dungeon as fast as possible, focus on identifying 50 items.
You'll usually end up clearing the dungeon at around half the depth if you identify all possible items.
Create safe situations to test unidentified items in instead of focusing on conserving items.
- Grass, Scroll, Incense, Pot (Tap Type) → Use before advancing to the next floor.
- If an item is cursed, insert it into a pot (Put In Type) or light an incense with it.
- Identifier Scroll → Use on Pots (Put In Type).
- Identifier Pot → Insert bracelets or staves.
The item that gets auto-ID'd when changing floors will be selected from whatever is left after said tests.
Strategy #2 - Specific Reward
Taking home a specific reward requires more strategy compared to simply clearing the dungeon,
as the player needs to ensure the item they're aiming for doesn't get identified until the very end.
This is the strategy you want to use for taking home an Appraiser's Bracelet (13-50F).
Basic Strategy (Not Appraiser's Bracelet on 50F)
- Identify 49 items, obtain the target item.
- Keep the target item in a non-item-altering pot so that it doesn't get auto-identified.
- Safe = Preservation, Ordinary, Exorcism, Synthesis, Upgrading, Degrading, or Walrus.
- Unsafe = Identifier, Transmutation, Cashing, Unbreakable, or Curse (if ID'ing via usage).
- Always account for the possibility of a lucky use when reading an Identifier Scroll.
- If the Identifier Scroll is blessed, it has a 100% chance for a lucky use.
- If the target item is a pot or incense, keep at least 1 other unidentified item on hand.
- You'll have to hope the target item doesn't get auto-identified when changing floors.
- Keep the target item in a non-item-altering pot so that it doesn't get auto-identified.
- Place all unidentified items down except for the target item.
- Choose one of the following steps:
- Advance floors → Target item will be identified automatically, clearing the dungeon.
- However, auto-ID does not occur when you use the stairs on a final floor.
- Final floors = 20F (First Clear), or 50F (Sacred Tree Extension).
- Read an Identifier Scroll → Target item will be the only item identified even with a lucky use.
- Insert into an Identifier Pot → Target item will be the only item identified.
- Advance floors → Target item will be identified automatically, clearing the dungeon.
Appraiser's Bracelet (Found on 50F)
- Identify 49 items, find a Collection Scroll (or Evasive Incense) + Identifier Scroll or Identifier Pot.
- Collection Scroll (or Evasive Incense) is needed to counter Vexing Kappa (40-50F).
- Read the Collection Scroll at the start of 50F, then pick up the Appraiser's Bracelet.
- The Collection Scroll must already be ID'd, or else it'll increase the ID'd items count.
- Place all unidentified items down except for the Appraiser's Bracelet.
- Choose one of the following steps (Do not use the stairs on 50F):
- Read an Identifier Scroll → The bracelet will be the only item identified even with a lucky use.
- Insert into an Identifier Pot → The bracelet will be the only item identified.
Recovering from Accidental Early Target Identification
If the target item became identified early, don't give up! - It's fine as long as nothing else gets identified.
This strategy can be used for any item category, but can be difficult depending on ID progress.
- Place all unidentified items down, and don't pick up any new unidentified items.
- This includes any items you assigned names to that have green names.
- Rush to the stairs on all floors until you descend past the final floor, clearing the dungeon.
Parallel Play for Appraiser's Bracelet
The idea is to prepare a Monstercall Scroll and use Parallel Play to RNG manipulate for it.
Preparation:
- Monstercall Scroll
- Identifier Scroll or Identifier Pot
- Items that let you successfully tackle a Monster House.
- Blank Scroll (write Expulsion Scroll) + Seewell Grass is the ideal combo.
- 49 items identified so you can quickly clear the dungeon.
Steps:
- Create a Parallel Play data on a floor in the range of 13-50F (No need to upload).
- Suspend your real adventure, and resume from the Parallel Play data.
- Read the Monstercall Scroll.
- If an Appraiser's Bracelet was not generated:
- Give up, then resume from the same Parallel Play data again.
- Perform an action (example: normal attack) to advance the turn RNG.
- The action you choose here must be repeated as a chain during each subsequent attempt.
- Repeat from step 3.
- If an Appraiser's Bracelet was generated:
- Resume your real adventure.
- Perform the exact same actions you did during the previous Parallel Play adventure.
- Carefully identify the Appraiser's Bracelet to take it home as a reward.
Example:
- Prep (Real) = Monstercall Scroll in inventory on 13F → create Parallel Data → suspend.
- Attempt 1 (Parallel) = read Monstercall Scroll → no bracelet...
- Attempt 2 (Parallel) = normal attack x 1 → read Monstercall Scroll → no bracelet...
- Attempt 3 (Parallel) = normal attack x 2 → read Monstercall Scroll → no bracelet...
- Attempt 4 (Parallel) = normal attack x 3 → read Monstercall Scroll → bracelet found!
- Attempt 4b (Real) = normal attack x 3 → read Monstercall Scroll → bracelet found!
Important Items (First Clear)

 Weapon & Shield
High Base Value Items
Bronze Sword and Wooden Shield are often found between 1-5F, but everything else is rare,
making it rather difficult to activate a resonance effect that increases attack power and defense.
If you don't find the 2nd item in a resonance set, just use the highest base value items you find.
Watchful Shield, Counter Shield
Low base value, but the innate rune on either shield gets immediate results.
It's safe to say that these should be prioritized before Wooden Shield, at least.
Gazer Shield
Equip this shield before becoming adjacent to Gazer (8-20F) to avoid its hypnosis.
It goes without saying, but swap to your strongest shield before fighting other monsters.
Dragonkiller, Dragon Shield
Solid base value, great against Nashagga (7-14F) and Dragon (15-20F).
Shield of Sating
Makes it easier to maintain Sumo status, which is great for mid~late game floors.
Low base value, so it's best to swap to a stronger shield before fighting.
 Bracelets
Monster-find Bracelet, Item-find Bracelet, Clairvoyant Bracelet
Monster-find Bracelet lets you avoid encounters, allowing for more time to regenerate HP.
Item-find Bracelet is useful for planning a more efficient route at the start of a new floor.
Wallpass Bracelet
This bracelet lets you have a one-sided fight against most monsters if there's a wall tile.
Appraiser's Bracelet
Only found from 13F onwards - It's not guaranteed to appear during a run of the first clear.
Use an Identifier Scroll or Identifier Pot just before clearing the dungeon to take it home.
 Scrolls
Identifier Scroll
It's best to identify this early on if you want to take home a specific reward.
If the scroll is blessed and you select an unidentified item, all inventory items will get identified.
Eradication Scroll
Popular targets that reduce the risk of item loss include Gazer (8-20F) and Nigiri Morph (15-20F).
Otherwise, some players eradicate Nashagga (7-14F) or Dragon (15-20F) if they lack a Dragon Shield.
Blank Scroll
Always found in an identified state, so you can't take it home as a reward.
Select Write to instantly check whether or not the scroll is blessed or cursed.
If it's blessed, consider writing Identifier Scroll to identify your entire inventory at once.
If you need to register Eradication Scroll, do a few runs of Domain of Staves and Scrolls beforehand.
It might be best to write and use it before Gazer (8-20F) forces you to read it while hypnotized.
 Staves
Paralyzing Staff, Narrow-escape Staff, Unlucky Staff, Sealing Staff, Sluggish Staff
Staves that excel at disabling a single target - especially nice against stronger monsters near the end.
Unlucky Staff targets: Nashagga (7-14F), Brodillo (10-14F), Polygon Shaka (15-20F), Nigiri Morph (15-20F).
Keep in mind that slowed monsters can be used to stall out pursuing enemies in a hallway, too.
 Pots & Incenses
Identifier Pot
Useful when an unidentified item's possibilities is on the tricky side to narrow down without help.
Can also be used to check for curses on very important items like Revival Grass.
Preservation Pot
Best pot to use as a container to prevent auto-identification from targeting specific items.
Other pots that act as storage include Ordinary, Exorcism, Synthesis, Upgrading, Degrading, and Walrus.
Water Gun Pot
Can be used to significantly lower Nashagga (7-14F)'s attack power or one-shot Fierous (10-16F).
Deals 5 damage and has 100% accuracy, so it can also be used to instantly slay a Cave Mamel.
Blurry Incense
Pair it with Monster-find Bracelet or Clairvoyant Bracelet to safely ignore monsters in a room.
Also plays well with Guiding Staff, if you're lucky enough to find both items.


 Farming Related
Fortune Grass, Angel Seed, Disguising Staff, Blinding Grass, Berserk Seed, Jitters Scroll
Some of the items that can be utilized to level up a Mamel (1-3F) or Pit Mamel (1-3F) into a Cave Mamel.
Other options include Confusion Grass, Confusion Scroll, and Rotten Onigiri, but they're less reliable.
Sluggish Staff, Knockback Staff, Burrowing Staff, Thunderbolt Staff, Rock, Rotten Onigiri, Gitan
Some of the items that can be used to safely defeat a Cave Mamel for 2,000 experience points.
Remember that Rocks, Rotten Onigiri, and Gitan can miss - don't risk it when adjacent.
Another 100% accuracy option aside from staves is Water Gun Pot.
Fortune Staff
Can be used to level up a Pit Mamel (1-3F) into a Cave Mamel for experience points.
It's worth keeping Fortune Staff on hand even if you've gone past the floors where Pit Mamel appears,
since it can be paired with Reflective Incense to hit yourself with magic bullets to rapidly level up.
Reflective Incense
Light the incense, then swing a Fortune Staff at a foe to hit yourself with magic bullets and level up.
Reflects Gazer (8-20F), Curse Girl (13-20F), and Polygon Shaka (15-20F)'s special attacks.
Don't forget that player-side magic bullets from swinging staves will also be reflected.
Cautious Incense
Stops Thiefwalrus (8-11F) or Greenwalrus (16-20F) from being able to steal inventory items.
That said, you likely won't have the means to linger and farm Thiefwalrus family monsters,
regardless of whether or not you have a Cautious Incense on hand.
Monstercall Scroll, Walrus Pot, Transmutation Pot
Some of the items that can be used to generate additional items during a run.
If you decide to read a Monstercall Scroll, follow it up with items that quickly wipe out the room.
Walrus Pot should be thrown against a wall → defeat the Thiefwalrus monsters for item drops.
Important Items (Sacred Tree Extension)
 Weapon & Shield
Dragonkiller, Dragon Shield
Solid base value, great against Nashagga (7-14F), Dragon (15-39F), and Sky Dragon (40-50F).
Arguably the best main weapon for this dungeon, especially if you activate the resonance effect.
Watchful Shield, Counter Shield
These shields have special abilities that provide an advantage during combat even with low defense,
or when Pesky Kappa (21-39F), Vexing Kappa (40-50F), or Sleep Radish (40-50F) inflicts a status.
Cyclops Bane, Gazer Shield
Secondary gear that should be used against Gazer (8-20F) and Super Gazer (21-39F).
Cyclops Bane is also effective against Metalhead (10-18F).
Sickle of Salvation
Shines against Soul Reaper (40-50F) and Sleep Radish (40-50F) near the end.
Probably best wielded as a rune instead of using it as a main weapon.
Shield of Sating
Makes it easier to maintain Sumo status, which is great for mid~late game floors.
However, Sumo status isn't a free win thanks to dark hallways + Nigiri Boss's Onigiri status.
Probably best wielded as a rune instead of using it as a main shield.
Kappa's Dish
Boosts your chance of dodging projectiles aimed at you, which is great on 21-50F.
Applicable to Pesky Kappa (21-39F), Vexing Kappa (40-50F), and Sleep Radish (40-50F).
That said, dodging projectiles isn't guaranteed, so think of it as chance-based insurance.
 Bracelets
Wallpass Bracelet
Fantastic bracelet that lets you have a one-sided fight against most monsters if there's a wall tile.
Exceptions: Pesky Kappa (21-39F), Vexing Kappa (40-50F), Sleep Radish (40-50F), Soul Reaper (40-50F).
Clairvoyant Bracelet
Offers enhanced exploration efficiency, letting you avoid enemies or plan better routes for items.
Also clues you in on incoming Sleep Radish (40-50F) and Soul Reaper (40-50F) combinations,
which not even Wallpass Bracelet is enough to protect against.
Monster-find Bracelet, Item-find Bracelet
Monster-find Bracelet lets you avoid encounters, allowing for more time to regenerate HP.
Item-find Bracelet is useful for planning a more efficient route at the start of a new floor.
Floating Bracelet
Pair with Wallpass Bracelet to enhance your range of movement even further.
You also won't need to worry about stepping on traps while this bracelet is equipped.
Leaping Bracelet
Lets you warp from room to room instead of having to navigate dark hallways.
It's safer to activate it by walking, instead of stepping in place or swinging your weapon.
Cursebreak Bracelet
Protects against Curse Girl (13-20F) and Cursister (21-39F)'s equipment-cursing special attack.
Curse Girl curses an equipped shield, and Cursister curses an equipped weapon or shield.
Rousing Bracelet
Protects against Sleep Radish (40-50F)'s Sedating Grass throwing special attack.
Effectively expands your options when choosing an Eradication Scroll target as well.
Appraiser's Bracelet
Only found from 13F onwards - It's almost guaranteed to appear on 50F in the extension.
Use an Identifier Scroll or Identifier Pot just before clearing the dungeon to take it home.

 Projectiles
Porky's Rock
Projectiles are hard to obtain in meaningful quantities, but they're nice for lighting incenses.
Porky's Rocks can be used to check for incoming monsters even when the hallway bends,
so consider keeping them on hand in favor of other types or rocks or arrows.


 Staves & Scrolls & Grass
Identifier Scroll
Store at least 1 of these inside a pot so that you can take home a specific reward at the end.
If the scroll is blessed and you select an unidentified item, all inventory items will get identified.
There's a small chance for a lucky roll that identifies all items even when it's not blessed.
Collection Scroll
Store 1 of these inside a pot for use on 50F if you want to take home an Appraiser's Bracelet.
Exorcism Scroll
Cursed items are quite common, so do your best not to waste these scrolls.
It's particularly nice if you can lift a curse from a pot that can be used as storage.
Monstercall Scroll
Read these early game when monsters are still manageable to obtain additional items.
Kokatsu Shiren can read them even later on, since Blazing Heat can be used to clear Monster Houses.
Eradication Scroll
Pesky Kappa and Vexing Kappa can throw this scroll, making you instantly collapse.
Popular targets on 21-39F include Dragon (15-39F), Nigiri Boss (21-39F), or Pesky Kappa (21-39F).
For targets on 40-50F, the best choice is likely either Sleep Radish (40-50F) or Vexing Kappa (40-50F).
When throwing this scroll at a Bored Kappa type, inflict Sealed, Disguised, or Paralyzed status first.
If Bored Kappa types aren't eradicated and you find an Eradication Scroll you don't plan on using,
be sure to consume it by reading it instead of leaving it on the ground when between 21-50F.
Confusion Scroll, Slumber Scroll, Jitters Scroll
Aim to keep one of these on hand for a bad starting room or Summoning Trap accident.
Sweet Potato doesn't seem to be in the item table for this dungeon.
Paralyzing Staff, Narrow-escape Staff
Single-target options that are handy when you're struggling to keep up with combat.
Disguising Staff, Sealing Staff
Inflicting either status makes it safer to throw an Eradication Scroll at the target.
Don't hesitate to use it against an adjacent Nigiri Boss or such to ensure safety.
Switching Staff, Vaulting Staff, Burrowing Staff
Staves used to run away from monsters, or to spend fewer turns on movement.
However, Switching and Vaulting staves can't be used while Sumo status is active.
Unlucky Staff
Swing it to significantly weaken most Lv2 or higher monsters in this dungeon.
Nashagga (7-14F), Brodillo (10-14F), Polygon Shaka (15-20F), Nigiri Morph (15-20F), etc.
Fortune Staff
Can be used to level up a Pit Mamel (1-3F) into a Cave Mamel for experience points.
It's worth keeping Fortune Staff on hand even if you've gone past the floors where Pit Mamel appears,
since it can be paired with Reflective Incense to hit yourself with magic bullets to rapidly level up.
Revival Grass
An extremely important item, since it's easy to collapse from accidents in this dungeon.
Store them in pots, and don't hesitate to read Exorcism Scrolls on these to check for curses.
Invincible Grass
Useful as a last-ditch effort when surrounded by monsters.
Blocks Super Gazer (21-39F), Nigiri Boss (21-39F), and Sleep Radish (40-50F) special attacks.


 Food & Pots & Incenses
Grilled Onigiri
Dragon (15-39F) and Sky Dragon (40-50F) appear for a long time, so this is your main food option.
Eat Special Onigiri and Huge Onigiri before they become grilled if you haven't found a pot.
Preservation Pot
Inserted items are exempt from the item auto-identification upon changing floors mechanic,
which means you can insert player-named staves without incrementing the ID'd items count.
Also nice for storing an unidentified item you wish to take home as a reward.
Identifier Pot
Useful, but can be risky to carry on Pesky Kappa (21-39F) and Vexing Kappa (40-50F) floors,
since an unidentified item thrown by a kappa can land in the pot and increment the ID'd items count.
Some players like to insert important items to check for curses and break it right away instead.
Exorcism Pot
Insert Revival Grass into this pot whenever possible.
Synthesis Pot, Upgrading Pot
Fantastic options for upgrading equipment when playing as Normal Shiren or Asuka.
That said, don't count on actually finding either pot during any given adventure.
Reflective Incense, Evasive Incense
Reflective Incense can be paired with Fortune Staff to rapidly level up on any floor,
and also counters Gazer (8-20F), Super Gazer (21-39F), Curse Girl (13-20F), Cursister (21-39F), etc.
Evasive Incense counters Sleep Radish (40-50F), but also Lv2-3 Bored Kappa types (21-50F).
Farming Techniques
 Cave Mamel Hunting (1-3F)
Pit Mamel (1-3F) can be leveled up to a Cave Mamel and hunted for 2,000 experience points.
Level up options include items like Fortune Staff, Disguising Staff, Fortune Grass, Jitters Scroll, etc.
Rocks, Knockback Staff, and other items that deal fixed damage can be used to one-shot Cave Mamel.
 Nigiri Morph Factory (3-6F)
Nigiri Baby (3-6F) can be used to turn unneeded items into Large Onigiri if you find a shield.
If you find rocks or arrows, turn single rocks or arrows into Large Onigiri instead of the entire stack.
You can do so by stepping on single rocks or arrows and exchanging them with inventory items.
It's worth trying Nigiri Morph Factory even if you don't have a shield - walk around in a large room.
Increasing Max Fullness to 150+ activates Sumo status, which can be quite helpful.
Keep 3~4 Large Onigiri on hand for the journey after increasing Max Fullness.
 Greenwalrus Hunting (16-20F)
Greenwalrus (16-20F) spawns deep enough to possibly drop an Appraiser's Bracelet (13-50F),
so use a Cautious Incense to safely hunt them to increase your odds of finding said bracelet.
However, be careful not to overextend if you're struggling to keep up with other monsters.
Floor Guide
This section assumes that you're attempting to reach the deepest floor instead of returning early.
First Clear
General Advice
The main theme is protecting your inventory against foes capable of stealing or destroying items,
along with finding creative ways to survive stronger monster encounters with weaker equipment.
The newbie "walls" are 5F (Mid Chintala) and 7F (Nashagga) where trading hits usually begins to fail,
unless you've leveled up significantly and/or activated Sumo status using farming techniques.
1-3F
Stronger monsters like Chintala (1-3F) and Shagga (1-4F) appear right from the start.
Hallways are dark on all floors, making exploration riskier than in Training Path of Inference.
However, you'll still want to fully explore each floor at least until the end of 6F.
Fortune Staff and Fortune Grass are somewhat common, so try to hunt Cave Mamels to level up.
See farming related items for options to level up a Pit Mamel (1-3F) and defeat a Cave Mamel.
Test items or use the inference mechanic to quickly identify staves and pots (Put In Type).
If you find a dungeon shop, attempt to identify items by checking buying or selling prices.
These 2 points are particularly important when aiming for 20F instead of returning early.
Monster Stats (1-3F)
| Floor | Monster | HP | Atk | Def | Exp | Type |
|---|---|---|---|---|---|---|
| 1-3 | Mamel | 8 | 3 | 4 | 2 | Normal |
| 1-3 | Pit Mamel | 11 | 5 | 8 | 5 | Normal |
| 1-3 | Chintala | 15 | 9 | 4 | 12 | Beast |
| 1-4 | Shagga | 18 | 6 | 4 | 12 | Dragon |
| 1-4 | Hat Urchin | 16 | 5 | 3 | 10 | Cyclops |
| 3-6 | Nigiri Baby | 17 | 8 | 2 | 11 | Normal |
4-6F
Nigiri Baby (3-6F) appears, so have one turn cursed or unneeded items into Large Onigiri.
However, there's no need to increase max fullness unless you're aiming to activate Sumo status.
It's best to stick to 3-4F when performing Nigiri Morph Factory to avoid Mid Chintala (5-8F),
and don't push things too much if you haven't found a decent shield.
Mid Chintala is formidable when first encountered on 5F, so don't hesitate to use items.
Aim to have several items on hand that can be reliably used when you're in danger by the end of 6F,
because even more powerful monsters like Nashagga (7-14F) begin appearing from 7F onwards.
If you didn't hunt a Cave Mamel or perform Nigiri Morph Factory, 6F is basically the last "safe" floor.
Monster Stats (4-6F)
| Floor | Monster | HP | Atk | Def | Exp | Type |
|---|---|---|---|---|---|---|
| 1-4 | Shagga | 18 | 6 | 4 | 12 | Dragon |
| 1-4 | Hat Urchin | 16 | 5 | 3 | 10 | Cyclops |
| 3-6 | Nigiri Baby | 17 | 8 | 2 | 11 | Normal |
| 4-6 | Hoppin' Batter | 20 | 7 | 3 | 9 | Normal |
| 4-8 | Armordillo | 20 | 11 | 15 | 15 | Beast |
| 5-8 | Mid Chintala | 45 | 23 | 10 | 27 | Beast |
7-9F
Nashagga (7-14F) attacks 2 times per turn, so item usage is nearly mandatory even with Sumo status.
Unlucky Staff, Sealing Staff, and Water Gun Pot are extremely effective at weakening Nashagga.
The monster table for 7F only has 4 enemies, so Nashagga is particularly common on that floor.
Gazer (8-20F) has a high spawn rate, and hypnotizes you and makes you waste items and turns.
It only has 30 HP so Sumo status or Cyclops Bane can be enough to one-shot it depending on level,
but if you don't have either of those, chip away at its HP using items before it's adjacent.
It's tempting to throw an Eradication Scroll at it, but Dragon (15-20F) might be a better choice.
If you lack a Gazer Shield, it's best to discard incense category items around this point.
Thiefwalrus (8-11F) might end up as an annoying enemy that steals items instead of being farmable.
It's rather risky to attempt to explore a floor in an effort to reclaim a stolen item after it warps away,
so consider shooting a projectile at a wall or placing an unneeded item on the ground as bait.
Monster Stats (7-9F)
| Floor | Monster | HP | Atk | Def | Exp | Type |
|---|---|---|---|---|---|---|
| 4-8 | Armordillo | 20 | 11 | 15 | 15 | Beast |
| 5-8 | Mid Chintala | 45 | 23 | 10 | 27 | Beast |
| 7-9 | Polygon Spinna | 33 | 16 | 17 | 28 | Draining |
| 7-14 | Nashagga | 70 | 21 | 20 | 60 | Dragon |
| 8-11 | Thiefwalrus | 65 | 25 | 23 | 75 | Aquatic |
| 8-20 | Gazer | 30 | 18 | 14 | 40 | Cyclops |
10-14F
An average run where a player identifies 50 items usually results in a clear around this point.
More power types like Brodillo (10-14F), Fierous (10-16F), and Metalhead (10-18F) appear.
Brodillo is especially tough with its 36 attack power and 38 defense - don't hesitate to use items.
You might be tempted to hunt them for 450 exp each, but you'll likely struggle even with Sumo status.
Other monsters besides Brodillo and Nashagga have about 60~70 HP and 24~30 attack.
Appraiser's Bracelet can be found starting from 13F, so generate extra items if possible.
This can mainly be accomplished by using items like Monstercall Scroll or Transmutation Pot.
Collection Scroll, Mapping Scroll, and Wallpass Bracelet also make it easier to claim items.
Remember to keep an Identifier Scroll or Identifier Pot on hand to identify the bracelet.
Monster Stats (10-14F)
| Floor | Monster | HP | Atk | Def | Exp | Type |
|---|---|---|---|---|---|---|
| 7-14 | Nashagga | 70 | 21 | 20 | 60 | Dragon |
| 8-11 | Thiefwalrus | 65 | 25 | 23 | 75 | Aquatic |
| 8-20 | Gazer | 30 | 18 | 14 | 40 | Cyclops |
| 10-14 | Brodillo | 70 | 36 | 38 | 450 | Beast |
| 10-14 | Lt. Spearfish | 60 | 24 | 17 | 55 | Aquatic |
| 10-14 | Tiger Thrower | 68 | 26 | 22 | 77 | Beast |
| 10-16 | Fierous | 60 | 25 | 22 | 55 | Normal |
| 10-18 | Metalhead | 66 | 30 | 19 | 61 | Cyclops |
| 13-20 | Curse Girl | 65 | 28 | 28 | 180 | Normal |
15-20F
Dragon (15-20F) usually takes 5~7 turns to slay with weak gear, so don't just trade hits with it.
Throw an Eradication Scroll at Dragon if you have one, even if you already threw one at Gazer earlier.
Otherwise, a Wallpass Bracelet or Sumo status + Dragon Shield provides a big advantage during combat.
Paralyzing Staff or Narrow-escape Staff (wave at a weak foe like Gazer first) can be used to avoid fights.
Of course, feel free to explore if you lucked out and found both Dragonkiller + Dragon Shield.
Polygon Shaka (15-20F) warps in front of you when inside a room, and lowers Fullness by 5.
Nigiri Morph (15-20F) has high attack power and turns inventory items into Large Onigiri without fail.
Possible counters include activating Sumo status, or throwing an onigiri category item to one-shot it.
N'dulu (17-20F) disguises itself as an item and doesn't reveal itself until you use it or change floors.
Unlucky Staff can be used to instantly and significantly weaken any of these 3 monsters.
Greenwalrus (16-20F) often ends up as an annoying enemy that steals items instead of being farmable.
It's rather risky to attempt to explore a floor in an effort to reclaim a stolen item after it warps away,
so consider shooting a projectile at a wall or placing an unneeded item on the ground as bait.
Monster Stats (15-20F)
| Floor | Monster | HP | Atk | Def | Exp | Type |
|---|---|---|---|---|---|---|
| 8-20 | Gazer | 30 | 18 | 14 | 40 | Cyclops |
| 10-16 | Fierous | 60 | 25 | 22 | 55 | Normal |
| 10-18 | Metalhead | 66 | 30 | 19 | 61 | Cyclops |
| 13-20 | Curse Girl | 65 | 28 | 28 | 180 | Normal |
| 15-20 | Dragon | 120 | 45 | 40 | 1000 | Dragon |
| 15-20 | Explochin | 120 | 25 | 22 | 55 | Exploding/Cyclops/Aquatic |
| 15-20 | Nigiri Morph | 88 | 35 | 30 | 255 | Normal |
| 15-20 | Bored Kappa | 50 | 18 | 11 | 48 | Aquatic |
| 15-20 | Polygon Shaka | 70 | 34 | 33 | 360 | Draining |
| 16-20 | Master Hen | 70 | 33 | 21 | 400 | Beast |
| 16-20 | Greenwalrus | 88 | 30 | 27 | 240 | Aquatic |
| 17-20 | N'dulu | 70 | 40 | 31 | 230 | Metal |
Sacred Tree Extension
General Advice
Simply clearing the extension isn't difficult, as you can just identify 50 items like the first clear.
However, advancing all the way to 50F and returning with an Appraiser's Bracelet is a different story.
Wallpass, Clairvoyant, and Rousing bracelets are particularly helpful in the extension.
Appraiser's Bracelet (50F)
Appraiser's Bracelet has an incredibly high chance of being generated on 50F in the extension.
(The chance is assumed to be 100%, but it hasn't actually been datamined at the time of this writing)
In any case, it's a reliable way to obtain said bracelet without resorting to Parallel Play shenanigans,
but there are 2 things you must be aware of when attempting to take this bracelet home as a reward:
- Auto-identification does not occur when you descend the stairs on 50F.
- Vexing Kappa (40-50F) can destroy the Appraiser's Bracelet by throwing it at the player.
Therefore, it's highly recommended to read a Collection Scroll at the start of the floor on 50F,
and save an Identifier Scroll or Identifier Pot to be used exclusively on the Appraiser's Bracelet.
If you're reading an Identifier Scroll, place all other unidentified items down before reading it.
 Kokatsu Shiren
Consider challenging this dungeon as Kokatsu Shiren for an overall easier run.
Kokatsu Shiren doesn't rely on equipment, and can create Special Onigiri for Knowledgeable status.
The only real downside of this character is that it's time consuming to farm via Sun's Blessing,
and you won't be able to equip Monster-find Bracelet or Clairvoyant Bracelet.
Meaner Monster Table
The monster table of the extension is generally harsher than Training Path of Inference.
Super Gazer and Pesky Kappa appear until 39F instead of exiting the monster table after 29F.
Nigiri Boss and Dragon overlap until 39F instead of Dragon exiting the monster table after 34F.
and Cursister who targets weapons and shields appears until 39F instead of Curse Girl until 35F,
making it harder to swap to secondary equipment when playing as Normal Shiren or Asuka.
Nigiri Boss exits the table after 39F which might sound like an adjustment that makes things easier,
but Soul Reapers will gladly rush you down while you're helplessly asleep thanks to Sleep Radish.
It's also risky to attempt to check for incoming enemies in dark hallways by throwing items,
since both Hoppin' Slugger (40-50F) and Vexing Kappa (40-50F) are around.
Think Before Identifying Items
The identification limit of 50 items means you'll want to prioritize identifying useful items.
If you instead simply identify everything, you'll quickly hit 49 ID'd items before reaching 50F,
and will likely be unable to utilize some of the better unidentified items you find later on.
It's also risky to carry an Identifier Pot, since Bored Kappa monsters can throw items into it.
Dark Hallways (1-50F)
All floors in this dungeon, including the extended floors, have dark hallways.
Kokatsu and Tatsumi Shiren have a slight disadvantage compared to Normal Shiren or Asuka,
since neither of the alternate Shirens can equip Monster-find Bracelet or Clairvoyant Bracelet.
Thrown Eradication Scrolls (21-50F)
Eradication Scroll can be found, and Pesky Kappa (21-39F) and Vexing Kappa (40-50F) appear.
This means there's a small chance you'll get hit by a thrown Eradication Scroll if you're unlucky,
resulting in the player character instantly collapsing - it's game over without Revival Grass.
Kokatsu Shiren and Tatsumi Shiren can create their own Revival Grass as a counter.
1-20F
This floor range is similar to the first clear, but you'll want to be more conservative with items.
Hunt Cave Mamels to level up on 1-3F, and increase Max Fullness via Nigiri Morph Factory on 3-6F.
Aim to get strong enough to take on Dragon (15-20F) without consuming lots of items each encounter.
Identify unidentified items you find on the ground by utilizing the Inference Mechanic when possible.
You can only identify 50 items total before you're forced to exit the dungeon, so be selective.
Unidentified Item Tips
- Shops are rare, but they can be used to rule out possibilities based on an item's price.
- If an unidentified item doesn't seem very useful, place it down instead of identifying it.
- This prevents needlessly incrementing the ID'd items count.
- Check the list of possibilities to get an idea whether or not the item is useful.
- Assign a name like "x" before discarding the unidentified item if you deem the item is bad.
- Swing a staff to check its effect, assign a name to it, then insert it into a Preservation Pot.
- This lets you continue to use the staff while avoiding incrementing the ID'd items count.
- Thin out your unidentified items before advancing in hopes of auto-ID'ing a bracelet or pot.
- Bracelets and pots are often harder to identify than other categories.
- Storage pots = Preservation, Ordinary, Exorcism, Synthesis, Upgrading, Degrading, Walrus.
Kokatsu Shiren & Tatsumi Shiren Tips
Prioritize identifying grasses that can be obtained using Sun's Blessing / Rain's Blessing.
However, if a grass isn't useful, assign a name like "x" and recycle it instead of identifying it.
Monster Stats (1-20F)
| Floor | Monster | HP | Atk | Def | Exp | Type |
|---|---|---|---|---|---|---|
| 1-3 | Mamel | 8 | 3 | 4 | 2 | Normal |
| 1-3 | Pit Mamel | 11 | 5 | 8 | 5 | Normal |
| 1-3 | Chintala | 15 | 9 | 4 | 12 | Beast |
| 1-4 | Shagga | 18 | 6 | 4 | 12 | Dragon |
| 1-4 | Hat Urchin | 16 | 5 | 3 | 10 | Cyclops |
| 3-6 | Nigiri Baby | 17 | 8 | 2 | 11 | Normal |
| 4-6 | Hoppin' Batter | 20 | 7 | 3 | 9 | Normal |
| 4-8 | Armordillo | 20 | 11 | 15 | 15 | Beast |
| 5-8 | Mid Chintala | 45 | 23 | 10 | 27 | Beast |
| 7-9 | Polygon Spinna | 33 | 16 | 17 | 28 | Draining |
| 7-14 | Nashagga | 70 | 21 | 20 | 60 | Dragon |
| 8-11 | Thiefwalrus | 65 | 25 | 23 | 75 | Aquatic |
| 8-20 | Gazer | 30 | 18 | 14 | 40 | Cyclops |
| 10-14 | Brodillo | 70 | 36 | 38 | 450 | Beast |
| 10-14 | Lt. Spearfish | 60 | 24 | 17 | 55 | Aquatic |
| 10-14 | Tiger Thrower | 68 | 26 | 22 | 77 | Beast |
| 10-16 | Fierous | 60 | 25 | 22 | 55 | Normal |
| 10-18 | Metalhead | 66 | 30 | 19 | 61 | Cyclops |
| 13-20 | Curse Girl | 65 | 28 | 28 | 180 | Normal |
| 15-20 | Explochin | 120 | 25 | 22 | 55 | Exploding/Cyclops/Aquatic |
| 15-20 | Nigiri Morph | 88 | 35 | 30 | 255 | Normal |
| 15-20 | Bored Kappa | 50 | 18 | 11 | 48 | Aquatic |
| 15-20 | Polygon Shaka | 70 | 34 | 33 | 360 | Draining |
| 15-39 | Dragon | 120 | 45 | 40 | 1000 | Dragon |
| 16-20 | Master Hen | 70 | 33 | 21 | 400 | Beast |
| 16-20 | Greenwalrus | 88 | 30 | 27 | 240 | Aquatic |
| 17-20 | N'dulu | 70 | 40 | 31 | 230 | Metal |
21-39F
Dragon, Cursister, Nigiri Boss, Super Gazer, and Pesky Kappa are the only monsters on 21-39F.
They're all tricky in different ways, so consider rushing to the stairs from this point onward.
- Super Gazer
- Hypnosis can force you to use valuable items, or insert main gear into incenses or pots.
- Avoid its special attack using Gazer Shield, Reflective Incense, projectiles, staves, etc.
- Nigiri Boss
- High stats, inflicts Onigiri status (can't use items, negates equipped items for 10 turns).
- Use an item to stop it from acting when adjacent, or just throw an Eradication Scroll at it.
- Fire or explosion damage instantly makes you collapse if you have Onigiri status.
- Pesky Kappa
- Stands on an item → throws it at you when you approach within a 5 tile radius.
- Pesky Kappa can potentially throw an Eradication Scroll at you (instant collapse).
- Evasive Incense counters it, and don't leave bad items in rooms you might have to revisit.
- Dragon
- Dragon's flame instantly makes you collapse if you have Onigiri status when hit.
- 100% special attack usage rate when lined up at a distance, or through hallway corners.
- Don't let your guard down even if you have Dragonkiller + Dragon Shield.
- Cursister
- Curses your equipped weapon or shield, hindering the use of secondary equipment.
- Cursebreak Bracelet counters it, and having synthesized gear makes it less threatening.
Monster Stats (21-39F)
| Floor | Monster | HP | Atk | Def | Exp | Type |
|---|---|---|---|---|---|---|
| 15-39 | Dragon | 120 | 45 | 40 | 1000 | Dragon |
| 21-39 | Cursister | 115 | 38 | 38 | 380 | Normal |
| 21-39 | Nigiri Boss | 133 | 45 | 42 | 555 | Normal |
| 21-39 | Super Gazer | 66 | 30 | 26 | 222 | Cyclops |
| 21-39 | Pesky Kappa | 75 | 29 | 22 | 330 | Aquatic |
40-50F
The monster table is refreshed, and remains static for the remainder of the dungeon (40-50F).
Vexing Kappa, Sleep Radish, and Soul Reaper can still attack you even if you're inside a wall tile.
Evasive Incense is a massive help against Sleep Radish and Vexing Kappa.
Sleep Radish throws Sedating Grass → Poison Grass within a 3 tile radius, making it very deadly.
Soul Reaper has Swift 2 speed, can wall-clip, and detects you from anywhere on the floor.
Vexing Kappa's item throwing range is a 10 tile radius, so it can throw items from off-screen.
Sky Dragon can spew a 20 damage flame when you're in the same room (Nigiri Boss is gone).
Fleefrog has 60 attack power and can pull you from 10 tiles away and strike on the same turn.
Hoppin' Slugger nullifies or reflects magic bullets and thrown items.
Appraiser's Bracelet (50F) Tips
Sort your items on 49F so that Collection and Identifier scrolls can be used right away on 50F.
Once you descend the stairs on 49F and arrive on 50F, immediately read a Collection Scroll,
then quickly and carefully identify the Appraiser's Bracelet by reading an Identifier Scroll.
It goes without saying, but place all other unidentified items down before reading the scroll,
or else you risk a lucky roll of Identifier Scroll causing you to not take home the bracelet.
If you attract 2 or more unidentified bracelets that list Appraiser's Bracelet as a possibility,
maybe create Parallel Play data and test the bracelets before committing in your real adventure.
(Yes, it's technically cheating, but do you really want to risk having to make a 2nd trip?)
Monster Stats (40-50F)
| Floor | Monster | HP | Atk | Def | Exp | Type |
|---|---|---|---|---|---|---|
| 40-50 | Fleefrog | 125 | 60 | 45 | 900 | Aquatic |
| 40-50 | Sky Dragon | 140 | 55 | 50 | 1600 | Dragon |
| 40-50 | Soul Reaper | 75 | 40 | 40 | 555 | Ghost/Floating |
| 40-50 | Sleep Radish | 135 | 47 | 38 | 900 | Ghost |
| 40-50 | Vexing Kappa | 175 | 49 | 33 | 960 | Aquatic |
| 40-50 | Hoppin' Slugger | 72 | 39 | 31 | 400 | Normal |
Monsters
See Monsters for individual monster details.
- F - Dark hallways
- S - Shop is possible
- M - Monster House is possible
Monster Colors = Farming, Useful, Lowers Stats, Targets Items, Dangerous
Items
※ This section is currently incomplete.
Item Table Key
| ID | Explanation |
|---|---|
| F | Floor |
| S | Shop |
| P | Peddler |
| M | Monster drop |
| B | Buried |
| H | Thiefwalrus |
| I | Island |
| T | Transmutation Pot |
| U | Surprise Pot |
| W | Tunnel of Wishes |
 Weapon
| Weapon | ||||||||||
|---|---|---|---|---|---|---|---|---|---|---|
| Name | F | S | P | M | B | H | I | T | U | W |
| Wooden Sword | X | X | ||||||||
| Bronze Sword | X | |||||||||
| Katana | X | |||||||||
| Doutanuki | X | |||||||||
| Manji Kabura | X | |||||||||
| Kajin Fuuma | ||||||||||
| Kabura Sutegi | ||||||||||
| Golden Sword | X | X | ||||||||
| Kama Itachi | X | |||||||||
| Axe of the Minotaur | ||||||||||
| Accurate Sword | ||||||||||
| Swift Sword | ||||||||||
| Watersplitter | ||||||||||
| Primal Axe | X | |||||||||
| Dragonkiller | ||||||||||
| Crescent Blade | ||||||||||
| Sky Sword | ||||||||||
| Sickle of Salvation | ||||||||||
| Drain Slayer | ||||||||||
| Cyclops Bane | ||||||||||
| Steel Severer | ||||||||||
| Whopping Harisen | ||||||||||
| Healing Sword | ||||||||||
| Peach Club | ||||||||||
| Spender's Club | ||||||||||
| Ferrous Greatsword | ||||||||||
| Steak Knife | ||||||||||
| Jagged Sword | ||||||||||
| Quad-edge | ||||||||||
| Auspicious Kumade | ||||||||||
| Pickaxe | ||||||||||
| Golden Pickaxe | ||||||||||
| Wooden Mallet | ||||||||||
| Epic Hammer | ||||||||||
| Trapseeker | ||||||||||
| Bonito Block | ||||||||||
| Yamanba's Cleaver | ||||||||||
| Break-Off Blade | ||||||||||
 Shield
| Shield | ||||||||||
|---|---|---|---|---|---|---|---|---|---|---|
| Name | F | S | P | M | B | H | I | T | U | W |
| Wooden Shield | X | |||||||||
| Bronze Shield | X | |||||||||
| Iron Shield | X | |||||||||
| Wolfshead | X | X | ||||||||
| Fuuma Shield | ||||||||||
| Rasen Fuuma | ||||||||||
| Golden Shield | X | |||||||||
| Counter Shield | X | X | ||||||||
| Watchful Shield | X | X | ||||||||
| Dragon Shield | X | |||||||||
| Blast Shield | X | X | ||||||||
| Targe of the Minotaur | ||||||||||
| Walrus Stopper | X | |||||||||
| Froggo Stopper | ||||||||||
| Hat Stopper | ||||||||||
| Nigiri Stopper | ||||||||||
| Spearscale Shield | X | |||||||||
| Kappa's Dish | X | |||||||||
| Gazer Shield | ||||||||||
| Shield of Negation | ||||||||||
| Unmoving Wall | ||||||||||
| Zabuton | ||||||||||
| Spender's Shield | ||||||||||
| Ferrous Kite | ||||||||||
| Steak Plate | ||||||||||
| Gutsy Shield | ||||||||||
| Hunky-dory Shield | ||||||||||
| Bodhi Shield | ||||||||||
| Shield of Sating | X | |||||||||
| Auspicious Omamori | ||||||||||
| Shield of Presage | ||||||||||
| Yamanba's Potlid | ||||||||||
| Break-Off Shield | ||||||||||
 Bracelet
| Bracelet | ||||||||||
|---|---|---|---|---|---|---|---|---|---|---|
| Name | F | S | P | M | B | H | I | T | U | W |
| Healing Bracelet | X | |||||||||
| Strength Bracelet | X | |||||||||
| Bellyexpand Bracelet | X | |||||||||
| Bellyshrink Bracelet | ||||||||||
| Fortune Bracelet | ||||||||||
| Cleansing Bracelet | ||||||||||
| Focusing Bracelet | ||||||||||
| Rousing Bracelet | X | |||||||||
| Rustproof Bracelet | X | |||||||||
| Cursebreak Bracelet | X | |||||||||
| Affixing Bracelet | X | |||||||||
| Far-throwing Bracelet | X | |||||||||
| Bad-aim Bracelet | ||||||||||
| Sure-aim Bracelet | ||||||||||
| Bouncy Bracelet | X | |||||||||
| Rapid-fire Bracelet | X | |||||||||
| Daredevil Bracelet | X | |||||||||
| Dreaded Bracelet | X | |||||||||
| Leaping Bracelet | X | |||||||||
| Blasting Bracelet | ||||||||||
| Clairvoyant Bracelet | ||||||||||
| Monster-find Bracelet | ||||||||||
| Item-find Bracelet | X | |||||||||
| Passage-find Bracelet | X | |||||||||
| Waterwalk Bracelet | X | |||||||||
| Floating Bracelet | ||||||||||
| Wallpass Bracelet | ||||||||||
| Tiptoe Bracelet | X | |||||||||
| Passerby Bracelet | ||||||||||
| Item-losing Bracelet | ||||||||||
| Gitan-losing Bracelet | X | |||||||||
| Monstercall Bracelet | X | |||||||||
| Trapmore Bracelet | X | |||||||||
| Haggling Bracelet | ||||||||||
| Trapper's Bracelet | ||||||||||
| Appraiser's Bracelet | X | |||||||||
| Cannonboost Bracelet | ||||||||||

 Projectile
| Projectile | ||||||||||
|---|---|---|---|---|---|---|---|---|---|---|
| Name | F | S | P | M | B | H | I | T | U | W |
| Wooden Arrow | X | |||||||||
| Iron Arrow | ||||||||||
| Silver Arrow | X | X | ||||||||
| Poison Arrow | ||||||||||
| Truestrike Arrow | X | |||||||||
| Rock | ||||||||||
| Porky's Rock | X | X | ||||||||
 Food
Food
| Food | ||||||||||
|---|---|---|---|---|---|---|---|---|---|---|
| Name | F | S | P | M | B | H | I | T | U | W |
| Onigiri | X | X | X | |||||||
| Large Onigiri | X | X | ||||||||
| Huge Onigiri | X | |||||||||
| Rotten Onigiri | X | |||||||||
| Grilled Onigiri | ||||||||||
| Special Onigiri | ||||||||||
| Sumo Onigiri | ||||||||||
| Sweet Potato | ||||||||||
| Yakitori | ||||||||||
| Rotten Peach Bun | ||||||||||
 Grass
Grass
| Grass | ||||||||||
|---|---|---|---|---|---|---|---|---|---|---|
| Name | F | S | P | M | B | H | I | T | U | W |
| Weeds | ||||||||||
| Herb | X | |||||||||
| Otogirisou | X | X | X | |||||||
| Healing Grass | X | |||||||||
| Life Grass | X | X | ||||||||
| Fragrant Grass | X | |||||||||
| Revival Grass | ||||||||||
| Bellyexpand Seed | X | X | ||||||||
| Bellyshrink Seed | ||||||||||
| Dragon Grass | X | X | ||||||||
| Leaping Grass | X | X | X | |||||||
| Antidote Grass | X | |||||||||
| Strength Grass | X | |||||||||
| Poison Grass | X | |||||||||
| Confusion Grass | X | X | ||||||||
| Sedating Grass | ||||||||||
| Berserk Seed | X | X | ||||||||
| Blinding Grass | X | |||||||||
| Seewell Grass | X | X | ||||||||
| Swift Grass | X | |||||||||
| Power-up Grass | X | |||||||||
| Invincible Grass | X | X | ||||||||
| Fortune Grass | X | |||||||||
| Angel Seed | X | X | ||||||||
| Feeble Grass | X | |||||||||
| Unlucky Seed | X | |||||||||
| Ill-fated Seed | ||||||||||
 Scroll
| Scroll | ||||||||||
|---|---|---|---|---|---|---|---|---|---|---|
| Name | F | S | P | M | B | H | I | T | U | W |
| Confusion Scroll | X | |||||||||
| Slumber Scroll | X | X | ||||||||
| Jitters Scroll | X | X | ||||||||
| Windblade Scroll | X | |||||||||
| Expulsion Scroll | ||||||||||
| Exorcism Scroll | X | |||||||||
| Identifier Scroll | X | X | ||||||||
| Heavenly Scroll | X | X | ||||||||
| Earthly Scroll | X | |||||||||
| Plating Scroll | X | |||||||||
| Slot-adding Scroll | ||||||||||
| Rune-eraser Scroll | X | |||||||||
| Silver-seal Scroll | X | |||||||||
| Silverpurge Scroll | ||||||||||
| Pot-upsize Scroll | X | |||||||||
| Extraction Scroll | X | |||||||||
| Onigiri Scroll | X | X | ||||||||
| Curse Scroll | X | |||||||||
| Mapping Scroll | X | |||||||||
| Map-loss Scroll | X | |||||||||
| Trap-eraser Scroll | X | |||||||||
| Trap Scroll | ||||||||||
| Water-drain Scroll | X | |||||||||
| Monstercall Scroll | X | |||||||||
| Wall-less Scroll | ||||||||||
| Gathering Scroll | X | X | ||||||||
| Collection Scroll | X | |||||||||
| Gambler's Scroll | X | |||||||||
| Muzzle Scroll | X | |||||||||
| Carry-ban Scroll | X | |||||||||
| Swift Foe Scroll | X | |||||||||
| Fixer Scroll | X | |||||||||
| Escape Scroll | ||||||||||
| Eradication Scroll | X | |||||||||
| Sanctuary Scroll | X | |||||||||
| Blank Scroll | ||||||||||
| Wet Scroll | ||||||||||
 Staff
Staff
| Staff | ||||||||||
|---|---|---|---|---|---|---|---|---|---|---|
| Name | F | S | P | M | B | H | I | T | U | W |
| Ordinary Staff | X | X | ||||||||
| Paralyzing Staff | X | |||||||||
| Sealing Staff | X | |||||||||
| Disguising Staff | X | |||||||||
| Empathetic Staff | X | X | ||||||||
| Narrow-escape Staff | X | |||||||||
| Knockback Staff | X | X | ||||||||
| Switching Staff | X | |||||||||
| Vaulting Staff | X | |||||||||
| Skull Mage's Staff | ||||||||||
| Thunderbolt Staff | X | X | ||||||||
| Burrowing Staff | X | |||||||||
| Earthmound Staff | X | |||||||||
| Balance Staff | X | |||||||||
| Guiding Staff | X | |||||||||
| Swift Staff | X | |||||||||
| Sluggish Staff | X | |||||||||
| Fortune Staff | X | |||||||||
| Unlucky Staff | X | |||||||||
| Peach Staff | ||||||||||
 Pot
Pot
| Pot | ||||||||||
|---|---|---|---|---|---|---|---|---|---|---|
| Name | F | S | P | M | B | H | I | T | U | W |
| Preservation Pot | X | |||||||||
| Identifier Pot | X | |||||||||
| Transmutation Pot | X | |||||||||
| Cashing Pot | ||||||||||
| Synthesis Pot | X | |||||||||
| Exorcism Pot | X | |||||||||
| Curse Pot | X | |||||||||
| Upgrading Pot | X | X | ||||||||
| Degrading Pot | X | |||||||||
| Bottomless Pot | ||||||||||
| Warehouse Pot | ||||||||||
| Handtrapper Pot | X | X | ||||||||
| Unbreakable Pot | X | X | ||||||||
| Ordinary Pot | ||||||||||
| Hiding Pot | X | |||||||||
| Rejuvenation Pot | X | |||||||||
| Walrus Pot | X | |||||||||
| Water Gun Pot | X | |||||||||
| Hilarious Pot | ||||||||||
| Monster Pot | X | |||||||||
| Surprise Pot | ||||||||||
 Incense
| Incense | ||||||||||
|---|---|---|---|---|---|---|---|---|---|---|
| Name | F | S | P | M | B | H | I | T | U | W |
| Heat-ban Incense | X | |||||||||
| Evasive Incense | X | X | ||||||||
| Cautious Incense | X | |||||||||
| Reflective Incense | X | |||||||||
| Aggressive Incense | X | X | ||||||||
| Defensive Incense | X | |||||||||
| Blurry Incense | X | |||||||||
| Weighted Incense | X | |||||||||
| Unwanting Incense | X | X | ||||||||
