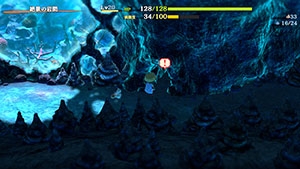
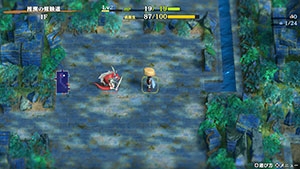
Training Path of Inference
Overview
| Unlock | Clear Serpentcoil Island → Talk to the monk in Shukuba Beach → Go to Rocky Viewpoint. |
|---|---|
| Entrance | Rocky Viewpoint (Cave to the right) |
| Floors | 20F / 50F (Sacred Tree) | ||
|---|---|---|---|
| Bring Items | No | Stairs | Descending |
| Companions | No | Roamers | |
| Rescues | 3 | Starting Level | Lv1 |
| Starting Item | Large Onigiri | ||
| Unidentified | All categories | ||
| Shops | Yes | Monster Houses | |
| Behemoths | No | Wishing Shrines | No |
| Kron's Challenge | No | Fever Time | No |
| Initial Enemies | 5 | Spawn Rate | 30 Turns |
| Wind (1st Gust) | 900 Turns | Reward | Gutsy Shield |
Postgame dungeon that utilizes a new inference mechanic introduced in Shiren 6.
This inference mechanic automatically narrows down unidentified items to 3 possibilities.
It's a nice dungeon to practice identification, but the monster table is on the tougher side,
so don't expect to be able to breeze through it without making smart use of items.
Navigation
Strategy
General Advice (First Clear)
Training Path of Inference (20F) is a tricky dungeon, despite being an early unlock in postgame.
It features a new inference mechanic, and the number of items per floor is overall on the high side.
However, cursed items are also very common, so a decent amount of items won't actually be usable.
Get into the habit of testing newly found staves, pots, and incenses 1 time to check for curses.
Shops are rare, but they can be used to identify items by price if you happen to find one.
It's rare to find strong gear or high value Gitan bags, and stronger foes appear early on.
Rotting and Monsterizing traps are common, while Removal and arrow traps are never generated.
Mixer family monsters aren't in the monster table, so don't expect to be able to synthesize gear.
Therefore, some players say this dungeon is actually harder than the first clear of Kiki Island.
It's important to utilize inference and save good items instead of just using all items right away.
Try to envision situations where you might use each unidentified item, like:
- If Revival Grass is a possibility, don't use or throw the grass.
- If a scroll is narrowed down to Confusion or Slumber, save it for a tricky starting room.
- If a grass is narrowed down to Otogirisou or Dragon Grass, save it for a 1 vs 1 situation.
Nigiri Baby (3-6F) can be used to increase Max Fullness to 150+ for Sumo status if desired.
Sumo status reduces accidents, but keep in mind you can't use Vaulting Staff or Switching Staff,
and some enemies later on are arguably too tough to trade hits with regardless.
 Inference Mechanic
New gameplay mechanic introduced in Shiren 6 that is enabled only in certain dungeons.
Check an unidentified item's description to view 3 possibilities as to what the item could be,
then choose how to best use the item based on the list of possibilities.
Example:
| Item Name |
|---|
| Herb |
| Dragon Grass |
| Sedating Grass |
So in this case, you wouldn't want to risk using it when an enemy is adjacent due to Sedating Grass.
Both Sedating Grass and Dragon Grass are good when thrown, and throwing an Herb is harmless
if the target is already at full HP, so you might want to lean towards throwing this grass item.
Unfortunately, item names assigned by the player are not reflected in the list of possibilities.
If a possibility has already been fully identified, the possibility will be greyed-out.
General Advice (Sacred Tree Extension)
A number of factors make this 50F Sacred Tree Mode extension one of the harder ones in the game:
- Base value of weapons and shields is on the low side in this dungeon.
- The bronze or dragon set is about the best you can hope for in terms of base value.
- Mixer family monsters don't appear at all, so it's difficult to upgrade equipment.
- Upgrading Pot and Synthesis Pot can be found, but they're quite rare.
- It's both time-consuming and resource-draining to fight many of the tougher monsters.
- Super Gazer (20-29F) often forces the player to waste valuable items.
- Hat Brat (30-39F) steals and tosses away staff, grass, and food category items.
- Hoppin' Slugger (30-50F) is immune to projectiles and staff magic.
- Nigiri Boss (20-50F) overlaps with Dragon (20-34F) and Sky Dragon (40-50F),
creating the possibility of the player instantly collapsing as a Grilled Onigiri.
- Hallways are visible, but it can be tricky to stay stocked up on items thanks to certain foes.
- Greenwalrus (16-39F) steals an item found on the ground, then warps and runs away.
- Pesky Kappa (20-29F) and Vexing Kappa (35-50F) destroy items on the ground.
- The dreadful Sleep Radish appears near the end, and it isn't exactly rare.
- Sleep Radish (40-50F) throws Sedating Grass → Poison Grass within a 3 tile radius.
- It has 47 attack power, so expect to receive significant damage even on its own.
All said, Kokatsu Shiren and Tatsumi Shiren have quite an advantage over Normal Shiren or Asuka,
since they both have the ability to transform unneeded items into more useful items on demand.
It might be best to adopt a fast, evasive playstyle if you're intent on playing as Normal Shiren.
Important Items (First Clear)

 Weapon & Shield
High Base Value Items
Bronze Sword and Wooden Shield are common, but Bronze Shield and Wooden Sword are rare,
making it rather difficult to activate a resonance effect that increases attack power and defense.
If you don't find the 2nd item in a resonance set, just use the highest base value items you find.
Watchful Shield, Counter Shield
Low base value, but the innate rune on either shield gets immediate results.
It's safe to say that these should be prioritized before Wooden Shield, at least.
Cyclops Bane, Gazer Shield
Nice to equip against Gazer (8-20F) and Super Gazer (20F).
Dragonkiller, Dragon Shield
Higher base value, and effective against Nashagga (7-13F) and Dragon (20F).
Kama Itachi
Low base value, but hallways are visible so you can get 2 hits in around corners.
Shield of Sating
Makes it easier to maintain Sumo status, which is great for mid~late game floors.
Low base value, so it's best to swap to a stronger shield before fighting.
 Bracelets
Monster-find Bracelet, Item-find Bracelet
Monster-find Bracelet lets you avoid encounters, allowing for more time to regenerate HP.
Item-find Bracelet is useful for planning a more efficient route at the start of a new floor.
Bellyexpand Bracelet
Raises Max Fullness by 25 while equipped, which is nice for extending the duration of Sumo status.
 Projectiles
Porky's Rock
Great for chipping away at an incoming enemy's HP, but the Fierous family is immune to rocks.
Can also be used as fodder for Nigiri Baby (3-6F) to transform into Large Onigiri.
 Scrolls & Pots
Identifier Scroll, Identifier Pot
Blessed Identifier Scrolls always identify all inventory items when you select an unidentified item.
Useful when an unidentified item's possibilities is on the tricky side to narrow down without help.
Can also be used to check for curses on very important items like Revival Grass.
Exorcism Scroll, Exorcism Pot
Blessed Exorcism Scrolls always lift curses from all inventory items when you select a cursed item.
Cursed items are common and Removal Trap doesn't appear, so items that lift curses are handy here.
Unlike some of the older games in this series, Exorcism Scroll can be found cursed in Shiren 6.
Water Gun Pot
Can be used to significantly lower Nashagga (7-13F)'s attack power or one-shot Fierous (10-20F).
Seriosuly, don't just throw this pot at a wall whenever you come across it!

 Staves & Incenses
Paralyzing Staff, Narrow-escape Staff, Unlucky Staff, Sealing Staff, Sluggish Staff
Staves that excel at disabling a single target - especially nice against stronger monsters near the end.
Unlucky Staff targets: Nashagga (7-13F), Brodillo (10-20F), Polygon Shaka (15-20F), Nigiri Morph (15-20F).
Keep in mind that slowed monsters can be used to stall out pursuing enemies in a hallway, too.
Blurry Incense
Pair it with Monster-find Bracelet to safely ignore monsters in a room.
Also plays well with Guiding Staff, if you're lucky enough to find both items.


 Farming Related
Fortune Grass, Angel Seed, Disguising Staff, Blinding Grass, Berserk Seed, Jitters Scroll
Some of the items that can be utilized to level up a Mamel (1-3F) or Pit Mamel (1-3F) into a Cave Mamel.
Other options include Confusion Grass, Confusion Scroll, and Rotten Onigiri, but they're less reliable.
Sluggish Staff, Knockback Staff, Burrowing Staff, Thunderbolt Staff, Rock, Rotten Onigiri, Gitan
Some of the items that can be used to safely defeat a Cave Mamel for 2,000 experience points.
Remember that Rocks, Rotten Onigiri, and Gitan can miss - don't risk it when adjacent.
Another 100% accuracy option aside from staves is Water Gun Pot.
Fortune Staff
Can be used to level up a Pit Mamel (1-3F) into a Cave Mamel for experience points.
It's worth keeping Fortune Staff on hand even if you've gone past the floors where Pit Mamel appears,
since it can be paired with Reflective Incense to hit yourself with magic bullets to rapidly level up.
Reflective Incense
Light the incense, then swing a Fortune Staff at a foe to hit yourself with magic bullets and level up.
Reflects Gazer (8-20F), Curse Girl (13-20F), and Polygon Shaka (15-20F)'s special attacks.
Don't forget that player-side magic bullets from swinging staves will also be reflected.
Cautious Incense
Stops Thiefwalrus (8-11F) or Greenwalrus (16-20F) from being able to steal inventory items.
That said, you likely won't have the means to linger and farm Thiefwalrus family monsters,
regardless of whether or not you have a Cautious Incense on hand.
Important Items (Sacred Tree Extension)
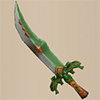
 Weapon & Shield
Enemy stats eventually rises to where a few points of base value won't make much of a difference,
so it's probably best to focus on a piece of equipment's innate rune, even if you don't synthesize.
Watchful Shield, Counter Shield
These shields have special abilities that provide an advantage during combat even with low defense.
Cyclops Bane, Gazer Shield
Secondary gear that should be used against Gazer (8-20F) and Super Gazer (20-29F).
Cyclops Bane is also effective against Metalhead (10-20F) and Hat Brat (30-39F).
Dragonkiller, Dragon Shield
Solid base value, great against Nashagga (7-13F), Dragon (20-34F), and Sky Dragon (40-50F).
Watersplitter
Effective against a variety of tougher Aquatic type monsters that appear from 21F onwards like
Pesky Kappa (20-29F), Capt. Spearfish (30-39F), Vexing Kappa (35-50F), Fleefrog (37-50F), etc.
Kama Itachi
Hallways are visible even on the extension floors, so you can get 2 hits in around corners.
However, base value is very low, so it's best to synthesize it instead of maining it.
Shield of Sating
Makes it easier to maintain Sumo status, which is great for mid~late game floors.
Low base value, so it's best to swap to a stronger shield before fighting.
Kappa's Dish
Insurance against Pesky Kappa (20-29F), Vexing Kappa (35-50F), and Sleep Radish (40-50F).
Keep in mind that it only provides a chance to dodge projectiles, and isn't guaranteed.
 Bracelets
Monster-find Bracelet, Item-find Bracelet
Monster-find Bracelet lets you avoid encounters, allowing for more time to regenerate HP.
Item-find Bracelet is useful for planning a more efficient route at the start of a new floor,
and also clues you into spots where a Bored Kappa enemy might be waiting on an item.
Bellyexpand Bracelet
Raises Max Fullness by 25 while equipped, which is nice for extending the duration of Sumo status.
Rousing Bracelet
Extremely valuable in the extension, since Sleep Radish (40-50F) inflicts Asleep status.
Cursebreak Bracelet
Useful if your playstyle involves swapping between main and secondary shields.
Curse Girl (13-35F) is the only Curse Girl family monster that appears.


 Staves & Scrolls & Grass
Disguising Staff
Can be used to level up a Pit Mamel (1-3F) into a Cave Mamel for experience points.
Otherwise, aim to save uses for when you're surrounded by tougher monsters between 20-50F.
Paralyzing Staff, Narrow-escape Staff, Unlucky Staff, Sealing Staff, Sluggish Staff
Staves that excel at disabling a single target - especially nice against stronger foes between 20-50F.
Unlucky Staves are effective against more monsters than in the first clear, so never discard them.
Narrow-escape Staff can be paired with Monster-find Bracelet to quickly locate the stairs.
Burrowing Staff
Nice when you don't have Sumo status, or when you want to dig in fewer turns.
Switching Staff, Vaulting Staff, Leaping Grass
Emergency escape options - Switching Staff is easier to use since hallways are visible.
Vaulting Staff can also be used to skip across water and air tiles.
Confusion Scroll, Slumber Scroll, Jitters Scroll
Aim to keep one of these on hand for a bad starting room or Summoning Trap accident.
Sweet Potato doesn't seem to be in the item table for this dungeon.
Revival Grass, Invincible Grass
Save Revival Grass for Nigiri Boss (20-50F) or Sleep Radish (40-50F) floors if possible.
Invincible Grass should be used early into a deteriorating situation, before things get dire.
Sedating Grass
Can be collected from Sleep Radish (40-50F) if you have an Evasive Incense.
However, beware of Vexing Kappa (35-50F) throwing any Sedating Grass you leave on the ground.


 Food & Pots & Incenses
Onigiri Category Items
Throw any onigiri category item at a Nigiri Boss (20-50F) to instantly defeat it.
Store Large Onigiri and Huge Onigiri in a Preservation Pot to protect against grilling.
Preservation Pot
Not super common in this dungeon, but being able to carry more items is fantastic.
Some players like to organize their inventory by inserting all important items into a single pot,
but keep in mind that a Nigiri Morph (15-20F) might target said pot.
Water Gun Pot
Useful against Cave Mamel (level up a Pit Mamel on 1-3F), Nashagga (7-13F), and Fierous (10-20F).
It's fine to discard any Water Gun Pots that you find between 21-50F to free up inventory space.
Blurry Incense
Pair it with Monster-find Bracelet to safely ignore monsters in a room.
Can also be paired with Guiding Staff to help ensure safety while rushing to the stairs.
Evasive Incense
Protects against Pesky Kappa (20-29F), Vexing Kappa (35-50F), and Sleep Radish (40-50F) special attacks.
Don't forget that enemies also dodge projectiles - focus on staves while it's in effect.
Aggressive Incense
Hallways are visible on all floors, so it's easier to use than in other dungeons.
That said, never use it on Sleep Radish (40-50F) floors.
Farming Techniques
 Cave Mamel Hunting (1-3F)
Pit Mamel (1-3F) can be leveled up to a Cave Mamel and hunted for 2,000 experience points.
Level up options include items like Fortune Staff, Disguising Staff, Fortune Grass, Jitters Scroll, etc.
Rocks, Knockback Staff, and other items that deal fixed damage can be used to one-shot Cave Mamel.
 Nigiri Morph Factory (3-6F)
Nigiri Baby (3-6F) can be used to turn unneeded items into Large Onigiri if you find a shield.
If you find rocks or arrows, turn single rocks or arrows into Large Onigiri instead of the entire stack.
You can do so by stepping on single rocks or arrows and exchanging them with inventory items.
It's worth trying Nigiri Morph Factory even if you don't have a shield - walk around in a large room.
Increasing Max Fullness to 150+ activates Sumo status, which can be quite helpful.
Keep 3~4 Large Onigiri on hand for the journey after increasing Max Fullness.
Floor Guide
First Clear
General Advice
Powerful monsters begin to appear from 7F onwards, so the key is how you handle those enemies.
Synthesis Pot is rare, so inventory space is better used on consumables instead of synthesis ingredients.
Hallways are visible, so it's best to avoid dashing and instead react to foes as they appear on-screen.
1-3F
Identify unidentified items you find on the ground by utilizing the Inference Mechanic.
However, if you plan on performing Nigiri Morph Factory on 3-6F, save unidentified items
as Large Onigiri transformation fodder instead of consuming them for identification purposes.
If you find staves, swing them at a monster that's at least 2 tiles away to safely identify them.
If Revival Grass is listed as a possibility for an unidentified grass, don't use that grass.
Pit Mamel (1-3F) appears, so level it up into a Cave Mamel and hunt it for 2,000 exp if possible.
Options include Fortune Staff, Disguising Staff, Fortune Grass, Blinding Grass, Jitters Scroll, etc.
Items like Knockback Staff, Rock, Gitan, or Water Gun Pot can be used to one-shot it.
Monster Stats (1-3F)
| Floor | Monster | HP | Atk | Def | Exp | Type |
|---|---|---|---|---|---|---|
| 1-3 | Mamel | 8 | 3 | 4 | 2 | Normal |
| 1-3 | Pit Mamel | 11 | 5 | 8 | 5 | Normal |
| 1-3 | Chintala | 15 | 9 | 4 | 12 | Beast |
| 1-4 | Shagga | 18 | 6 | 4 | 12 | Dragon |
| 1-4 | Hat Urchin | 16 | 5 | 3 | 10 | Cyclops |
| 3-6 | Nigiri Baby | 17 | 8 | 2 | 11 | Normal |
4-6F
Nigiri Baby (3-6F) appears, so have one turn cursed or unneeded items into Large Onigiri.
It's best to stick to 3-4F when performing Nigiri Morph Factory to avoid Mid Chintala (5-8F),
and don't push things too much if you haven't found a decent shield.
Mid Chintala is formidable when first encountered on 5F, so don't hesitate to use items.
Aim to have several items on hand that can be reliably used when you're in danger by the end of 6F,
because even more powerful monsters like Nashagga (7-13F) begin appearing from 7F onwards.
If you didn't hunt a Cave Mamel or perform Nigiri Morph Factory, 6F is basically the last "safe" floor.
Monster Stats (4-6F)
| Floor | Monster | HP | Atk | Def | Exp | Type |
|---|---|---|---|---|---|---|
| 1-4 | Shagga | 18 | 6 | 4 | 12 | Dragon |
| 1-4 | Hat Urchin | 16 | 5 | 3 | 10 | Cyclops |
| 3-6 | Nigiri Baby | 17 | 8 | 2 | 11 | Normal |
| 4-6 | Hoppin' Batter | 20 | 7 | 3 | 9 | Normal |
| 4-8 | Armordillo | 20 | 11 | 15 | 15 | Beast |
| 5-8 | Mid Chintala | 45 | 23 | 10 | 27 | Beast |
7-9F
Nashagga (7-13F) attacks 2 times per turn, so item usage is nearly mandatory even with Sumo status.
The monster table for 7F only has 4 enemies, so Nashagga is particularly common on that floor.
Gazer (8-20F) has a high spawn rate, and hypnotizes you and makes you waste items and turns.
It only has 30 HP so Sumo status or Cyclops Bane can be enough to one-shot it depending on level,
but if you don't have either of those, chip away at its HP using items before it's adjacent.
Thiefwalrus (8-11F) might end up as an annoying enemy that steals items instead of being farmable.
It's rather risky to attempt to explore a floor in an effort to reclaim a stolen item after it warps away,
so consider shooting a projectile at a wall or placing an unneeded item on the ground as bait.
Monster Stats (7-9F)
| Floor | Monster | HP | Atk | Def | Exp | Type |
|---|---|---|---|---|---|---|
| 4-8 | Armordillo | 20 | 11 | 15 | 15 | Beast |
| 5-8 | Mid Chintala | 45 | 23 | 10 | 27 | Beast |
| 7-9 | Polygon Spinna | 33 | 16 | 17 | 28 | Draining |
| 7-13 | Nashagga | 70 | 21 | 20 | 60 | Dragon |
| 8-11 | N'dubba | 32 | 16 | 8 | 16 | Metal |
| 8-11 | Thiefwalrus | 65 | 25 | 23 | 75 | Aquatic |
| 8-20 | Gazer | 30 | 18 | 14 | 40 | Cyclops |
10-14F
Average attack power of monsters increases again, so keep exploration light and descend quickly.
Brodillo (10-20F) is especially tough with its 36 attack power and 38 defense - use items against it.
You might be tempted to hunt them for 450 exp each, but you'll likely struggle even with Sumo status.
Other monsters besides Brodillo and Nashagga have about 60~70 HP and 24~30 attack.
Monster Stats (10-14F)
| Floor | Monster | HP | Atk | Def | Exp | Type |
|---|---|---|---|---|---|---|
| 7-13 | Nashagga | 70 | 21 | 20 | 60 | Dragon |
| 8-11 | N'dubba | 32 | 16 | 8 | 16 | Metal |
| 8-11 | Thiefwalrus | 65 | 25 | 23 | 75 | Aquatic |
| 8-20 | Gazer | 30 | 18 | 14 | 40 | Cyclops |
| 10-20 | Fierous | 60 | 25 | 22 | 55 | Normal |
| 10-20 | Brodillo | 70 | 36 | 38 | 450 | Beast |
| 10-20 | Metalhead | 66 | 30 | 19 | 61 | Cyclops |
| 10-20 | Lt. Spearfish | 60 | 24 | 17 | 55 | Aquatic |
| 10-20 | Tiger Thrower | 68 | 26 | 22 | 77 | Beast |
| 13-20 | Curse Girl | 65 | 28 | 28 | 180 | Normal |
15-19F
Rush to the stairs regardless of whether or not you have Sumo status.
Polygon Shaka (15-20F) warps in front of you when inside a room, and lowers Fullness by 5.
Nigiri Morph (15-20F) has high attack power and turns inventory items into Large Onigiri without fail.
Possible counters include activating Sumo status, or throwing an onigiri category item to one-shot it.
If you meet the conditions to activate Sumo status, it's best to maintain it until the end now.
Otherwise, if you lack Sumo status, items, and have weak equipment, evasive play is your only option.
Be resourceful with staves and any other items you have to descend quickly.
Monster Stats (15-19F)
| Floor | Monster | HP | Atk | Def | Exp | Type |
|---|---|---|---|---|---|---|
| 8-20 | Gazer | 30 | 18 | 14 | 40 | Cyclops |
| 10-20 | Fierous | 60 | 25 | 22 | 55 | Normal |
| 10-20 | Brodillo | 70 | 36 | 38 | 450 | Beast |
| 10-20 | Metalhead | 66 | 30 | 19 | 61 | Cyclops |
| 10-20 | Lt. Spearfish | 60 | 24 | 17 | 55 | Aquatic |
| 10-20 | Tiger Thrower | 68 | 26 | 22 | 77 | Beast |
| 13-20 | Curse Girl | 65 | 28 | 28 | 180 | Normal |
| 15-20 | Explochin | 120 | 25 | 22 | 55 | Exploding/Cyclops/Aquatic |
| 15-20 | Nigiri Morph | 88 | 35 | 30 | 255 | Normal |
| 15-20 | Bored Kappa | 50 | 18 | 11 | 48 | Aquatic |
| 15-20 | Polygon Shaka | 70 | 34 | 33 | 360 | Draining |
| 16-20 | Master Hen | 70 | 33 | 21 | 400 | Beast |
| 16-20 | Greenwalrus | 88 | 30 | 27 | 240 | Aquatic |
20F
The final floor, but even more powerful monsters are added to the monster table.
Don't ever attempt to simply trade normal attacks with a Super Gazer, Nigiri Boss, or Dragon.
Worst case, Nigiri Boss inflicts Onigiri status → you become a Grilled Onigiri thanks to Dragon.
Just rush to the stairs as fast as possible while utilizing all available inventory items.
Monster Stats (20F)
| Floor | Monster | HP | Atk | Def | Exp | Type |
|---|---|---|---|---|---|---|
| 8-20 | Gazer | 30 | 18 | 14 | 40 | Cyclops |
| 10-20 | Fierous | 60 | 25 | 22 | 55 | Normal |
| 10-20 | Brodillo | 70 | 36 | 38 | 450 | Beast |
| 10-20 | Metalhead | 66 | 30 | 19 | 61 | Cyclops |
| 10-20 | Lt. Spearfish | 60 | 24 | 17 | 55 | Aquatic |
| 10-20 | Tiger Thrower | 68 | 26 | 22 | 77 | Beast |
| 13-20 | Curse Girl | 65 | 28 | 28 | 180 | Normal |
| 15-20 | Explochin | 120 | 25 | 22 | 55 | Exploding/Cyclops/Aquatic |
| 15-20 | Nigiri Morph | 88 | 35 | 30 | 255 | Normal |
| 15-20 | Bored Kappa | 50 | 18 | 11 | 48 | Aquatic |
| 15-20 | Polygon Shaka | 70 | 34 | 33 | 360 | Draining |
| 16-20 | Master Hen | 70 | 33 | 21 | 400 | Beast |
| 16-20 | Greenwalrus | 88 | 30 | 27 | 240 | Aquatic |
| 20 | Dragon | 120 | 45 | 40 | 1000 | Dragon |
| 20 | Nigiri Boss | 133 | 45 | 42 | 555 | Normal |
| 20 | Super Gazer | 66 | 30 | 26 | 222 | Cyclops |
| 20 | Pesky Kappa | 75 | 29 | 22 | 330 | Aquatic |
Sacred Tree Extension
General Advice
This section is written assuming that the player character is Normal Shiren or Asuka.
Asuka has higher attack than Shiren, but may struggle more due to faster hunger during Sumo status.
Other characters generally have an easier time, provided you can find a way to keep up on Fullness.
The main case to watch out for is Nigiri Boss (20-50F)'s Onigiri status → fire damage or being on water,
which results in the player instantly collapsing as a Grilled Onigiri or Rotten Onigiri respectively.
Never risk letting a Nigiri Boss use its special when adjacent while on a water tile as Tatsumi Shiren.
1-20F
This floor range is similar to the first clear, but you'll want to be more conservative with items.
Identify unidentified items you find on the ground by utilizing the Inference Mechanic when possible.
Hunt Cave Mamels to level up on 1-3F, and increase Max Fullness via Nigiri Morph Factory on 3-6F.
It's up to your ability to adapt to circumstances on the fly to decide when to switch to rushing stairs,
but when in doubt, consider starting off with a similar flow to the first clear section.
Monster Stats (1-20F)
| Floor | Monster | HP | Atk | Def | Exp | Type |
|---|---|---|---|---|---|---|
| 1-3 | Mamel | 8 | 3 | 4 | 2 | Normal |
| 1-3 | Pit Mamel | 11 | 5 | 8 | 5 | Normal |
| 1-3 | Chintala | 15 | 9 | 4 | 12 | Beast |
| 1-4 | Shagga | 18 | 6 | 4 | 12 | Dragon |
| 1-4 | Hat Urchin | 16 | 5 | 3 | 10 | Cyclops |
| 3-6 | Nigiri Baby | 17 | 8 | 2 | 11 | Normal |
| 4-6 | Hoppin' Batter | 20 | 7 | 3 | 9 | Normal |
| 4-8 | Armordillo | 20 | 11 | 15 | 15 | Beast |
| 5-8 | Mid Chintala | 45 | 23 | 10 | 27 | Beast |
| 7-9 | Polygon Spinna | 33 | 16 | 17 | 28 | Draining |
| 7-13 | Nashagga | 70 | 21 | 20 | 60 | Dragon |
| 8-11 | N'dubba | 32 | 16 | 8 | 16 | Metal |
| 8-11 | Thiefwalrus | 65 | 25 | 23 | 75 | Aquatic |
| 8-20 | Gazer | 30 | 18 | 14 | 40 | Cyclops |
| 10-20 | Fierous | 60 | 25 | 22 | 55 | Normal |
| 10-20 | Brodillo | 70 | 36 | 38 | 450 | Beast |
| 10-20 | Metalhead | 66 | 30 | 19 | 61 | Cyclops |
| 10-20 | Lt. Spearfish | 60 | 24 | 17 | 55 | Aquatic |
| 10-20 | Tiger Thrower | 68 | 26 | 22 | 77 | Beast |
| 13-35 | Curse Girl | 65 | 28 | 28 | 180 | Normal |
| 15-20 | Explochin | 120 | 25 | 22 | 55 | Exploding/Cyclops/Aquatic |
| 15-20 | Nigiri Morph | 88 | 35 | 30 | 255 | Normal |
| 15-20 | Bored Kappa | 50 | 18 | 11 | 48 | Aquatic |
| 15-20 | Polygon Shaka | 70 | 34 | 33 | 360 | Draining |
| 16-20 | Master Hen | 70 | 33 | 21 | 400 | Beast |
| 16-39 | Greenwalrus | 88 | 30 | 27 | 240 | Aquatic |
| 20-29 | Super Gazer | 66 | 30 | 26 | 222 | Cyclops |
| 20-29 | Pesky Kappa | 75 | 29 | 22 | 330 | Aquatic |
| 20-34 | Dragon | 120 | 45 | 40 | 1000 | Dragon |
| 20-50 | Nigiri Boss | 133 | 45 | 42 | 555 | Normal |
21-29F
Super Gazer (20-29F), Pesky Kappa (20-29F), and Greenwalrus (16-39F) continue to target items.
Arrows are hard to accumulate in this dungeon, so you may be forced to deal with Super Gazers up close.
It's likely worth keeping Kama Itachi, Cyclops Bane, and Gazer Shield on hand until you pass these floors,
even if you weren't able to synthesize them and have to use them as secondary gear.
The chance of Pesky Kappas claiming items rises with the number of turns spent exploring a floor.
If you're being chased and see a Pesky Kappa on an item up ahead, focus on the foe behind you first,
or else you risk being getting hit by an unknown item while also being sandwiched by monsters.
Evasive or Unwanting incense can be used to ensure Pesky Kappa doesn't hit you with a thrown item,
but Evasive Incenses are best saved for Sleep Radish floors near the end of the dungeon.
Pesky Kappa's item throwing range is anywhere within a 5 tile radius.
Nigiri Boss (20-50F) is a constant threat in the monster table until the very end.
It inflicts Onigiri status instead of transforming a single inventory item into a Large Onigiri,
which is extremely dangerous when a Dragon (20-34F) is nearby, since fire damage one-shots you.
Dragon has a 100% special attack usage rate around corners or when lined up at a distance.
100% accuracy options like staves are great at stopping Nigiri Boss from acting when adjacent.
Monster Stats (21-29F)
| Floor | Monster | HP | Atk | Def | Exp | Type |
|---|---|---|---|---|---|---|
| 13-35 | Curse Girl | 65 | 28 | 28 | 180 | Normal |
| 16-39 | Greenwalrus | 88 | 30 | 27 | 240 | Aquatic |
| 20-29 | Super Gazer | 66 | 30 | 26 | 222 | Cyclops |
| 20-29 | Pesky Kappa | 75 | 29 | 22 | 330 | Aquatic |
| 20-34 | Dragon | 120 | 45 | 40 | 1000 | Dragon |
| 20-50 | Nigiri Boss | 133 | 45 | 42 | 555 | Normal |
| 21-26 | Big Chintala | 85 | 40 | 33 | 350 | Beast |
30-34F
Super Gazer and Pesky Kappa exit the table, so it's easier to restock items for a little while.
Hoppin' Slugger (30-50F) and the Aquatic types that appear here don't hit as hard as Dragon (20-34F),
and Hat Brat (30-39F) has low defense, so it's easier to defeat despite its high HP and attack power.
Overall, if you're able to trade hits with monsters to some degree, consider exploring for items.
Monster Stats (30-34F)
| Floor | Monster | HP | Atk | Def | Exp | Type |
|---|---|---|---|---|---|---|
| 13-35 | Curse Girl | 65 | 28 | 28 | 180 | Normal |
| 16-39 | Greenwalrus | 88 | 30 | 27 | 240 | Aquatic |
| 20-34 | Dragon | 120 | 45 | 40 | 1000 | Dragon |
| 20-50 | Nigiri Boss | 133 | 45 | 42 | 555 | Normal |
| 30-39 | Hat Brat | 125 | 45 | 9 | 880 | Cyclops |
| 30-39 | Capt. Spearfish | 100 | 39 | 30 | 410 | Aquatic |
| 30-39 | Famed Octopling | 99 | 25 | 30 | 420 | Aquatic |
| 30-50 | Hoppin' Slugger | 72 | 39 | 31 | 400 | Normal |
35-39F
Most players are rushing to the stairs instead of exploring at this point.
Dragon exits the table, and Vexing Kappa (35-50F) and Fleefrog (37-50F) join the fray.
Items are once again tricky to restock thanks to Vexing Kappas, so try to be conservative.
Vexing Kappa's item throwing range is a 10 tile radius, so it can throw items from off-screen.
Again, it's tempting to use Evasive Incense, but those should be saved for the next floor range.
Don't underestimate Fleefrog, as it has 60 attack and can pull you from 10 tiles away.
Monster Stats (35-39F)
| Floor | Monster | HP | Atk | Def | Exp | Type |
|---|---|---|---|---|---|---|
| 13-35 | Curse Girl | 65 | 28 | 28 | 180 | Normal |
| 16-39 | Greenwalrus | 88 | 30 | 27 | 240 | Aquatic |
| 20-50 | Nigiri Boss | 133 | 45 | 42 | 555 | Normal |
| 30-39 | Hat Brat | 125 | 45 | 9 | 880 | Cyclops |
| 30-39 | Capt. Spearfish | 100 | 39 | 30 | 410 | Aquatic |
| 30-39 | Famed Octopling | 99 | 25 | 30 | 420 | Aquatic |
| 30-50 | Hoppin' Slugger | 72 | 39 | 31 | 400 | Normal |
| 35-50 | Vexing Kappa | 175 | 49 | 33 | 960 | Aquatic |
| 37-50 | Fleefrog | 125 | 60 | 45 | 900 | Aquatic |
40-50F
Rush to the stairs as fast as possible while utilizing all available inventory items.
Sleep Radish (40-50F), Sky Dragon (40-50F), and Fluffy Bunny (46-50F) are the trickier additions.
Sleep Radish throws Sedating Grass → Poison Grass within a 3 tile radius, making it very deadly.
Don't let Nigiri Boss act when adjacent, as Sky Dragon can grill you from anywhere in the room.
Vexing Kappa is still around until the end, so you don't have the luxury of exploring for items.
When dealing with multi-monster situations, focus on disabling Sleep Radish first if present.
Evasive Incense can be used to dodge Sleep Radish and Vexing Kappa's thrown items,
but remember that you can't throw onigiri to one-shot Nigiri Boss while it's in effect.
Monster Stats (40-50F)
| Floor | Monster | HP | Atk | Def | Exp | Type |
|---|---|---|---|---|---|---|
| 20-50 | Nigiri Boss | 133 | 45 | 42 | 555 | Normal |
| 30-50 | Hoppin' Slugger | 72 | 39 | 31 | 400 | Normal |
| 35-50 | Vexing Kappa | 175 | 49 | 33 | 960 | Aquatic |
| 37-50 | Fleefrog | 125 | 60 | 45 | 900 | Aquatic |
| 40-50 | Sky Dragon | 140 | 55 | 50 | 1600 | Dragon |
| 40-50 | Sleep Radish | 135 | 47 | 38 | 900 | Ghost |
| 43-50 | Huge Chintala | 185 | 60 | 40 | 1350 | Beast |
| 46-50 | Fluffy Bunny | 10 | 10 | 50 | 50 | Beast |
Monsters
See Monsters for individual monster details.
- F - Dark hallways
- S - Shop is possible
- M - Monster House is possible
Monster Colors = Farming, Useful, Lowers Stats, Targets Items, Dangerous
Items
※ This section is currently incomplete.
Item Table Key
| ID | Explanation |
|---|---|
| F | Floor |
| S | Shop |
| P | Peddler |
| M | Monster drop |
| B | Buried |
| H | Thiefwalrus |
| I | Island |
| T | Transmutation Pot |
| U | Surprise Pot |
| W | Tunnel of Wishes |
 Weapon
| Weapon | ||||||||||
|---|---|---|---|---|---|---|---|---|---|---|
| Name | F | S | P | M | B | H | I | T | U | W |
| Wooden Sword | X | |||||||||
| Bronze Sword | X | X | ||||||||
| Katana | X | |||||||||
| Doutanuki | ||||||||||
| Manji Kabura | ||||||||||
| Kajin Fuuma | ||||||||||
| Kabura Sutegi | ||||||||||
| Golden Sword | X | X | ||||||||
| Kama Itachi | X | |||||||||
| Axe of the Minotaur | ||||||||||
| Accurate Sword | ||||||||||
| Swift Sword | ||||||||||
| Watersplitter | ||||||||||
| Primal Axe | ||||||||||
| Dragonkiller | ||||||||||
| Crescent Blade | ||||||||||
| Sky Sword | ||||||||||
| Sickle of Salvation | ||||||||||
| Drain Slayer | ||||||||||
| Cyclops Bane | ||||||||||
| Steel Severer | ||||||||||
| Whopping Harisen | ||||||||||
| Healing Sword | ||||||||||
| Peach Club | ||||||||||
| Spender's Club | ||||||||||
| Ferrous Greatsword | ||||||||||
| Steak Knife | ||||||||||
| Jagged Sword | ||||||||||
| Quad-edge | ||||||||||
| Auspicious Kumade | ||||||||||
| Pickaxe | X | |||||||||
| Golden Pickaxe | ||||||||||
| Wooden Mallet | ||||||||||
| Epic Hammer | ||||||||||
| Trapseeker | ||||||||||
| Bonito Block | ||||||||||
| Yamanba's Cleaver | ||||||||||
| Break-Off Blade | ||||||||||
 Shield
| Shield | ||||||||||
|---|---|---|---|---|---|---|---|---|---|---|
| Name | F | S | P | M | B | H | I | T | U | W |
| Wooden Shield | X | X | ||||||||
| Bronze Shield | X | X | ||||||||
| Iron Shield | ||||||||||
| Wolfshead | ||||||||||
| Fuuma Shield | ||||||||||
| Rasen Fuuma | ||||||||||
| Golden Shield | X | |||||||||
| Counter Shield | ||||||||||
| Watchful Shield | ||||||||||
| Dragon Shield | ||||||||||
| Blast Shield | X | |||||||||
| Targe of the Minotaur | ||||||||||
| Walrus Stopper | ||||||||||
| Froggo Stopper | ||||||||||
| Hat Stopper | ||||||||||
| Nigiri Stopper | ||||||||||
| Spearscale Shield | X | |||||||||
| Kappa's Dish | ||||||||||
| Gazer Shield | ||||||||||
| Shield of Negation | ||||||||||
| Unmoving Wall | ||||||||||
| Zabuton | ||||||||||
| Spender's Shield | ||||||||||
| Ferrous Kite | ||||||||||
| Steak Plate | ||||||||||
| Gutsy Shield | ||||||||||
| Hunky-dory Shield | ||||||||||
| Bodhi Shield | ||||||||||
| Shield of Sating | ||||||||||
| Auspicious Omamori | ||||||||||
| Shield of Presage | ||||||||||
| Yamanba's Potlid | ||||||||||
| Break-Off Shield | ||||||||||
 Bracelet
| Bracelet | ||||||||||
|---|---|---|---|---|---|---|---|---|---|---|
| Name | F | S | P | M | B | H | I | T | U | W |
| Healing Bracelet | ||||||||||
| Strength Bracelet | ||||||||||
| Bellyexpand Bracelet | ||||||||||
| Bellyshrink Bracelet | ||||||||||
| Fortune Bracelet | X | |||||||||
| Cleansing Bracelet | ||||||||||
| Focusing Bracelet | ||||||||||
| Rousing Bracelet | ||||||||||
| Rustproof Bracelet | ||||||||||
| Cursebreak Bracelet | ||||||||||
| Affixing Bracelet | ||||||||||
| Far-throwing Bracelet | ||||||||||
| Bad-aim Bracelet | ||||||||||
| Sure-aim Bracelet | ||||||||||
| Bouncy Bracelet | ||||||||||
| Rapid-fire Bracelet | ||||||||||
| Daredevil Bracelet | ||||||||||
| Dreaded Bracelet | ||||||||||
| Leaping Bracelet | ||||||||||
| Blasting Bracelet | ||||||||||
| Clairvoyant Bracelet | ||||||||||
| Monster-find Bracelet | ||||||||||
| Item-find Bracelet | X | |||||||||
| Passage-find Bracelet | ||||||||||
| Waterwalk Bracelet | ||||||||||
| Floating Bracelet | ||||||||||
| Wallpass Bracelet | ||||||||||
| Tiptoe Bracelet | ||||||||||
| Passerby Bracelet | ||||||||||
| Item-losing Bracelet | ||||||||||
| Gitan-losing Bracelet | ||||||||||
| Monstercall Bracelet | ||||||||||
| Trapmore Bracelet | ||||||||||
| Haggling Bracelet | ||||||||||
| Trapper's Bracelet | ||||||||||
| Appraiser's Bracelet | ||||||||||
| Cannonboost Bracelet | X | |||||||||

 Projectile
| Projectile | ||||||||||
|---|---|---|---|---|---|---|---|---|---|---|
| Name | F | S | P | M | B | H | I | T | U | W |
| Wooden Arrow | ||||||||||
| Iron Arrow | X | |||||||||
| Silver Arrow | ||||||||||
| Poison Arrow | ||||||||||
| Truestrike Arrow | ||||||||||
| Rock | ||||||||||
| Porky's Rock | X | X | ||||||||
 Food
Food
| Food | ||||||||||
|---|---|---|---|---|---|---|---|---|---|---|
| Name | F | S | P | M | B | H | I | T | U | W |
| Onigiri | X | X | ||||||||
| Large Onigiri | X | X | ||||||||
| Huge Onigiri | ||||||||||
| Rotten Onigiri | X | X | ||||||||
| Grilled Onigiri | ||||||||||
| Special Onigiri | ||||||||||
| Sumo Onigiri | ||||||||||
| Sweet Potato | ||||||||||
| Yakitori | ||||||||||
| Rotten Peach Bun | ||||||||||
 Grass
Grass
| Grass | ||||||||||
|---|---|---|---|---|---|---|---|---|---|---|
| Name | F | S | P | M | B | H | I | T | U | W |
| Weeds | ||||||||||
| Herb | X | |||||||||
| Otogirisou | X | X | ||||||||
| Healing Grass | X | |||||||||
| Life Grass | X | |||||||||
| Fragrant Grass | ||||||||||
| Revival Grass | ||||||||||
| Bellyexpand Seed | X | |||||||||
| Bellyshrink Seed | ||||||||||
| Dragon Grass | X | |||||||||
| Leaping Grass | ||||||||||
| Antidote Grass | X | |||||||||
| Strength Grass | X | |||||||||
| Poison Grass | X | |||||||||
| Confusion Grass | ||||||||||
| Sedating Grass | X | |||||||||
| Berserk Seed | X | |||||||||
| Blinding Grass | ||||||||||
| Seewell Grass | ||||||||||
| Swift Grass | ||||||||||
| Power-up Grass | X | |||||||||
| Invincible Grass | X | |||||||||
| Fortune Grass | X | |||||||||
| Angel Seed | X | |||||||||
| Feeble Grass | X | |||||||||
| Unlucky Seed | X | X | ||||||||
| Ill-fated Seed | ||||||||||
 Scroll
| Scroll | ||||||||||
|---|---|---|---|---|---|---|---|---|---|---|
| Name | F | S | P | M | B | H | I | T | U | W |
| Confusion Scroll | X | |||||||||
| Slumber Scroll | X | X | ||||||||
| Jitters Scroll | ||||||||||
| Windblade Scroll | X | |||||||||
| Expulsion Scroll | ||||||||||
| Exorcism Scroll | X | |||||||||
| Identifier Scroll | X | X | ||||||||
| Heavenly Scroll | ||||||||||
| Earthly Scroll | X | |||||||||
| Plating Scroll | X | |||||||||
| Slot-adding Scroll | X | |||||||||
| Rune-eraser Scroll | X | |||||||||
| Silver-seal Scroll | ||||||||||
| Silverpurge Scroll | X | |||||||||
| Pot-upsize Scroll | X | |||||||||
| Extraction Scroll | ||||||||||
| Onigiri Scroll | ||||||||||
| Curse Scroll | ||||||||||
| Mapping Scroll | X | |||||||||
| Map-loss Scroll | ||||||||||
| Trap-eraser Scroll | X | |||||||||
| Trap Scroll | ||||||||||
| Water-drain Scroll | ||||||||||
| Monstercall Scroll | ||||||||||
| Wall-less Scroll | X | |||||||||
| Gathering Scroll | ||||||||||
| Collection Scroll | X | |||||||||
| Gambler's Scroll | X | |||||||||
| Muzzle Scroll | ||||||||||
| Carry-ban Scroll | ||||||||||
| Swift Foe Scroll | ||||||||||
| Fixer Scroll | X | X | ||||||||
| Escape Scroll | ||||||||||
| Eradication Scroll | ||||||||||
| Sanctuary Scroll | X | |||||||||
| Blank Scroll | X | |||||||||
| Wet Scroll | ||||||||||
 Staff
Staff
| Staff | ||||||||||
|---|---|---|---|---|---|---|---|---|---|---|
| Name | F | S | P | M | B | H | I | T | U | W |
| Ordinary Staff | ||||||||||
| Paralyzing Staff | ||||||||||
| Sealing Staff | X | |||||||||
| Disguising Staff | ||||||||||
| Empathetic Staff | X | |||||||||
| Narrow-escape Staff | ||||||||||
| Knockback Staff | X | |||||||||
| Switching Staff | X | |||||||||
| Vaulting Staff | X | |||||||||
| Skull Mage's Staff | ||||||||||
| Thunderbolt Staff | ||||||||||
| Burrowing Staff | X | |||||||||
| Earthmound Staff | ||||||||||
| Balance Staff | X | |||||||||
| Guiding Staff | X | |||||||||
| Swift Staff | ||||||||||
| Sluggish Staff | ||||||||||
| Fortune Staff | X | |||||||||
| Unlucky Staff | ||||||||||
| Peach Staff | ||||||||||
 Pot
Pot
| Pot | ||||||||||
|---|---|---|---|---|---|---|---|---|---|---|
| Name | F | S | P | M | B | H | I | T | U | W |
| Preservation Pot | ||||||||||
| Identifier Pot | ||||||||||
| Transmutation Pot | ||||||||||
| Cashing Pot | X | |||||||||
| Synthesis Pot | ||||||||||
| Exorcism Pot | ||||||||||
| Curse Pot | ||||||||||
| Upgrading Pot | ||||||||||
| Degrading Pot | ||||||||||
| Bottomless Pot | ||||||||||
| Warehouse Pot | ||||||||||
| Handtrapper Pot | X | X | ||||||||
| Unbreakable Pot | ||||||||||
| Ordinary Pot | ||||||||||
| Hiding Pot | ||||||||||
| Rejuvenation Pot | ||||||||||
| Walrus Pot | X | |||||||||
| Water Gun Pot | X | |||||||||
| Hilarious Pot | X | |||||||||
| Monster Pot | ||||||||||
| Surprise Pot | ||||||||||
 Incense
| Incense | ||||||||||
|---|---|---|---|---|---|---|---|---|---|---|
| Name | F | S | P | M | B | H | I | T | U | W |
| Heat-ban Incense | X | |||||||||
| Evasive Incense | X | |||||||||
| Cautious Incense | X | X | X | |||||||
| Reflective Incense | X | |||||||||
| Aggressive Incense | X | |||||||||
| Defensive Incense | X | |||||||||
| Blurry Incense | X | |||||||||
| Weighted Incense | ||||||||||
| Unwanting Incense | ||||||||||
