Postgame Guide
Overview
Congratulations on clearing the main story! You're now finished with the tutorial.
That's right - The main story was just the introduction to Shiren 6, and there's lots more to do!
There are up to 33 other dungeons besides Serpentcoil Island (excluding hidden routes) with various rules.
In addition, there's a notebook to complete, up to 78 achievements to aim for, and a secret title screen.
※ This page was last edited on July 14th, 2025 (Game version 2.2.3).
Dungeons
Dungeon List
Reward for 2nd+ clears for dungeons that only list a 1st clear reward is a random blue sacred item.
If a dungeon lists two different depths, the second depth is accessible through Sacred Tree Mode.
| Name | Depth | Level Reset | Bring Items | Rescues | Clear Reward |
|---|---|---|---|---|---|
| Base Game | |||||
| Serpentcoil Island | 31F | No | Yes | 3 | 1st: Staff credits, title screen changes. 2nd: Unlock Wagoneer, Dune of Batsu. 3rd+: Random Sacred Item (Blue) |
| Secluded Path | 3~6F | No | Yes | 0 | None |
| Ghost Ship | 4~7F | No | Yes | 0 | None |
| Golden Highway | 2~6F | No | Yes | 0 | None |
| Dune of Batsu | 30F | Yes | Yes | 3 | Unlock Cavern of Suiryu. |
| Cavern of Suiryu | 20F | Yes | No | 3 | Unlock Heart of Serpentcoil Island. Title screen changes. |
| Yamakagashi Pass | 25F | Yes | No | 3 | Seki rejoins as a companion. |
| Kiki Island | 25F / 99F | Yes | No | 3 | Hibiki and Tugai rejoin as companions. Unlock Escape Scroll. |
| Training Path of Inference | 20F / 50F | Yes | No | 3 | 1st: Gutsy Shield Unlock Training Path of Extra Inference. |
| Training Path of Extra Inference | 20F / 50F | Yes | No | 0 | Final item the player identified. |
| Peach Dungeon | 25F / 99F | Yes | No | 3 | 1st: Better Peach Buns in shop. 2nd+: Peach Bun (Random) |
| Sumo Dungeon | 20F / 99F | Yes | Yes | 3 | 1st: Steak Plate (Gold) |
| Cat-Ching's Divine Will | 10F / 99F | Yes | No | 3 | 1st: Trapseeker (Gold) |
| Trapper's Secret Path | 20F / 99F | Yes | No | 3 | None |
| Training Path of Gimmicks | 20F / 50F | Yes | No | 3 | 1st: Auspicious Omamori (Gold) |
| Training Path of Shopping | 40F / 99F | Yes | Yes | 3 | 1st: Shield of Presage (Gold) |
| Behemoth Rush | 30F / 99F | Yes | No | 0 | 1st: Auspicious Kumade (Gold) |
| Sacred Ocean Tunnel | 15F / 99F | Yes | No | 3 | Random Sacred Item (Gold) |
| Domain of Staves and Scrolls | 20F / 50F | Yes | No | 3 | 1st: Steak Knife (Gold) |
| Isle of the Mighty | 50F / 99F | Yes | Yes | 3 | 1st: Hunky-dory Shield (Gold) |
| Heart of Serpentcoil Island | 99F | Yes | No | 3 | Reward is a 6 item loop as follows: 1st: Manji Kabura (Gold) 2nd: Fuuma Shield (Gold) 3rd: Golden Pickaxe (Gold) 4th: Epic Hammer (Gold) 5th: Bodhi Shield (Gold) 6th: Accurate Sword (Gold) |
| Heart of Serpentcoil Island (The 12 Celestial Stones) | 99F | Yes | No | 3 | Title screen changes. |
| Free Update | |||||
| Go Go Dungeon | 5F | Yes | No | 0 | |
| Wanderers' Highway | 99F | Yes | No | 3 | |
| Quietude of Serpentcoil Island | 99F | Yes | No | 3 | |
| Training Path of Hiding | 20F / 99F | Yes | No | 3 | |
| Cliff of Condensing | 25F / 50F | Yes | No | 3 | |
| Wild Monster Path | 50F / 99F | Yes | No | 3 | |
| Paid DLC | |||||
| Forest of Frugality | 30F / 99F | Yes | No | 3 | |
| Researcher's Experimental Site | 99F | Yes | No | 3 | |
| Winding Valley | 99F | Yes | No | 3 | |
| Clash of Weapons and Shields | 50F / 99F | Yes | Yes | 3 | |
| Peachy Trap Domain | 50F / 99F | Yes | No | 3 | |
| Training Path of Deadly Strikes | 30F / 99F | Yes | No | 3 | |
| Battleground of the Rivals | 24F | Yes | No | 0 | |
| Timeworn Cave | 99F | Yes | No | 3 | |
| Floral Garden | 25F / 99F | Yes | No | 3 | |
| Soul of Serpentcoil Island | 99F | Yes | No | 3 | |
Dungeon Unlock Chart
If a particular dungeon doesn't seem to be unlocking, visit more locations that have a red ! on the map.
Progressing synthesis related events might also be part of the requirements for some dungeons.
| Name | Entrance | Unlock Condition |
|---|---|---|
| Base Game | ||
| Serpentcoil Island | Shukuba Beach | Available from the start. |
| Secluded Path | Secret Ninja Village | Progress Mountain Village events. |
| Ghost Ship | Small Harbor | Progress Small Harbor events. |
| Golden Highway | Icewall Village | Progress Golden Highway (Kawasaku) events. |
| Dune of Batsu | Shukuba Beach | 1. Clear Serpentcoil Island 2 times. 2. Go on a few adventures. |
| Cavern of Suiryu | Shukuba Beach | Clear Dune of Batsu. |
| Yamakagashi Pass | Secret Ninja Village | 1. Clear Serpentcoil Island. 2. Progress Secret Ninja Village events. |
| Kiki Island | Small Harbor | 1. Challenge Training Path of Inference 1 time. 2. Progress pirate events. |
| Training Path of Inference | Rocky Viewpoint | Clear Serpentcoil Island. |
| Training Path of Extra Inference | Rocky Viewpoint | Clear Training Path of Inference. |
| Peach Dungeon | Shukuba Beach | 1. Clear Serpentcoil Island. 2. Progress Peach Bun events. |
| Sumo Dungeon | Small Harbor | Clear Serpentcoil Island. |
| Cat-Ching's Divine Will | Mount Jatou Entrance | Clear Serpentcoil Island. |
| Trapper's Secret Path | Icewall Village | Clear Serpentcoil Island. |
| Training Path of Gimmicks | Underwater Training Ground | Clear Serpentcoil Island. |
| Training Path of Shopping | Underwater Training Ground | Clear Serpentcoil Island. |
| Behemoth Rush | Firespew Mountain Summit | Clear Serpentcoil Island. |
| Sacred Ocean Tunnel | Rocky Viewpoint | Challenge Training Path of Inference 1 time? |
| Domain of Staves and Scrolls | Small Harbor | Clear Dune of Batsu. |
| Isle of the Mighty | Shukuba Beach | Clear Cavern of Suiryu. |
| Heart of Serpentcoil Island | Firespew Mountain Summit | Clear Cavern of Suiryu. |
| Heart of Serpentcoil Island (The 12 Celestial Stones) | Shukuba Beach | Clear Heart of Serpentcoil Island. |
| Free Update | ||
| Go Go Dungeon | Shukuba Beach | Talk to Drokotay the Adventurer (Shukuba Beach). |
| Wanderers' Highway | Shukuba Beach | Talk to Drokotay the Adventurer (Shukuba Beach). |
| Quietude of Serpentcoil Island | Shukuba Beach | 1. Clear Heart of Serpentcoil Island. 2. Talk to Drokotay the Adventurer (Shukuba Beach). |
| Training Path of Hiding | Shukuba Beach | Talk to Drokotay the Adventurer (Shukuba Beach). |
| Cliff of Condensing | Shukuba Beach | Talk to Drokotay the Adventurer (Shukuba Beach). |
| Wild Monster Path | Shukuba Beach | Talk to Drokotay the Adventurer (Shukuba Beach). |
| Paid DLC | ||
| Forest of Frugality | Shukuba Beach | Talk to Drokotay the Adventurer (Shukuba Beach). |
| Researcher's Experimental Site | Shukuba Beach | Talk to Drokotay the Adventurer (Shukuba Beach). |
| Winding Valley | Shukuba Beach | Talk to Drokotay the Adventurer (Shukuba Beach). |
| Clash of Weapons and Shields | Shukuba Beach | Talk to Drokotay the Adventurer (Shukuba Beach). |
| Peachy Trap Domain | Shukuba Beach | 1. Unlock Trapper's Secret Path and Peach Dungeon. 2. Talk to Drokotay the Adventurer (Shukuba Beach). |
| Training Path of Deadly Strikes | Shukuba Beach | Talk to Drokotay the Adventurer (Shukuba Beach). |
| Battleground of the Rivals | Shukuba Beach | 1. Clear the following dungeons: ・Serpentcoil Island ・Dune of Batsu ・Cavern or Suiryu ・Yamakagashi Pass. 2. Talk to Drokotay the Adventurer (Shukuba Beach). |
| Timeworn Cave | Shukuba Beach | Talk to Drokotay the Adventurer (Shukuba Beach). |
| Floral Garden | Shukuba Beach | Talk to Drokotay the Adventurer (Shukuba Beach). |
| Soul of Serpentcoil Island | Shukuba Beach | 1. Clear Heart of Serpentcoil Island. 2. Talk to Drokotay the Adventurer (Shukuba Beach). |
Dungeon Difficulty Ranking
Keep in mind that this difficulty ranking is an opinion piece, and isn't absolute.
No Carry-In Items
- Dungeons within a tier are not ordered from hardest to easiest.
- Player character is Normal Shiren (except for Cavern of Suiryu) for this ranking.
- Scroll section of Notebook is complete, meaning any scroll can be written on a Blank Scroll.
- All unlockables like Mixers and Peach Staff are assumed to be unlocked.
- All Travel Companions unlocked.
| Difficulty | Type | Dungeon | Notes |
|---|---|---|---|
| Rank 7 (Hard) | Update | Cat-Ching's Divine Will (99F) | Said to be the hardest excluding DLC. |
| DLC | Forest of Frugality (99F) | Quite luck-dependent, some say it's the hardest. | |
| DLC | Researcher's Experimental Site (99F) | - | |
| DLC | Timeworn Cave (99F) | - | |
| DLC | Soul of Serpentcoil Island (99F) | Probably actually the hardest dungeon. | |
| Rank 6 | Update | Training Path of Extra Inference (50F) | Descend the stairs on 50F. |
| Base | Heart of Serpentcoil Island | The 12 Celestial Stones. | |
| Update | Training Path of Hiding (99F) | - | |
| DLC | Winding Valley (99F) | - | |
| DLC | Peachy Trap Domain (99F) | Farming Techniques lowers its rank. | |
| DLC | Training Path of Deadly Strikes (99F) | - | |
| DLC | Floral Garden (99F) | - | |
| Rank 5 | Update | Training Path of Inference (50F) | - |
| Update | Kiki Island (99F) | Harder than Heart's normal route. | |
| Update | Peach Dungeon (99F) | Harder than Heart's normal route. | |
| Update | Sacred Ocean Tunnel (99F) | - | |
| Update | Wanderers' Highway (99F) | Harder than Heart's normal route. | |
| Update | Cliff of Condensing (50F) | - | |
| Update | Wild Monster Path (99F) | - | |
| Rank 4 | Base | Yamakagashi Pass (25F) | Including boss fight. |
| Base | Training Path of Extra Inference (20F) | Descend to 20F. | |
| Update | Trapper's Secret Path (99F) | - | |
| Update | Behemoth Rush (99F) | - | |
| Update | Domain of Staves and Scrolls (50F) | Transmutation Pot lowers its rank. | |
| Base | Heart of Serpentcoil Island (99F) | Normal route. | |
| Update | Quietude of Serpentcoil Island (99F) | Harder or easier based on play style. | |
| DLC | Peachy Trap Domain (50F) | Farming Techniques lowers its rank. | |
| Rank 3 | Base | Training Path of Inference (20F) | - |
| Base | Kiki Island (25F) | - | |
| Base | Peach Dungeon (25F) | - | |
| Update | Training Path of Hiding (20F) | - | |
| DLC | Battleground of the Rivals (24F) | - | |
| Rank 2 | Base | Cavern of Suiryu (20F) | Playing as Kokatsu Shiren. |
| Base | Behemoth Rush (30F) | - | |
| Base | Sacred Ocean Tunnel (15F) | - | |
| Base | Domain of Staves and Scrolls (20F) | Transmutation Pot lowers its rank. | |
| DLC | Forest of Frugality (30F) | - | |
| Rank 1 (Easy) | Base | Training Path of Extra Inference | Identify 50 items. |
| Base | Cat-Ching's Divine Will (10F) | - | |
| Base | Trapper's Secret Path (20F) | - | |
| Update | Go Go Dungeon (5F) | Only clearing it 1 time. | |
| ??? | Base | Cavern of Suiryu (20F) | Playing as Normal Shiren. |
| Update | Cliff of Condensing (25F) | - | |
| Update | Wild Monster Path (50F) | - | |
| DLC | Training Path of Deadly Strikes (30F) | - | |
| DLC | Floral Garden (25F) | - |
Carry-In Items
- Dungeons within a tier are not ordered from hardest to easiest.
- All dungeons that allow bringing items drop down to the easiest rank if you overprepare.
| Difficulty | Type | Dungeon | Notes |
|---|---|---|---|
| Rank 4 (Hard) | Update | Sumo Dungeon (99F) | - |
| Update | Training Path of Shopping (99F) | - | |
| Update | Isle of the Mighty (99F) | - | |
| DLC | Clash of Weapons and Shields (99F) | - | |
| Rank 3 | Update | Training Path of Gimmicks (50F) | - |
| Base | Isle of the Mighty (50F) | - | |
| DLC | Clash of Weapons and Shields (50F) | - | |
| Rank 2 | Base | Dune of Batsu (30F) | - |
| Base | Training Path of Gimmicks (20F) | - | |
| Base | Training Path of Shopping (40F) | - | |
| Rank 1 (Easy) | Base | Serpentcoil Island (31F) | - |
| Base | Sumo Dungeon (20F) | - |
Restricted Play (No Bringing Items / Wanderer Rescue)
- Dungeons within a tier are not ordered from hardest to easiest.
| Difficulty | Type | Dungeon | Notes |
|---|---|---|---|
| Rank 4 (Hard) | Update | Training Path of Gimmicks (50F) | No bringing items. |
| Update | Training Path of Shopping (99F) | No bringing items. | |
| Rank 3 | Base | Training Path of Gimmicks (20F) | No bringing items. |
| Base | Training Path of Shopping (40F) | No bringing items. | |
| Update | Isle of the Mighty (99F) | Bring items from 1 run of Heart. | |
| Base | Isle of the Mighty (50F) | 50F rescue using Wanderer Aids. | |
| DLC | Clash of Weapons and Shields (99F) | Bring items from 1 run of Heart. | |
| DLC | Clash of Weapons and Shields (50F) | 50F rescue using Wanderer Aids. | |
| Rank 2 | Base | Dune of Batsu | No bringing items. |
| Base | Training Path of Gimmicks (20F) | Bring items from Serpentcoil Isle 12F. | |
| Base | Training Path of Shopping (40F) | Bring items from Serpentcoil Isle 12F. | |
| Update | Sumo Dungeon (99F) | No bringing items. | |
| Rank 1 (Easy) | Base | Serpentcoil Island (31F) | No bringing items. |
| Base | Sumo Dungeon (20F) | No bringing items. |
Characters
Playable Character Unlock Chart
- Special playable characters can be used in Sacred Tree Mode.
| Character | Type | Unlock Condition |
|---|---|---|
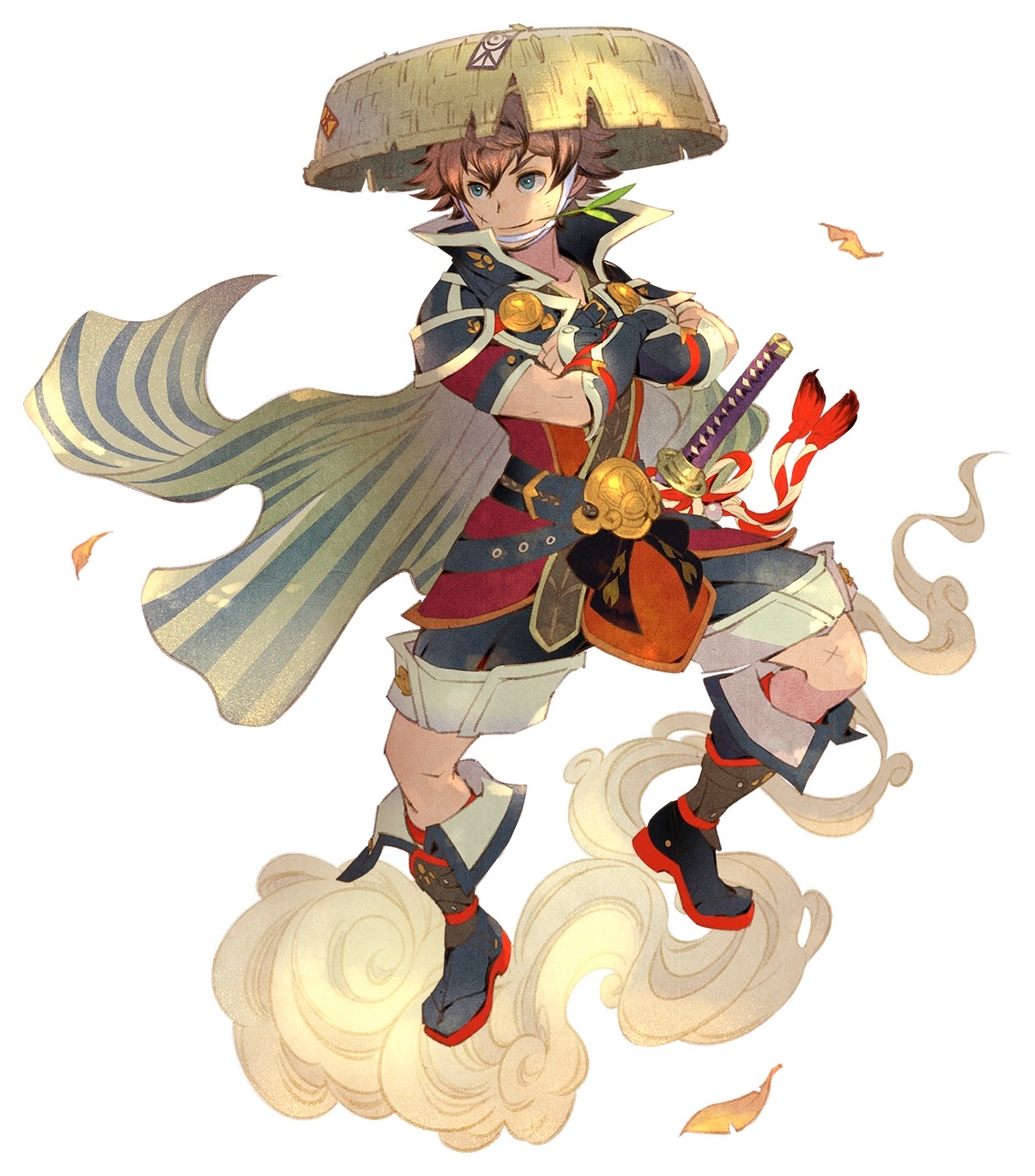
Shiren |
Base | Available from the start. |
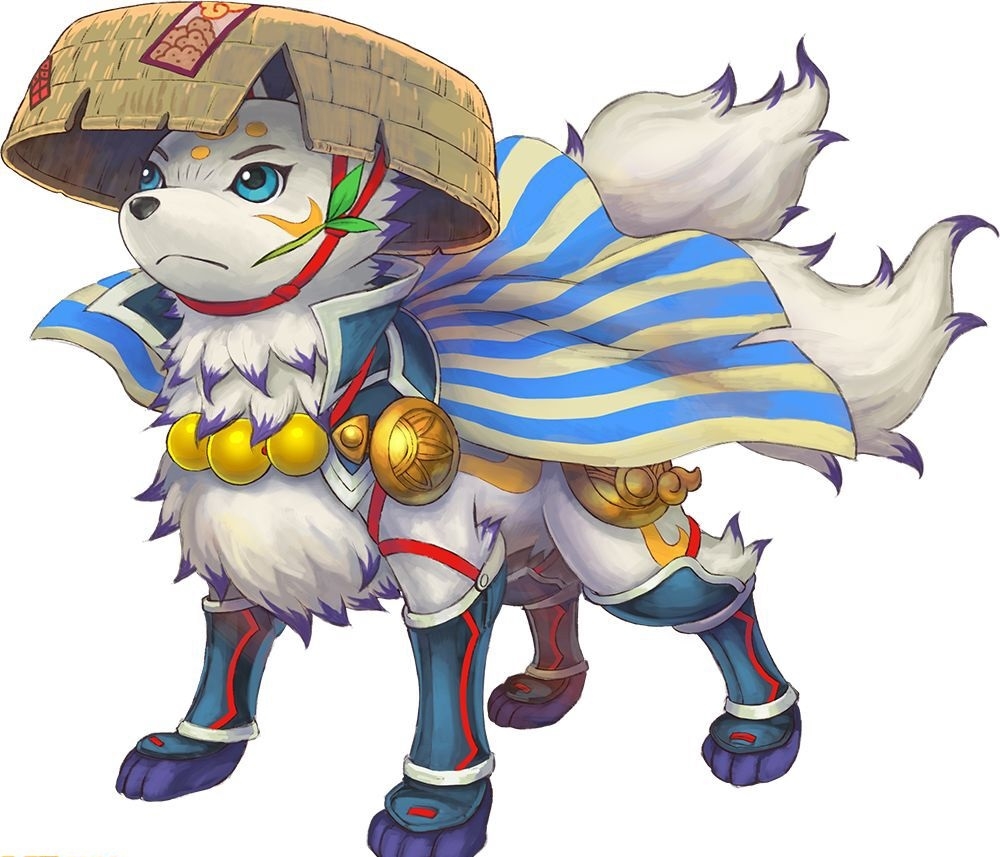
Kokatsu Shiren |
Update | 1. Clear Serpentcoil Island. 2. Clear Dune of Batsu. 3. Clear Cavern of Suiryu. 4. Visit the Sacred Tree in Shukuba Beach. |

Tatsumi Shiren |
Update | 1. Unlock Kokatsu Shiren 2. Visit the Sacred Tree in Shukuba Beach. |

Koppa |
DLC | 1. Unlock Tatsumi Shiren. 2. Event at Mount Jingara Summit. 3. Visit the Sacred Tree in Shukuba Beach. |
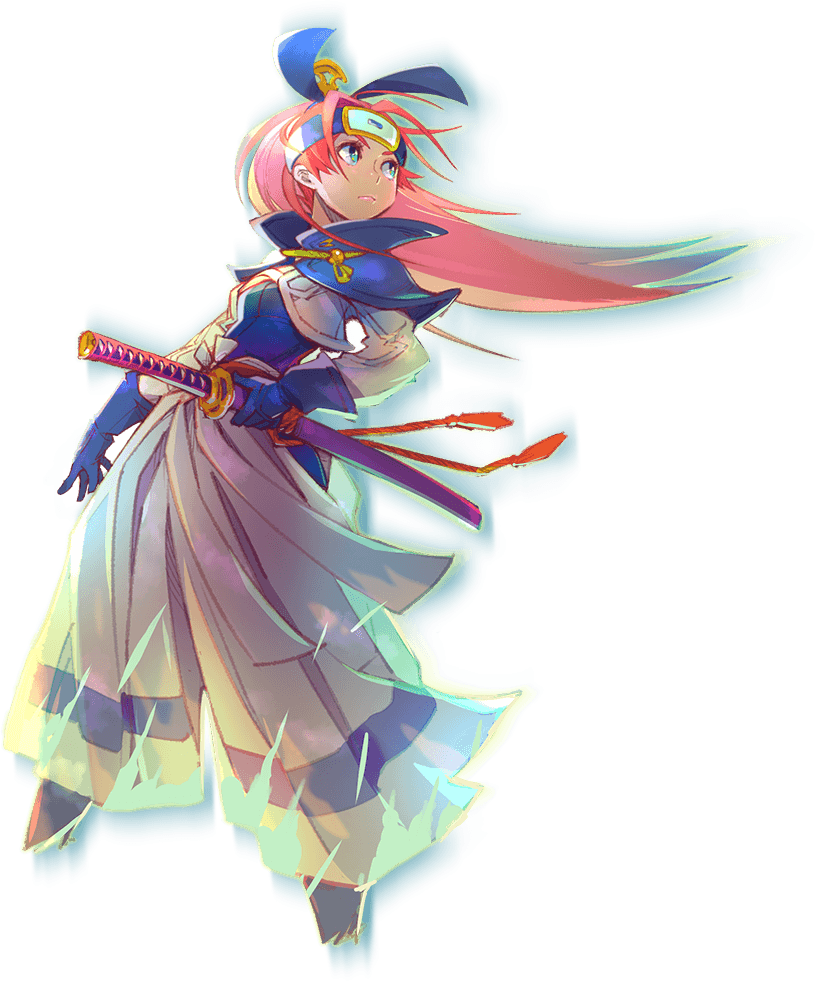
Asuka |
DLC | 1. Go through Peach Bun events and have Asuka join as an ally. 2. Visit the Sacred Tree in Shukuba Beach. |
Get Stronger
Some dungeons expect you to bring strong equipment, so this section helps you get up to speed.
Obtain the Best Equipment
Kabura Sutegi + Rasen Fuuma
Pros / Cons:
- (+) Highest base stats in the game, resonance effect lets you 2-shot Gitan Mamels.
- (−) Must bring 2 Strength Grass if you want to equip 2 bracelets at the start of a dungeon.
- (−) Costs twice the amount of Gitan to fully upgrade starting from Manji Kabura and Fuuma Shield.
Set Stats:
- Weapon: 50 Base Attack (Max: 149 non-sacred, up to 159 sacred).
- Shield: 30 Base Defense (Max: 129 non-sacred, up to 139 sacred).
- Resonance: Your normal attacks deal an additional 10 damage.
How to Obtain:
- Kabura Sutegi = Upgrade a Manji Kabura+99 at the Traveling Blacksmith in Shukuba Beach.
- Rune slots will be set to 15 slots upon transforming the Manji Kabura.
- Rasen Fuuma = Upgrade a Fuuma Shield+99 at the Traveling Blacksmith in Shukuba Beach.
- Rune slots will be set to 15 slots upon transforming the Fuuma Shield.
Yamanba's Cleaver + Yamanba's Potlid
Pros / Cons:
- (+) Resonance effect lets you equip 2 bracelets without bringing Strength Grass.
- (−) Fewer initial rune slots than Kabura Sutegi and Rasen Fuuma, so needs more Slot-adding Scrolls.
- (−) Lower damage output than Kabura Sutegi + Rasen Fuuma.
Set Stats:
- Weapon: 10 Base Attack (Max: 109 non-sacred, up to 119 sacred).
- Shield: 10 Base Defense (Max: 109 non-sacred, up to 119 sacred).
- Resonance: Weapon and shield become cursed, increase strength by 4.
How to Obtain:
- Found in various postgame dungeons.
Upgrade Equipment
The quickest method to upgrade equipment is to use the Traveling Blacksmith in Shukuba Beach 9 times,
then fast-travel to Secret Ninja Village and upgrade 1 time → return to Shukuba Beach from the map.
※ You can return to Shukuba Beach after using the Wagoneer as long as you don't enter a dungeon.
| Method | Count | Total cost to repeat until +99 |
|---|---|---|
| Shukuba Beach + Secret Ninja Village | 9 + 1 | (3,000 x 90 = 270,000) + (1,000 x 9 = 9,000) = 279,000 |
| Only Secret Ninja Village | 1 | 1,000 x 99 = 99,000 |
The total cost is actually slightly less since the blacksmith occasionally upgrades by +3 instead of +1.
Earning Gitan
As you can see in the table above, you'll need a lot of Gitan to fully upgrade equipment.
The best way to earn Gitan is to sell high-value items in a dungeon shop and steal them back.
(See Stealing Guide for safe methods)
Methods to earn Gitan that don't involve stealing:
- Read a Fixer Scroll inside the Shukuba Beach warehouse when your Gitan total is 0.
- Equip a Golden Sword and Golden Shield at the same time, then hunt monsters for Gitan drops.
- Collect lots of Blank Scrolls in Domain of Staves and Scrolls, then sell Eradication Scrolls.
- This becomes more efficient if you've cleared Kiki Island and have unlocked Escape Scrolls.
Synthesize Runes
Finalize your main weapon and shield by synthesizing the best runes.
Slot-adding Scrolls can be used to increase the number of rune slots on an item (max: 30 slots).
Mixergons can be found between 16-30F of Training Path of Shopping, and can eat up to 4 items.
If your equipment isn't strong enough yet, you can go to Serpentcoil Island or Golden Highway instead.
To ensure safety, swing a Peach Staff at a Mixergon and synthesize in the Shukuba Beach warehouse.
Weapon Runes
Feel free to swap runes out depending on your preferences.
*1: Rune is also randomly found on sacred items in Isle of the Mighty.
Shield Runes
Feel free to swap runes out depending on your preferences.
100% Notebook
※ This section needs to be updated.
Rare Entries
See Item Locations for rare item locations.
- Alarm Switch
- Heart of Serpentcoil Island (40~99F?)
- DLC - Clash of Weapons and Shields (1F+), Researcher's Experimental Site (1F+)
- Sacred Item exclusive runes
- Isle of the Mighty or Sacred Ocean Tunnel.
- DLC - Clash of Weapons and Shields
- Peach Buns
- Peach Bun shop in Shukuba Beach (Eat the Peach Bun to also unlock the monster entry).
Adventure Log
Peach Bun Method
Monster entries in the Adventure Log can be filled out by utilizing Peach Buns, such as:
- Go to a floor where the slot for Cave Mamel hasn't been unlocked yet.
- Throw a Cave Mamel Bun at any enemy.
- Swing a Peach Staff at the Cave Mamel, transforming it back into a Peach Bun.
- Check the Adventure Log to confirm that the slot for Cave Mamel is now unlocked on that floor.
This trick is particularly effective for rare encounter slots like Cave Mamel, Mixer, and Chow.
Other Methods
- Monstercall Scroll
- Up to a maximum of 15 or so new monsters are generated when this scroll is read.
- Monstercall Bracelet
- 2 bracelets shortens the interval between monster spawns even further.
- Schubell
- Either step in place and have an enemy Schubell family monster summon new monsters,
or eat a Schubell family monster's Peach Bun and summon new monsters yourself.
- Either step in place and have an enemy Schubell family monster summon new monsters,
- Summoning Trap / Monsterizing Trap
- Step on the trap to generate new monsters.
- For Monsterizing Trap, shoot arrows at a wall inside the room beforehand.
- Clairvoyant Bracelet / Monster-find Bracelet / Mapping Scroll
- Makes it easier to hunt down monsters that spawn.
Monster House Exclusive
Fluffy Bunny (80-89F) in Heart of Serpentcoil Island is currently thought to be Monster House exclusive.
Clear Icons
Colors = Update Required / DLC Required
Achievements
Colors = Update Required / DLC Required
| No | Achievement | In-Game Description | Version |
|---|---|---|---|
| 1 | Serpentcoil Island Completion | Defeated Jakaku and completed Serpentcoil Island. | 1.0.0 |
| 2 | Dune of Batsu Completion | Defeated Embodiment of Batsu and completed Dune of Batsu. | 1.0.0 |
| 3 | Cavern of Suiryu Completion | Defeated Embodiment of Suiryu and completed Cavern of Suiryu. | 1.0.0 |
| 4 | Yamakagashi Pass Completion | Defeated Madara and completed Yamakagashi Pass. | 1.0.0 |
| 5 | Kiki Island Completion | Completed Kiki Island. | 1.0.0 |
| 6 | Training Path of Inference Completion | Completed Training Path of Inference. | 1.0.0 |
| 7 | Training Path of Extra Inference Completion | Completed Training Path of Extra Inference. | 1.0.0 |
| 8 | Peach Dungeon Completion | Completed Peach Dungeon. | 1.0.0 |
| 9 | Sumo Dungeon Completion | Completed Sumo Dungeon. | 1.0.0 |
| 10 | Cat-Ching's Divine Will Completion | Completed Cat-Ching's Divine Will. | 1.0.0 |
| 11 | Trapper's Secret Path Completion | Completed Trapper's Secret Path. | 1.0.0 |
| 12 | Training Path of Gimmicks Completion | Completed Training Path of Gimmicks. | 1.0.0 |
| 13 | Training Path of Shopping Completion | Completed Training Path of Shopping. | 1.0.0 |
| 14 | Behemoth Rush Completion | Completed Behemoth Rush. | 1.0.0 |
| 15 | Sacred Ocean Tunnel Completion | Completed Sacred Ocrean Tunnel. | 1.0.0 |
| 16 | Domain of Staves and Scrolls Completion | Completed Domain of Staves and Scrolls. | 1.0.0 |
| 17 | Isle of the Mighty Completion | Completed Isle of the Mighty. | 1.0.0 |
| 18 | Heart of Serpentcoil Island Completion | Completed Heart of Serpentcoil Island. | 1.0.0 |
| 19 | Go Go Dungeon Completion | Completed Go Go Dungeon. | 2.0.1 |
| 20 | Wanderers' Highway Completion | Completed Wanderers' Highway. | 2.0.1 |
| 21 | Quietude of Serpentcoil Island Completion | Completed Quietude of Serpentcoil Island. | 2.0.1 |
| 22 | Training Path of Hiding Completion | Completed Training Path of Hiding. | 2.1.1 |
| 23 | Cliff of Condensing Completion | Completed Cliff of Condensing. | 2.1.1 |
| 24 | Wild Monster Path Completion | Completed Wild Monster Path. | 2.1.1 |
| 25 | Forest of Frugality Completion | Completed Forest of Frugality. | 2.0.1 |
| 26 | Researcher's Experimental Site Completion | Completed Researcher's Experimental Site. | 2.0.1 |
| 27 | Winding Valley Completion | Completed Winding Valley. | 2.0.1 |
| 28 | Clash of Weapons and Shields Completion | Completed Clash of Weapons and Shields. | 2.0.1 |
| 29 | Peachy Trap Domain Completion | Completed Peachy Trap Domain. | 2.0.1 |
| 30 | Training Path of Deadly Strikes Completion | Completed Training Path of Deadly Strikes. | 2.1.1 |
| 31 | Battleground of the Rivals Completion | Completed Battleground of the Rivals. | 2.1.1 |
| 32 | Timeworn Cave Completion | Completed Timeworn Cave. | 2.1.1 |
| 33 | Floral Garden Completion | Completed Floral Garden. | 2.1.1 |
| 34 | Soul of Serpentcoil Island Completion | Completed Soul of Serpentcoil Island. | 2.1.1 |
| 35 | Sumo-ready! | Experienced the Sumo condition. | 1.0.0 |
| 36 | Wish Granted | Reached the Tunnel of Wishes. | 1.0.0 |
| 37 | Blue Sacred Gear | Brought back a Blue Sacred item. | 1.0.0 |
| 38 | Golden Sacred Gear | Brought back a Golden Sacred item. | 1.0.0 |
| 39 | Cannon Master | Defeated a monster in a dungeon with a cannon. | 1.0.0 |
| 40 | Way of Gitau | Took the shop's wares and managed to escape. | 1.0.0 |
| 41 | Trusty Companions | Recruited all companions. | 1.0.0 |
| 42 | Seasoned Wanderer | Completed Kron's challenge. | 1.0.0 |
| 43 | Behemoth Vanquished! | Defeated a Behemoth. | 1.0.0 |
| 44 | Grilled to Perfection! | Had an Onigiri grilled. | 1.0.0 |
| 45 | How Did You Know?! | Attacked a Ninja in hiding. | 1.0.0 |
| 46 | Cooking in the Wild | Made a Hen into Yakitori. | 1.0.0 |
| 47 | Don't Overdo Your Diet | Collapsed due to starvation. | 1.0.0 |
| 48 | Don't Overstay in the Dungeon | Had a gust send you back to Shukuba Beach. | 1.0.0 |
| 49 | Immediate Danger! | Got thrown into a Monster House. | 1.0.0 |
| 50 | Awwww, How Cute! | Became friendly with a monster pup. | 1.0.0 |
| 51 | Rejoined by Fate | Bought back your weapon or shield at an Unsuspicious Shop. | 1.0.0 |
| 52 | First Successful Rescue | Succeeded in rescuing a Wanderer. | 1.0.0 |
| 53 | Invitation to a Parallel World *1 | Uploaded Parallel Data. | 1.0.0 |
| 54 | Journey to a Parallel World | Went on a Parallel Play adventure. | 1.0.0 |
| 55 | First Gear on the Rack | Hung a weapon or shield on the Gear Rack. | 2.0.1 |
| 56 | Weapon Collector | Completed the Weapon listing in the Item Notes. | 1.0.0 |
| 57 | Shield Collector | Completed the Shield listing in the Item Notes. | 1.0.0 |
| 58 | Bracelet Appraiser | Completed the Bracelet listing in the Item Notes. | 1.0.0 |
| 59 | Arrow Collector | Completed the Arrow listing in the Item Notes. | 1.0.0 |
| 60 | Rock Collector | Completed the Rock listing in the Item Notes. | 1.0.0 |
| 61 | Gourmet | Completed the Food listing in the Item Notes. | 1.0.0 |
| 62 | Vegetarian | Completed the Grass listing in the Item Notes. | 1.0.0 |
| 63 | Scroll Collector | Completed the Scroll listing in the Item Notes. | 1.0.0 |
| 64 | Master of Staves | Completed the Stave listing in the Item Notes. | 1.0.0 |
| 65 | Fragrance Expert | Completed the Incense listing in the Item Notes. | 1.0.0 |
| 66 | Pottery Aficionado | Completed the Pot listing in the Item Notes. | 1.0.0 |
| 67 | Peach Bun Lover | Completed the Peach Bun listing in the Item Notes. | 1.0.0 |
| 68 | Monster Whiz | Completed the Monster Notes. | 1.0.0 |
| 69 | Dojo Conqueror | Completed all Dojo Challenges at Monster Dojo. | 1.1.0 |
| 70 | Quick-witted | Completed a Sacred Tree dungeon in a Countdown Trial. | 1.1.0 |
| 71 | Most Efficient Moves | Completed a Sacred Tree dungeon in a Turn Trial. | 1.1.0 |
| 72 | Fastest Run | Completed a Sacred Tree dungeon in a Time Trial. | 1.1.0 |
| 73 | Proven Expert | Completed a Sacred Tree dungeon in a Challenge Trial. | 1.1.0 |
| 74 | A Monster's Life | Completed a Sacred Tree dungeon in a Monster Trial. | 1.1.0 |
| 75 | Tale of the Burning Sand | Completed a Sacred Tree dungeon as Kokatsu Shiren. | 1.1.0 |
| 76 | Dragon God's Frolic | Completed a Sacred Tree dungeon as Tatsumi Shiren. | 1.2.0 |
| 77 | Ferret's Feat | Completed a Sacred Tree dungeon as Koppa. | 2.0.1 |
| 78 | Bladedancing Swordswoman | Completed a Sacred Tree dungeon as Asuka. | 2.1.1 |
*1 Requires an internet connection.
Speedrunning
Interested in competing for world records? Check out the Shiren 6 page on speedrun.com.


