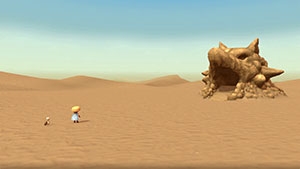
Dune of Batsu
Overview
| Unlock | Clear Serpentcoil Island 2 times → a few days later. |
|---|---|
| Entrance | Shukuba Beach (From the docks). |
| Floors | 30F | ||
|---|---|---|---|
| Bring Items | Yes | Stairs | Descending |
| Companions | Yes | Roamers | Yes |
| Rescues | 3 | Starting Level | Lv1 |
| Starting Item | Large Onigiri | ||
| Unidentified | Equipment, Grass, Scrolls, Staves, Pots | ||
| Shops | Yes | Monster Houses | Yes (Regular, Sudden, Special) |
| Behemoths | Yes | Wishing Shrines | Yes |
| Kron's Challenge | Yes | Fever Time | Yes |
| Initial Enemies | 4~7 | Spawn Rate | 30 Turns |
| Wind (1st Gust) | 900 Turns | Reward | Unlock Cavern of Suiryu. |
Postgame story dungeon with a boss fight that fully expects the average player to bring items.
It starts out on the mild side, but quickly introduces monsters capable of ruining inventory items.
In addition, Special Monster Houses can be generated, so runs can end fast if you're underprepared.
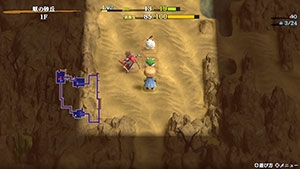
Hallways are dark the entire time, and all item categories are found unidentified except for incenses.
Overall, it's a dungeon with a great atmosphere which can be fun to attempt without bringing items.
Navigation
Strategy
General Advice (Anything Goes)
A good weapon and shield goes without saying - aim for 20 or higher for equipment strength.
You'll also want items to deal with Monster Houses, since Special Monster Houses can be generated.
Those would be items like Confusion Scroll, Vaulting or Switching staves, Swift or Invincible grass, etc.
Monster-find Bracelet is also nice to avoid surprise attacks in dark hallways by monsters explained below.
And of course, you'll need some strong items to help against the boss fight at the end.

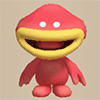
 Nigiri Baby (2-5F), Nigiri Morph (9-13F), Nigiri Boss (24-29F)
The first two transform non-equipped items into Large Onigiri, and the third inflicts Onigiri status.
Losing a Preservation Pot full of important items can be very devastating for the adventure of course,
but worse is that you'll insta-collapse if you take fire or explosion damage while you have Onigiri status,
and Sky Dragon who spews fire at you from anywhere in the room overlaps with Nigiri Boss on 24-27F.
The best counter is to synthesize the Nigiriproof rune into your shield to nullify their special attack,
but Nigiri Stopper can't be found in the main story dungeon so you're unlikely to have that rune yet.
Monster-find Bracelet prevents getting surprised by a Nigiri Baby type's special attack in a dark hallway,
and other items (arrows, staves, etc.) can be used to slay or disable them before they can act.
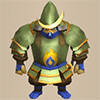
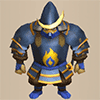 Swordsman (11-20F), Fencer (26-29F)
These monsters disarm and knock away your equipped items, with the item category varying by level.
Swordsman can only disarm your equipped shield, but Fencer can disarm either your weapon or shield.
The disarmed item is lost if it hits a character or if you had Far-throwing status via a trap or bracelet,
and the only way to reclaim it is to buy it back from the Unsuspicious Shop in Shukuba Beach.
There isn't a shield rune to nullify this special attack, but Affixing Bracelet keeps you safe.
 Super Gazer (8-23F)
These monsters appeared in the main story dungeon, but are dangerous enough to mention again.
One of the possible actions Gazer's hypnosis can force is throwing an item - including equipped items.
The item is lost if you throw your equipped item at a character, similar to Swordsman's situation.
Gazer can also make you insert equipped items into pots, including Cashing Pot or Transmutation Pot.
It's best to synthesize Hypnosisproof - Gazer Shield can be found in the main story dungeon.
General Advice (No Bringing Items / No Travel Companions)
Clearing this dungeon without bringing items or Travel Companions is challenging but doable,
but don't expect to clear it with these restrictions if all you've done so far is clear the main story.
You should be able to clear a dungeon like Yamakagashi Pass before attempting this restriction.
Mixers don't appear until 21-23F, so don't expect to be able to synthesize and upgrade gear early on.
Mid Chintala (4-7F) and Fierous (5-10F) are easily the early game "wall monsters" for this challenge.
Fierous in particular almost requires activating Sumo status using Nigiri Baby (2-5F) just to survive.
This wiki calls the technique of having Nigiri Baby turn unneeded items into onigiri "Nigiri Morph Factory".
Arrows should be collected from Bowboy or Crossbowboy between 5-7F, with 6F being the safest.
If you find a Poison Arrow Trap, be sure to throw rocks onto the trap to collect Poison Arrows,
since a single Poison Arrow reduces a monster's attack power by 50% in this game.
Some players like to shoot arrows in dark hallways to check for incoming enemies.
The monster table can feel relentless, but remember that the goal isn't to fully explore every floor.
Once you've determined that you have enough items for the boss, switch to rushing to the stairs.
Special Monster Houses
Special Monster Houses often feature enemies outside of the regular monster table.
What makes them so dangerous is that they've been sighted as early as 3F, yet can have Lv3-4 monsters,
meaning you can end up having to face a Gitan Mamel, Archdragon, Steadfast Tank, etc. at a low level.
Bring plenty of items for Monster Houses in case you run into these during your run.
Important Items
 Weapon & Shield
Primal Axe, Drain Slayer
Deals x1.5 damage to Beast and Draining type monsters, respectively.
These 2 monster types are very common from 24F onwards, and the boss is also a Beast type.
Gazer Shield
Super Gazer appears between 8-23F, so this shield (or rune) is a top priority.
Without it, you risk losing items by running into Super Gazers in dark hallways or such.
Dragon Shield
Reduces normal attack and fire damage received by 50% from Dragon types.
Dragon types are common here, including Shagga, Floor Dragon, and Dragon families.
 Bracelets
Monster-find Bracelet, Clairvoyant Bracelet, Affixing Bracelet
You'll want one of these bracelets to avoid losing equipped items to Swordsman family monsters.
Of the three, Monster-find Bracelet is the most likely one players will have at this point.
Trapper's Bracelet
Consider bringing this bracelet if you cleared Trapper's Secret Path beforehand.
Reveals hidden traps, and lets you pick them up and set them down to ensnare enemies.
 Projectiles
Rock, Porky's Rock
A single rock arcs above a Behemoth Monster's barrier and one-shots it, even from the front.
However, keep in mind that rocks can miss - don't risk it when adjacent to a Behemoth Monster.
 Food
Food
Sumo Onigiri
Consider bringing these onigiri if you cleared Sumo Dungeon beforehand.
Replenishes Fullness to max, increases Max Fullness to 150, and activates Sumo status.

 Miscellaneous
Blank Scroll, Sweet Potato, Blurry Incense
Bring at least 1 of these so that you can deal with a Special Monster House if needed.
Invincible Grass, Swift Grass, Power-up Grass, Water Gun Pot, Heat-ban Incense
Powerful items that should be saved for the boss fight if at all possible.
In particular, Water Gun Pot or Heat-ban Incense mostly makes the boss deal 0 damage to you,
so it's worth carrying it to the end even if you find the item as early as 1F.
Floor Guide
1-4F
Monsters are weak, so you shouldn't have issues until the end of 3F even if you didn't bring items.
Shagga (1-3F) might be intimidating if you played Shiren 5, but it's actually a pushover in this game.
Identify staves right away so that you can use them without guessing in trickier situations.
Unlike previous games in the series, Nigiri Baby (2-5F) can transform items into Large Onigiri.
Normal attacks can miss, so use staves against Nigiri Baby when adjacent if you brought valuable items.
No Carry-In Tips #1
Hell Reaper (4-6F) has Swift 2 speed and can be rough if you haven't found a decent shield.
Mid Chintala (4-7F) also hits hard, but Fierous (5-10F) is way worse, so try to conserve items on 4F.
To have the best chance of surviving from 4F onwards, aim for one or more of the following:
- Find a High base value weapon and shield (luck-dependent).
- Activate Sumo status (perform Nigiri Morph Factory using Nigiri Baby).
- Create Cave Mamels and hunt them to level up (item-dependent, Lv20 is ideal).
- Recruit a Travel Companion (if you aren't restricting their usage).
Monster Stats (1-4F)
| Floor | Monster | HP | Atk | Def | Exp | Type |
|---|---|---|---|---|---|---|
| 1-3 | Mamel | 8 | 3 | 4 | 2 | Normal |
| 1-3 | Shagga | 18 | 6 | 4 | 12 | Dragon |
| 1-3 | Chintala | 15 | 9 | 4 | 12 | Beast |
| 1-6 | Pit Mamel | 11 | 5 | 8 | 5 | Normal |
| 1-6 | Hat Urchin | 16 | 5 | 3 | 10 | Cyclops |
| 2-3 | Death Reaper | 22 | 6 | 5 | 9 | Ghost/Floating |
| 2-5 | Nigiri Baby | 17 | 8 | 2 | 11 | Normal |
| 4-6 | Hell Reaper | 45 | 12 | 15 | 30 | Ghost/Floating |
| 4-7 | Mid Chintala | 45 | 23 | 10 | 27 | Beast |
5-6F
Monsters are still easy to deal with if you brought upgraded gear, but otherwise it gets tricky.
Fierous (5-10F) is stronger than Mid Chintala (4-7F), and is immune to projectiles that don't pierce.
Piercing projectiles include Silver Arrows or items shot or thrown while you have Far-throwing status,
so basically you likely won't be able to chip away at a Fierous's HP from a distance.
Bowboy (5-7F) and Crossbowboy (5-7F) can be used to collect Wooden Arrows or Iron Arrows.
It's best to do this on 6F to avoid overlapping with either Nigiri Baby (2-5F) or Field Knave (7-9F).
Collecting methods include Evasive Incense, Earthmound Staff, and rooms that have 1-tile pillars.
No Carry-In Tips #2
Fierous is very tough to deal with, so you should activate Sumo status using Nigiri Baby (2-5F).
For reference, Sumo status grants the following effects:
- Max HP +50.
- x1.5 damage multiplier.
- Immunity to traps and tripping (traps you step on simply break).
- Ability to dig through walls (weapon upgrade value won't decrease).
- Movement related effects are nullified (Switching Staff, Tiger Thrower, etc.)
- Hunger rate is doubled (1 Fullness/5 Turns).
Monster Stats (5-6F)
| Floor | Monster | HP | Atk | Def | Exp | Type |
|---|---|---|---|---|---|---|
| 1-6 | Pit Mamel | 11 | 5 | 8 | 5 | Normal |
| 1-6 | Hat Urchin | 16 | 5 | 3 | 10 | Cyclops |
| 2-5 | Nigiri Baby | 17 | 8 | 2 | 11 | Normal |
| 4-6 | Hell Reaper | 45 | 12 | 15 | 30 | Ghost/Floating |
| 4-7 | Mid Chintala | 45 | 23 | 10 | 27 | Beast |
| 5-7 | Bowboy | 45 | 17 | 18 | 60 | Normal |
| 5-7 | Crossbowboy | 55 | 20 | 20 | 80 | Normal |
| 5-10 | Fierous | 60 | 25 | 22 | 55 | Normal |
7-10F
Behemoth Gates have a chance of being generated on 7-10F.
Possible Behemoth Monsters include Nashagga, Curse Girl, Hat Urchin, and Firepuff.
Claim the reward quickly if you decide to make the gate vanish, since Field Knave (7-9F) is around.
This monster roams around and transforms items found on the ground into Weeds.
Curse Girl (7-10F), Super Gazer (8-23F), Nigiri Morph (9-12F), and Brodillo (9-16F) also appear.
It's best to avoid using Handy Dash, since it can put you into a bad situation depending on your settings.
Super Gazer hypnotizes Shiren, forcing him to either attack in a random direction or use an item.
Nigiri Morph's special attack has a 100% success rate at turning an inventory item into a Large Onigiri.
Beware of Brodillo if you don't have Sumo status or a Balance Staff, since dropped pots can break.
Curse Girl only curses equipped shields, so she's not a problem unless you want to synthesize.
Use 100% accuracy options like staves or scrolls to disable Super Gazer or Nigiri Morph when adjacent,
and if there's distance between the two of you, shoot arrows or use
 Frontal Attack around a corner.
It's fine to just use normal attacks if you have
 Hypnosisproof and
 Nigiriproof shield runes.
Monster Stats (7-10F)
| Floor | Monster | HP | Atk | Def | Exp | Type |
|---|---|---|---|---|---|---|
| 4-7 | Mid Chintala | 45 | 23 | 10 | 27 | Beast |
| 5-7 | Bowboy | 45 | 17 | 18 | 60 | Normal |
| 5-7 | Crossbowboy | 55 | 20 | 20 | 80 | Normal |
| 5-10 | Fierous | 60 | 25 | 22 | 55 | Normal |
| 7-9 | Field Knave | 50 | 15 | 16 | 120 | Normal |
| 7-10 | Curse Girl | 65 | 28 | 28 | 180 | Normal |
| 7-10 | Floor Dragon | 55 | 25 | 20 | 80 | Dragon |
| 8 | Dark Owl | 90 | 16 | 25 | 120 | Normal |
| 8-12 | Ghost Radish | 40 | 18 | 15 | 49 | Ghost |
| 8-13 | Polygon Shaka | 70 | 34 | 33 | 360 | Draining |
| 8-23 | Super Gazer | 66 | 30 | 26 | 222 | Cyclops |
| 9-12 | Metalhead | 66 | 30 | 19 | 61 | Cyclops |
| 9-12 | Nigiri Morph | 88 | 35 | 30 | 255 | Normal |
| 9-16 | Brodillo | 70 | 36 | 38 | 450 | Beast |
| 10-13 | Porko | 65 | 36 | 18 | 840 | Beast |
11-20F
Swordsman (11-20F) can disarm your equipped shield, sending it flying 10 tiles behind you.
The disarmed shield is lost if it hits a foe or if you had Far-throwing status via a trap or bracelet,
so the best counter is to keep an Affixing Bracelet equipped at all times.
Otherwise, Pumpanshee (11-20F)'s ability to pass through walls can be a menace in dark hallways,
and N'dulu (13F) disguises itself as an item on the ground and attacks when you try to use the item.
N'dulu in your inventory are automatically identified when you advance to the next floor.
If you notice that the game suddenly feels a bit sluggish, it's probably due to Corporal Ant (11-20F).
The Soldier Ant monster family likes to roam around the floor and endlessly dig out wall tiles.
Monster Stats (11-20F)
| Floor | Monster | HP | Atk | Def | Exp | Type |
|---|---|---|---|---|---|---|
| 8-12 | Ghost Radish | 40 | 18 | 15 | 49 | Ghost |
| 8-13 | Polygon Shaka | 70 | 34 | 33 | 360 | Draining |
| 8-23 | Super Gazer | 66 | 30 | 26 | 222 | Cyclops |
| 9-12 | Metalhead | 66 | 30 | 19 | 61 | Cyclops |
| 9-12 | Nigiri Morph | 88 | 35 | 30 | 255 | Normal |
| 9-16 | Brodillo | 70 | 36 | 38 | 450 | Beast |
| 10-13 | Porko | 65 | 36 | 18 | 840 | Beast |
| 11-13 | Muddy | 75 | 25 | 33 | 230 | Draining/Aquatic |
| 11-20 | Swordsman | 77 | 30 | 25 | 122 | Normal |
| 11-20 | Corporal Ant | 100 | 40 | 20 | 220 | Normal |
| 11-20 | Pumpanshee | 60 | 35 | 22 | 250 | Ghost/Floating |
| 11-20 | Tiger Thrower | 68 | 26 | 22 | 77 | Beast |
| 11-23 | Skull Mage | 77 | 31 | 21 | 210 | Ghost |
| 11-26 | Egg Thing | 5 | 2 | 14 | 7 | Cyclops |
| 13 | N'dulu | 70 | 40 | 31 | 230 | Metal |
| 13 | Dark Owl | 90 | 16 | 25 | 120 | Normal |
| 14-20 | Schubell | 50 | 20 | 20 | 100 | Normal |
| 17-23 | Daze Radish | 80 | 37 | 27 | 400 | Ghost |
21-23F
Behemoth Gates have a chance of being generated on 21-23F.
Possible Behemoth Monsters include Nashagga, Curse Girl, Hat Urchin, and Firepuff.
Claim the reward quickly if you decide to make the gate vanish, since Pot Knave (21-23F) is around.
This monster throws Weeds into open pots in your inventory, but can't parry inventory items yet,
so your items are safe except for incenses as long as you don't place them on the ground.
If a Dragon (21-23F) hits a Blazeous (21-23F) with its flame, the Blazeous will level up.
A Lv3 Igneous (165 HP, 56 atk, 45 def) is far stronger than a Lv2 Blazeous (92 HP, 36 atk, 24 def),
so pay close attention to character positioning when you're inside a room.
Mixer (21-23F) can spawn only if you've finished the Synthesis unlock side quest.
Monster Stats (21-23F)
| Floor | Monster | HP | Atk | Def | Exp | Type |
|---|---|---|---|---|---|---|
| 8-23 | Super Gazer | 66 | 30 | 26 | 222 | Cyclops |
| 11-23 | Skull Mage | 77 | 31 | 21 | 210 | Ghost |
| 11-26 | Egg Thing | 5 | 2 | 14 | 7 | Cyclops |
| 17-23 | Daze Radish | 80 | 37 | 27 | 400 | Ghost |
| 21-23 | Mixer | 78 | 39 | 29 | 280 | Normal |
| 21-23 | Dragon | 120 | 45 | 40 | 1000 | Dragon |
| 21-23 | Blazeous | 92 | 36 | 24 | 150 | Normal |
| 21-23 | Pot Knave | 65 | 35 | 25 | 300 | Normal |
| 21-23 | Dragon Head | 88 | 31 | 25 | 266 | Dragon |
24-29F
The primary danger zone of this dungeon (especially 24-27F).
Nigiri Boss (24-29F) inflicts Onigiri status instead of transforming items into Large Onigiri.
Onigiri status prevents item usage and nullifies the effects of any equipped items for 10 turns.
If you get hit by Sky Dragon (24-27F)'s flame while you have Onigiri status, you'll instantly collapse.
Sky Dragon spews flames from anywhere in the same room, so beware of large rooms in particular.
Skull Wizard (24-27F) can inflict Confused status from a distance, so remember to Look Around in rooms.
Fencer (26-29F) disarms your weapon or shield - check for traps as you walk to the item if you get disarmed.
Porkon (27-30F) is a menace with its 75 attack power and Porky's Rock throwing range of 8 tiles.
Draining types include Polygon Singa (24-26F), Floppy Hani (25-29F), and Vile Scorpion (24-29F).
Polygon Singa lowers Max Fullness by 7 when adjacent, making it harder to activate or maintain Sumo status.
Floppy Hani lowers level by 1 when adjacent, which can be countered with a Fortune Bracelet.
Vile Scorpion lowers Current Strength by 2 when adjacent, reducing your damage output.
Monster Stats (24-29F)
| Floor | Monster | HP | Atk | Def | Exp | Type |
|---|---|---|---|---|---|---|
| 11-26 | Egg Thing | 5 | 2 | 14 | 7 | Cyclops |
| 24-26 | Polygon Singa | 129 | 40 | 40 | 445 | Draining |
| 24-27 | Lashagga | 99 | 43 | 34 | 500 | Dragon |
| 24-27 | Sky Dragon | 140 | 55 | 50 | 1600 | Dragon |
| 24-27 | Captain Ant | 110 | 55 | 39 | 440 | Normal |
| 24-27 | Skull Wizard | 88 | 35 | 24 | 250 | Ghost |
| 24-29 | Cursister | 115 | 38 | 38 | 380 | Normal |
| 24-29 | Pumplich | 100 | 50 | 30 | 800 | Ghost/Floating |
| 24-29 | Nigiri Boss | 133 | 45 | 42 | 555 | Normal |
| 24-29 | Vile Scorpion | 108 | 45 | 33 | 500 | Draining |
| 24-30 | Steamroid | 100 | 45 | 48 | 333 | Metal |
| 25 | Dark Owl | 90 | 16 | 25 | 120 | Normal |
| 25-29 | Floppy Hani | 85 | 39 | 39 | 390 | Draining |
| 25-30 | Tiger Hurler | 135 | 50 | 45 | 800 | Beast |
| 26-29 | Fencer | 140 | 49 | 48 | 1000 | Normal |
| 27-30 | Thrashead | 122 | 55 | 45 | 1100 | Cyclops |
| 27-30 | Porkon | 150 | 75 | 50 | 1800 | Beast |
Boss (30F)
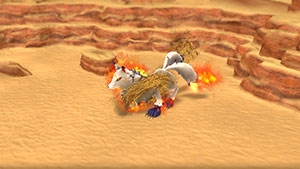
Embodiment of Batsu (888 HP, 52 atk, 30 def) is a Beast type monster, so Primal Axe deals x1.5 damage.
Status conditions can be inflicted, but they get cured in roughly 2~4 turns depending on the status.
Sanctuary Scroll and Knockback Staff do not work, Paralyzing Staff and Narrow-escape Staff do work.
It's immune to Dragon Grass, and projectiles burn up and get nullified unless they pierce.
Water Gun Pot lowers its attack power to 1 until it uses its Charge Attack.
Special attacks:
- Flame Attack (2 tiles ahead)
- Deals 20~30 damage when you have a shield with 30 defense.
- Charge Attack (3 tile radius)
- Cures bad status conditions including Weakened status, then deals 80~100 damage.
- This seems to be fixed damage, since the damage is the same without a shield.
- Cures bad status conditions including Weakened status, then deals 80~100 damage.
- Sandstorm (anywhere)
- Creates sand pillars on the field.
- The boss can walk through these pillars while destroying them.
- Creates sand pillars on the field.
- Howl (anywhere)
- Summons 3 monsters from the floor's monster table.
Other notes:
- The fight begins with no other monsters on the field.
- Expect to deal around 44~55 damage per direct attack at Lv30 with a weapon strength of 30.
- This calculates out to roughly 17~21 direct attacks to defeat it.
- Silver Arrows deal ~20 damage when Shiren is Lv30 and has 8 strength.
- The arrows don't break sand pillars even with piercing properties.
- Swift Grass, Power-up Grass, and Invincible Grass are fantastic.
- Aggressive Incense can be paired with Invincible Grass to quickly deal massive damage.
- The boss is immune to Explosion Trap, and gets cured of bad status conditions instead.
- Empathetic Staff can be used to supplement damage if your damage output is low.
- Slumber Scroll doesn't increase the action speed of the boss afterwards.
Monster Stats (30F)
| Floor | Monster | HP | Atk | Def | Exp | Type |
|---|---|---|---|---|---|---|
| 30 | Embodiment of Batsu | 888 | 52 | 30 | 0 | Beast |
| 24-30 | Steamroid | 100 | 45 | 48 | 333 | Metal |
| 25-30 | Tiger Hurler | 135 | 50 | 45 | 800 | Beast |
| 27-30 | Thrashead | 122 | 55 | 45 | 1100 | Cyclops |
| 27-30 | Porkon | 150 | 75 | 50 | 1800 | Beast |
| 30 | Bashagga | 154 | 55 | 40 | 950 | Dragon |
Monsters
See Monsters for individual monster details.
- F - Dark hallways, Boss Floor
- S - Shop is possible
- M - Monster House is possible
- W - Wishing Shrine is possible
- B - Behemoth Gate is possible
Monster Colors = Farming, Useful, Lowers Stats, Targets Items, Dangerous
Behemoths
| F | Behemoth Monsters | ||||
|---|---|---|---|---|---|
| 7-10 21-23 27-29 |
 Nashagga
 |
 Curse Girl
 |
 Hat Urchin
 |
 Firepuff
 |
|
Items
※ This section is currently incomplete.
Item Table Key
| ID | Explanation |
|---|---|
| F | Floor |
| S | Shop |
| P | Peddler |
| M | Monster drop |
| B | Buried |
| H | Thiefwalrus |
| I | Island |
| T | Transmutation Pot |
| U | Surprise Pot |
| W | Tunnel of Wishes |
 Weapon
| Weapon | ||||||||||
|---|---|---|---|---|---|---|---|---|---|---|
| Name | F | S | P | M | B | H | I | T | U | W |
| Wooden Sword | ||||||||||
| Bronze Sword | X | |||||||||
| Katana | X | X | X | |||||||
| Doutanuki | X | |||||||||
| Manji Kabura | ||||||||||
| Kajin Fuuma | ||||||||||
| Kabura Sutegi | ||||||||||
| Golden Sword | X | X | ||||||||
| Kama Itachi | X | X | ||||||||
| Axe of the Minotaur | ||||||||||
| Accurate Sword | ||||||||||
| Swift Sword | X | X | X | |||||||
| Watersplitter | X | |||||||||
| Primal Axe | X | |||||||||
| Dragonkiller | ||||||||||
| Crescent Blade | X | |||||||||
| Sky Sword | X | X | ||||||||
| Sickle of Salvation | X | |||||||||
| Drain Slayer | X | |||||||||
| Cyclops Bane | X | |||||||||
| Steel Severer | X | X | ||||||||
| Whopping Harisen | X | |||||||||
| Healing Sword | ||||||||||
| Peach Club | ||||||||||
| Spender's Club | X | |||||||||
| Ferrous Greatsword | X | |||||||||
| Steak Knife | ||||||||||
| Jagged Sword | X | |||||||||
| Quad-edge | X | |||||||||
| Auspicious Kumade | ||||||||||
| Pickaxe | X | |||||||||
| Golden Pickaxe | ||||||||||
| Wooden Mallet | ||||||||||
| Epic Hammer | ||||||||||
| Trapseeker | X | |||||||||
| Bonito Block | X | X | ||||||||
| Yamanba's Cleaver | X | X | ||||||||
| Break-Off Blade | X | |||||||||
 Shield
| Shield | ||||||||||
|---|---|---|---|---|---|---|---|---|---|---|
| Name | F | S | P | M | B | H | I | T | U | W |
| Wooden Shield | X | |||||||||
| Bronze Shield | X | X | X | |||||||
| Iron Shield | X | X | ||||||||
| Wolfshead | X | X | X | |||||||
| Fuuma Shield | X | X | X | |||||||
| Rasen Fuuma | ||||||||||
| Golden Shield | X | |||||||||
| Counter Shield | X | |||||||||
| Watchful Shield | X | |||||||||
| Dragon Shield | X | X | ||||||||
| Blast Shield | ||||||||||
| Targe of the Minotaur | ||||||||||
| Walrus Stopper | X | |||||||||
| Froggo Stopper | X | |||||||||
| Hat Stopper | X | |||||||||
| Nigiri Stopper | ||||||||||
| Spearscale Shield | X | |||||||||
| Kappa's Dish | ||||||||||
| Gazer Shield | X | |||||||||
| Shield of Negation | X | |||||||||
| Unmoving Wall | X | |||||||||
| Zabuton | ||||||||||
| Spender's Shield | X | |||||||||
| Ferrous Kite | X | X | ||||||||
| Steak Plate | ||||||||||
| Gutsy Shield | X | |||||||||
| Hunky-dory Shield | X | |||||||||
| Bodhi Shield | ||||||||||
| Shield of Sating | X | X | ||||||||
| Auspicious Omamori | ||||||||||
| Shield of Presage | ||||||||||
| Yamanba's Potlid | X | X | ||||||||
| Break-Off Shield | X | X | X | X | ||||||
 Bracelet
| Bracelet | ||||||||||
|---|---|---|---|---|---|---|---|---|---|---|
| Name | F | S | P | M | B | H | I | T | U | W |
| Healing Bracelet | ||||||||||
| Strength Bracelet | X | |||||||||
| Bellyexpand Bracelet | ||||||||||
| Bellyshrink Bracelet | ||||||||||
| Fortune Bracelet | X | |||||||||
| Cleansing Bracelet | ||||||||||
| Focusing Bracelet | X | |||||||||
| Rousing Bracelet | X | |||||||||
| Rustproof Bracelet | X | |||||||||
| Cursebreak Bracelet | X | |||||||||
| Affixing Bracelet | ||||||||||
| Far-throwing Bracelet | X | |||||||||
| Bad-aim Bracelet | X | |||||||||
| Sure-aim Bracelet | ||||||||||
| Bouncy Bracelet | ||||||||||
| Rapid-fire Bracelet | X | |||||||||
| Daredevil Bracelet | ||||||||||
| Dreaded Bracelet | ||||||||||
| Leaping Bracelet | ||||||||||
| Blasting Bracelet | ||||||||||
| Clairvoyant Bracelet | ||||||||||
| Monster-find Bracelet | X | X | X | |||||||
| Item-find Bracelet | ||||||||||
| Passage-find Bracelet | X | |||||||||
| Waterwalk Bracelet | X | |||||||||
| Floating Bracelet | ||||||||||
| Wallpass Bracelet | ||||||||||
| Tiptoe Bracelet | ||||||||||
| Passerby Bracelet | X | |||||||||
| Item-losing Bracelet | ||||||||||
| Gitan-losing Bracelet | ||||||||||
| Monstercall Bracelet | ||||||||||
| Trapmore Bracelet | ||||||||||
| Haggling Bracelet | ||||||||||
| Trapper's Bracelet | ||||||||||
| Appraiser's Bracelet | ||||||||||
| Cannonboost Bracelet | ||||||||||

 Projectile
| Projectile | ||||||||||
|---|---|---|---|---|---|---|---|---|---|---|
| Name | F | S | P | M | B | H | I | T | U | W |
| Wooden Arrow | X | X | ||||||||
| Iron Arrow | X | X | X | |||||||
| Silver Arrow | X | X | ||||||||
| Poison Arrow | ||||||||||
| Truestrike Arrow | X | X | X | |||||||
| Rock | X | X | ||||||||
| Porky's Rock | X | X | ||||||||
 Food
Food
| Food | ||||||||||
|---|---|---|---|---|---|---|---|---|---|---|
| Name | F | S | P | M | B | H | I | T | U | W |
| Onigiri | X | X | ||||||||
| Large Onigiri | X | X | X | X | X | |||||
| Huge Onigiri | X | |||||||||
| Rotten Onigiri | X | X | X | |||||||
| Grilled Onigiri | ||||||||||
| Special Onigiri | X | X | X | X | ||||||
| Sumo Onigiri | ||||||||||
| Sweet Potato | ||||||||||
| Yakitori | ||||||||||
| Rotten Peach Bun | ||||||||||
 Grass
Grass
| Grass | ||||||||||
|---|---|---|---|---|---|---|---|---|---|---|
| Name | F | S | P | M | B | H | I | T | U | W |
| Weeds | ||||||||||
| Herb | X | X | X | |||||||
| Otogirisou | X | X | X | X | X | |||||
| Healing Grass | X | X | X | |||||||
| Life Grass | X | X | X | |||||||
| Fragrant Grass | X | |||||||||
| Revival Grass | X | X | ||||||||
| Bellyexpand Seed | X | X | X | |||||||
| Bellyshrink Seed | ||||||||||
| Dragon Grass | X | X | X | X | ||||||
| Leaping Grass | X | X | X | X | ||||||
| Antidote Grass | X | X | X | |||||||
| Strength Grass | X | X | ||||||||
| Poison Grass | X | X | ||||||||
| Confusion Grass | X | X | ||||||||
| Sedating Grass | X | X | ||||||||
| Berserk Seed | ||||||||||
| Blinding Grass | X | |||||||||
| Seewell Grass | X | X | ||||||||
| Swift Grass | X | X | X | X | ||||||
| Power-up Grass | X | X | X | |||||||
| Invincible Grass | X | X | ||||||||
| Fortune Grass | X | X | X | |||||||
| Angel Seed | ||||||||||
| Feeble Grass | ||||||||||
| Unlucky Seed | ||||||||||
| Ill-fated Seed | ||||||||||
 Scroll
| Scroll | ||||||||||
|---|---|---|---|---|---|---|---|---|---|---|
| Name | F | S | P | M | B | H | I | T | U | W |
| Confusion Scroll | X | X | ||||||||
| Slumber Scroll | X | X | X | |||||||
| Jitters Scroll | X | X | X | |||||||
| Windblade Scroll | X | |||||||||
| Expulsion Scroll | ||||||||||
| Exorcism Scroll | ||||||||||
| Identifier Scroll | X | X | X | |||||||
| Heavenly Scroll | X | X | X | X | ||||||
| Earthly Scroll | X | X | X | |||||||
| Plating Scroll | X | X | X | |||||||
| Slot-adding Scroll | X | X | ||||||||
| Rune-eraser Scroll | X | X | ||||||||
| Silver-seal Scroll | ||||||||||
| Silverpurge Scroll | X | X | X | |||||||
| Pot-upsize Scroll | X | X | ||||||||
| Extraction Scroll | X | X | X | |||||||
| Onigiri Scroll | X | X | ||||||||
| Curse Scroll | ||||||||||
| Mapping Scroll | X | X | ||||||||
| Map-loss Scroll | ||||||||||
| Trap-eraser Scroll | X | X | ||||||||
| Trap Scroll | ||||||||||
| Water-drain Scroll | X | |||||||||
| Monstercall Scroll | ||||||||||
| Wall-less Scroll | ||||||||||
| Gathering Scroll | ||||||||||
| Collection Scroll | ||||||||||
| Gambler's Scroll | ||||||||||
| Muzzle Scroll | ||||||||||
| Carry-ban Scroll | ||||||||||
| Swift Foe Scroll | ||||||||||
| Fixer Scroll | X | X | ||||||||
| Escape Scroll | X | |||||||||
| Eradication Scroll | ||||||||||
| Sanctuary Scroll | X | X | X | |||||||
| Blank Scroll | X | X | ||||||||
| Wet Scroll | ||||||||||
 Staff
Staff
| Staff | ||||||||||
|---|---|---|---|---|---|---|---|---|---|---|
| Name | F | S | P | M | B | H | I | T | U | W |
| Ordinary Staff | ||||||||||
| Paralyzing Staff | X | X | ||||||||
| Sealing Staff | X | X | ||||||||
| Disguising Staff | X | X | ||||||||
| Empathetic Staff | X | |||||||||
| Narrow-escape Staff | X | |||||||||
| Knockback Staff | X | X | X | X | ||||||
| Switching Staff | X | X | ||||||||
| Vaulting Staff | X | X | X | |||||||
| Skull Mage's Staff | ||||||||||
| Thunderbolt Staff | X | X | ||||||||
| Burrowing Staff | X | X | ||||||||
| Earthmound Staff | X | X | X | |||||||
| Balance Staff | X | X | ||||||||
| Guiding Staff | ||||||||||
| Swift Staff | ||||||||||
| Sluggish Staff | X | X | ||||||||
| Fortune Staff | ||||||||||
| Unlucky Staff | ||||||||||
| Peach Staff | X | X | ||||||||
 Pot
Pot
| Pot | ||||||||||
|---|---|---|---|---|---|---|---|---|---|---|
| Name | F | S | P | M | B | H | I | T | U | W |
| Preservation Pot | X | X | X | |||||||
| Identifier Pot | X | X | X | |||||||
| Transmutation Pot | X | X | ||||||||
| Cashing Pot | X | |||||||||
| Synthesis Pot | X | |||||||||
| Exorcism Pot | X | X | ||||||||
| Curse Pot | ||||||||||
| Upgrading Pot | ||||||||||
| Degrading Pot | ||||||||||
| Bottomless Pot | ||||||||||
| Warehouse Pot | X | X | ||||||||
| Handtrapper Pot | ||||||||||
| Unbreakable Pot | ||||||||||
| Ordinary Pot | X | |||||||||
| Hiding Pot | X | |||||||||
| Rejuvenation Pot | ||||||||||
| Walrus Pot | X | X | X | |||||||
| Water Gun Pot | X | X | X | |||||||
| Hilarious Pot | ||||||||||
| Monster Pot | X | X | ||||||||
| Surprise Pot | ||||||||||
 Incense
| Incense | ||||||||||
|---|---|---|---|---|---|---|---|---|---|---|
| Name | F | S | P | M | B | H | I | T | U | W |
| Heat-ban Incense | X | |||||||||
| Evasive Incense | X | X | ||||||||
| Cautious Incense | X | |||||||||
| Reflective Incense | X | X | ||||||||
| Aggressive Incense | X | X | X | X | ||||||
| Defensive Incense | X | X | ||||||||
| Blurry Incense | X | X | ||||||||
| Weighted Incense | X | X | X | |||||||
| Unwanting Incense | X | X | X | X | ||||||
