Trapper's Secret Path
Overview
| Unlock | Clear Serpentcoil Island → Check Tiger Thrower statue in Icewall Village. |
|---|---|
| Entrance | Icewall Village (Hole near the Inn). |
| Floors | 20F / 99F (Sacred Tree) | ||
|---|---|---|---|
| Bring Items | No | Stairs | Descending |
| Companions | No | Roamers | No |
| Rescues | 3 | Starting Level | Lv1 |
| Starting Item | Large Onigiri, Trapper's Bracelet | ||
| Unidentified | Bracelets, Grass, Staves, Scrolls, Pots | ||
| Shops | Yes | Monster Houses | Yes (Regular, Sudden) |
| Behemoths | No | Wishing Shrines | No |
| Kron's Challenge | Yes | Fever Time | No |
| Initial Enemies | 5 | Spawn Rate | 40 Turns |
| Wind (1st Gust) | 900 Turns | Reward | |
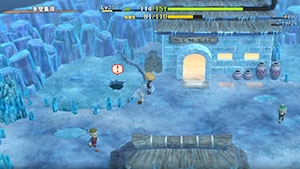
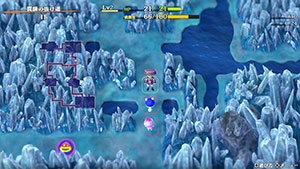
Postgame dungeon where you start with a Trapper's Bracelet and utilize traps to progress.
Trapper status allows Shiren to pick up traps and set them on the ground to ensnare monsters.
Shiren's attack power remains the same in both modes, so the only time the player would want to
unequip the bracelet would be when the player wants to use a Blast Trap to one-shot enemies.
Navigation
Strategy
General Advice (First Clear & Sacred Tree Extension)
 Trapper Status
Shiren's color palette changes to a purple one while he has Trapper status.
All hidden traps are revealed, and traps can be picked up, thrown, or set on the ground.
Monsters can be ensnared by traps, and traps never activate when Shiren walks on top of them.
Once set, traps can't be picked up again, and the status is lost while the bracelet is unequipped.
Shiren earns 10% of the regular amount of experience points when a monster steps on a trap,
and also earns x2.0 experience points when a monster is defeated by a trap that deals damage.
However, traps like Rotting Trap that instantly defeat a monster do not grant experience points.
 Trapping Floating Type Monsters
Floating types normally can't be ensnared by traps since they float above the trap on the ground.
However, you can still lure them onto a trap → shoot arrows until one misses to activate the trap,
resulting in the Floating type monster getting caught in the trap located underneath them.
Floating Type Monsters:
| Monster | Floor |
|---|---|
| Pumphantasm | 4-5F |
| Hell Reaper | 7-9F |
| Flamepuff | 18-20F |
| Soul Reaper | 40F, 54-60F, 64-70F, 75-79F, 85-89F, 95-99F |
| Pumplich | 49-53F, 60-63F, 70-74F, 80-84F, 90-94F |
 Floor Dragon Family Warning
Floor Dragon monsters can't be ensnared by traps at all, so don't try to trap them.
Dragonkiller, Dragon Shield, and arrows are a significant help against this monster family.
Floor Dragon Monsters:
| Monster | Floor |
|---|---|
| Floor Dragon | 13-15F |
| Dragon Head | 30-39F |
| Dragon Pit | 93-99F |
 Trap-Based Explosion Warning
Blast Trap and Explosion Trap function differently under Trapper status against monsters:
Trap Notes (First Clear & Sacred Tree Extension)
 Rock
Rock
 Boulder
 Log
Log
 Tripping
Rock Trap deals 16~20 damage, and Boulder Trap deals 32~38 damage.
These traps can be used to reliably earn experience points if placed in intersections.
Log Trap and Tripping Trap can also be used to deal damage, but they're not as powerful.
 Spinning
 Sleep
Sleep
 Blinding
 Sluggish
 Delusion
 Onigiri
These are traps that inflict a negative stauts condition, with Delusion Trap being the best.
Monsters with Deluded status won't attack Shiren, and will instead run away from him forever.
The second best trap is Blinding Trap, since its effect similarly never wears off for monsters.
Sleep Trap lasts 6 turns and Onigiri Trap lasts 10 turns, so use those on foes you can slay quickly.
Spinning Trap lasts 20 turns and Sluggish Trap lasts forever, making them good stalling options.
 Curse
Curse
 Silver-seal
Inflicts a monster with Sealed status, making them unable to use abilities.
Nice when hunting Thiefwalrus (5-13F), though you might want to pair it with a stat-lowering trap,
such as
 Removal Trap,
 Hunger Trap, or
 Onigiri Trap (
 Rust Trap heals Aquatic types).
Also great for disabling Skull Wizard (19-20F), Super Gazer (22-24F), Vile Scorpion (32-86F), etc.
 Rust
Rust
Reduces defense + inflicts a similar effect to getting hit by a Water Gun Pot.
Basically makes Masked Samurai (10-12F), Minotaur (16-20F), and Pop Tank (16-18F) a non-issue.
However, this trap cannot be used to transform enemies with Onigiri status into Rotten Onigiri.
Mudkin (11-14F) and other Aquatic type monsters will have their HP restored by 25% instead.
 Removal
Reduces a monster's attack power and defense - Does not inflict Sealed status!
Intentionally step on it yourself if you equip a cursed weapon, shield, or bracelet.
 Blast
Blast
 Explosion
Under Trapper status, HP is reduced by 50% for Blast Trap, and HP is set to 1 for Explosion Trap.
Always unequip the Trapper Bracelet before stepping on it when you want to one-shot monsters.
Otherwise, you're extremely likely to collapse if you step on it while you're surrounded by foes.
Use it after luring a monster onto an
 Onigiri Trap to instantly turn them into Grilled Onigiri.
Overall, prioritize carrying stronger traps like
 Rotting Trap or
 Delusion Trap.
 Rotting
Monsters who step on this trap will be instantly defeated and transformed into Rotten Onigiri.
Rotten Onigiri can be thrown at a foe to deal 5 damage + inflict a negative status condition,
which is randomly selected from Weakened, Confused, Asleep, Blind, or Deluded status.
 Blast Trap or
 Explosion Trap can be used to turn Rotten Onigiri into Grilled Onigiri.
 Trap-setting
Step on this to increase the number of traps on the ground.
Save it for when the number of traps in your inventory starts to get low.
 Spring
Step on this when you're being chased to warp to a different location on the current floor.
Similar to Leaping Grass, but it can also be used to warp monsters instead of yourself.
 Wooden Arrow
 Poison Arrow
Use these traps to stock up on arrows instead of setting them for enemies to step on.
Place it down alongside a wall, then throw an item at the wall so that the item lands on the trap.
Poison Arrows are fantastic in particular, since 1 arrow reduces enemy attack power by ~50%,
but don't shoot them at Scorpion (4-7F), Ghost Radish (16-17F), Daze Radish (26-29F),
or Vile Scorpion (32-86F), since it results in an attack power boost via Empowered status.
 Monsterizing
 Summoning
 Rage
Rage
Negative effect traps - These 3 offer nearly zero advantages for the player when activated.
Monsterizing Trap and Summoning Trap have a use for item drops, but Rage Trap is useless.
Move these to a spot where foes won't step on them, or insert them into Transmutation Pots.
 Pitfall
Emergency escape option that can also be used to safely steal from a dungeon shop.
To utilize it during Sumo status, set it underfoot next to a wall → shoot an arrow at the wall.
Important Items (First Clear)
 Weapon & Shield
High Base Value Gear
Mixers don't appear, so prioritize high base stats instead of special abilities.
Hell Reaper (7-9F) floors are tough without a shield in particular.
Dragonkiller, Dragon Shield
Nice against Floor Dragon (13-15F) and Flamepuff (18-20F), who don't step on traps.
Equipping both and activating the resonance effect lets you potentially one-shot Floor Dragon.
Walrus Stopper, Primal Axe, Steel Severer
Walrus Stopper is nice as a secondary shield to help with item collection up to 12F or so.
The latter 2 weapons help against Beast and Metal types that appear near the end.
Watchful Shield, Counter Shield
Most damage received from monsters is through normal attacks, making these shields great.
 Bracelets
Trapper's Bracelet
The player starts with this item, but additional copies can be found inside the dungeon.
Strength Grass is on the uncommon side, so don't plan on being able to equip 2 bracelets.
It's a good idea to keep this bracelet equipped to avoid accidentally losing it.
 Projectiles
Poison Arrow, Wooden Arrow
A single Poison Arrow reduces enemy attack power by ~50%.
Collect arrows from any arrow traps you encounter, repositioning the trap as needed.
Intentionally step on a
 Far-throwing Trap to give your arrows piercing properties.
Don't shoot Poison Arrows at Scorpion (4-7F) or Ghost Radish (16-17F).
 Staves & Scrolls & Incenses
Mapping Scroll, Guiding Staff
 Floor-exiting Trap and
 Pitfall Trap are never naturally generated in this dungeon,
so Mapping Scroll and Guiding Staff are the next best options for quickly advancing floors.
Disguising Staff
Can be used to create a higher level monster early on for experience points,
and also a fantastic crowd control option on later floors when surrounded by monsters.
Feel free to carry 2 or more copies of this staff, as it's extremely useful.
Vaulting Staff, Switching Staff, Blurry Incense
These items are nice to have on hand in case you encounter a single room Monster House.
Trap Scroll
Similar to
 Trap-setting Trap, use it when the number of traps in your inventory gets low.
Consider your current Fullness and remaining food items before reading this scroll.
 Pots
Pots
Preservation Pot
Lets you carry more traps and consumable items, which is incredibly handy.
Exorcism Scrolls should be saved for cursed Preservation Pots you find on the ground.
If you encounter a Bouncy Wall Room, see if you can duplicate Preservation Pots first.
Bottomless Pot
Break a Bottomless Pot to generate a number of
 Pitfall Traps equal to the pot's capacity.
This dungeon has descending stairs, so said traps can be used to advance to the next floor.
Particularly great when attempting a speedrun of this dungeon.
Important Items (Sacred Tree Extension)
 Weapon & Shield
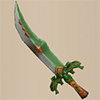
Dragonkiller
Nice against Sky Dragon (28-99F), Dragon Head (30-39F), Dragon Pit (93-99F), etc.
The best main weapon for this dungeon, and even better when paired with Dragon Shield,
since the Anti-Dragon damage multiplier receives a boost (x1.5 → x2.5).
Drain Slayer
Great against Polygon Shaka (30-99F) and Vile Scorpion (32-86F) in particular.
Not exactly essential if you find a Cleansing Bracelet, though.
Sickle of Salvation, Sky Sword
Helpful against Floating types that can't be trapped like Soul Reaper and Pumplich.
However, Dragonkiller or Drain Slayer should probably be prioritized above these options.
Soul Reaper appears on 40F, 54-60F, 64-70F, 75-79F, 85-89F, and 95-99F.
Pumplich appears on 49-53F, 60-63F, 70-74F, 80-84F, and 90-94F.
Kama Itachi
Weak, so only viable when combined with Sumo status + Monster-find Bracelet.
Axe of the Minotaur
Occasionally dropped by Minotaur (16-20F), but don't expect it to drop even if you linger.
Chance-based rune, but effective at boosting your damage dealt against any monster.
Synthesis isn't possible in this dungeon, so you can't transfer the rune.
Shield of Sating
Mostly for players who like to maintain Sumo status throughout the dungeon.
Dragon Shield, Kappa's Dish
Sky Dragon (28-99F) and Baby Tank (29-99F) can be a menace in single room Monster Houses,
so these are better main shield options for those who don't plan on maintaining Sumo status.
 Bracelets
Rapid-fire Bracelet
Doubles the power of projectiles, letting you slay Vile Scorpion (32-86F) before it gets close.
Hallways remain visible through 50F, and Baby Tank (29-99F) can be used to restock arrows.
For 51-99F, either shoot arrows to check for incoming foes or use Monster-find Bracelet.
Monster-find Bracelet
Counters dark hallways (51-99F), and makes it easier to deal with Soul Reaper and Pumplich.
Also prevents getting surprised by Vile Scorpion (32-86F)'s special attack in dark hallways.
Soul Reaper appears on 40F, 54-60F, 64-70F, 75-79F, 85-89F, and 95-99F.
Pumplich appears on 49-53F, 60-63F, 70-74F, 80-84F, and 90-94F.
Cleansing Bracelet
Nullifies Vile Scorpion (32-86F)'s special attack - it's fine to discard it once you reach 87F.
Can also be used to block the Strength -3 effect when eating Rotten Onigiri.
 Projectiles
Wooden Arrow
Obtained from
 Wooden Arrow Trap or Bowboy (6-9F).
Mainly used before collecting Iron Arrows from Crossbowboy (10-12F) or Baby Tank (29-99F).
Iron Arrow
Obtained from Crossbowboy (10-12F) or Baby Tank (29-99F).
Earthmound Staff or Evasive Incense makes it trivial to collect arrows from Baby Tank.
Feel free to collect literally hundreds of arrows if you find a Rapid-fire Bracelet.
Poison Arrow
Obtained from
 Poison Arrow Trap - 1 arrow reduces enemy attack power by ~50%.
Excellent against stronger foes like Sky Dragon, Baby Tank, and Soul Reaper in particular.
Never shoot arrows at Hoppin' Slugger (37-89F) since it has a 50% chance to reflect them.
Don't shoot Poison Arrows at Daze Radish (26-29F) or Vile Scorpion (32-86F).


 Staves & Scrolls & Grass
Paralyzing Staff, Narrow-escape Staff, Sealing Staff, Sluggish Staff
Single-target options for disabling enemy special attacks or creating distance.
Sealing Staff can backfire if it hits a Baby Tank (29-99F) or Hoppin' Slugger (37-89F).
Swing Narrow-escape Staff at a Hoppin' Slugger for a 50% chance to be warped to the stairs.
Skull Mage's Staff
Obtained from Skull Mage (22-23F, 40-59F) or Skull Wizard (19-20F).
Single-target option for either shutting down or warping a monster elsewhere.
Switching Staff, Vaulting Staff, Leaping Grass
Emergency escape options for Monster Houses, but can't be used during Sumo status.
Staves are best for single room MHs, while Leaping Grass is best for pop-up style MHs.
 Spring Trap can be used like Leaping Grass, but foes can also step on the trap.
If you're maintaining Sumo status, prioritize scrolls instead of these items.
Earthmound Staff
A single use lets you collect hundreds of Iron Arrows from Baby Tank (29-99F).
Can also be used to create a safe spot where you shoot arrows at foes through corners.
Blank Scroll
It might be best to save this scroll as an Expulsion Scroll for a single room Monster House.
If writing Eradication Scroll, it's probably best to throw it at either N'dama or Soul Reaper.
Soul Reaper appears on 40F, 54-60F, 64-70F, 75-79F, 85-89F, and 95-99F.
N'dama appears on 60-62F, 69-71F, 78-80F, and 97-99F.
Confusion Scroll, Slumber Scroll, Jitters Scroll
Sweet Potato can't be found in this dungeon, so these are handy for Monster Houses.


 Food & Pots & Incenses
Grilled Onigiri
Main food source, since Nigiri Morph family monsters don't appear in this dungeon.
 Rotting Trap for Rotten Onigiri →
 Blast Trap or get hit by Sky Dragon (28-99F)'s fire.
Grilled Onigiri increases Max Fullness by 2 when eaten when Fullness is already full,
so prepare to activate Sumo status for the final stretch with Popdillo (90-99F).
Identifier Pot
Insert bracelets in search of Rapid-fire, Monster-find, and Cleansing bracelets.
If you feel like your bracelet selection is good, use it as storage for Revival Grass.
Bottomless Pot
Break a Bottomless Pot to generate a number of
 Pitfall Traps equal to the pot's capacity.
This dungeon has descending stairs, so said traps can be used to advance to the next floor.
Save Pitfall Traps for single room Monster Houses or dangerous floor ranges.
It goes without saying, but store Pitfall Traps in Preservation Pots.
Water Gun Pot
Splash water on a Soul Reaper to reduce its attack power by 8 stages.
Soul Reaper appears on 40F, 54-60F, 64-70F, 75-79F, 85-89F, and 95-99F.
However, beware of accidentally making an important trap vanish.
Heat-ban Incense
Counters Sky Dragon (28-99F)'s flames in a single room Monster House.
Evasive Incense
Counters Baby Tank (29-99F)'s Iron Arrows in a single room Monster House.
Your arrows also miss while it's active, so use a
 Pitfall Trap after lighting it.
Blurry Incense
Counters a single room Monster House no matter what your playstyle is like.
This applies to all incenses, but it's best to select an arrow or trap when lighting it.
Farming Techniques
 Grilled Onigiri
Rotting Trap Method:
Set a
 Rotting Trap on the ground and lure enemies onto it to obtain Rotten Onigiri,
then get hit by fire/blast damage or step on a
 Blast Trap to turn them into Grilled Onigiri.
Non-trap sources include Pop Tank (16-18F), Flamepuff (18-20F), Sky Dragon (28-99F), etc.
Onigiri Trap Method:
Set an
 Onigiri Trap on the ground and lure a foe onto it to inflict Onigiri status,
then lure the enemy onto a
 Blast Trap to turn them into Grilled Onigiri.

 Wooden Arrows / Poison Arrows
If you spot an arrow trap, place it next to a wall → throw items onto the trap to collect arrows.
 Cave Mamel Hunting (1-3F)
Pit Mamel (1-3F) can be leveled up into a Cave Mamel and hunted for 4,000+ experience points.
Easy level up options include
 Blinding Trap, Disguising Staff, Blinding grass, Jitters Scroll, etc.
Set non-damaging traps (ex:
 Rust Trap) for Cave Mamel to step on for 200 exp per activation,
then end with a trap that deals damage (ex:
 Rock Trap) for 4,000 experience points.

 Thiefwalrus / Greenwalrus Hunting (5-13F, 25-29F)
Use traps to safely hunt Thiefwalrus (5-13F) or Greenwalrus (25-29F) for extra items.
However, be careful of their higher attack power if you decide to inflict Sealed status.
Thiefwalrus has 25 attack power, and Greenwalrus has 30 attack power.
 Iron Arrows (10-12F)
Crossbowboy (10-12F) appears with Bored Kappa (10-12F), so use the combo to collect arrows.
The exact setup varies, but the idea is to position a Bored Kappa between you and a Crossbowboy.
You can hold ZR and press A to quickly pick up arrows instead of opening the menu every time.
Picking up items doesn't regen HP, so don't forget to walk or step in place to heal as needed.
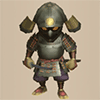
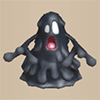
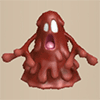
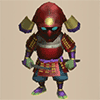 Great Samurai / Lordly Samurai Hunting (10-12F)
Slay Masked Samurais (10-12F) → let Ghost Samurais level up a Masked Samurai to Lv3-4,
then lure the Lv3-4 Masked Samurai onto a
 Rust Trap to lower its attack power by 8 stages.
You can safely trade hits at that point, though you might need to walk to regen HP at times.
Great Samurai provides 840 experience points, and Lordly Samurai 1,280 experience points.
Set non-damaging traps for more exp, and slay it with a damaging trap to double exp.
 Mudster / Mudder Hunting (11-12F)
Mudkin (11-14F) and Masked Samurai (10-12F) overlap, so hunt Lv3-4 Mudkins to level up.
Crossbowboy (10-12F) often significantly interferes, so it's best to seal off the stairs room.
As always, unequip your gear and stand on the stairs when punching Lv3-4 Mudkins for exp.
Don't inflict Sealed status - Mudster has 35 attack power, and Mudder has 45 attack power.
Mudster provides 460 experience points, and Mudder 920 experience points.
Floor Guide
First Clear
General Advice
Review how traps affect the player vs. monsters (See Traps or check the in-game Notebook).
Knowing how to utilize traps for extra food, arrows, experience points, etc. is a massive help.
Floating type enemies and Floor Dragon family monsters naturally avoid stepping on traps,
but Floating types can still be trapped by luring them above a trap and shooting arrows.
1-2F
Traps are effective against all monsters since Floating type monsters don't appear yet.
Secure extra food in the form of Grilled Onigiri by utilizing
 Rotting Trap and
 Blast Trap.
Set
 Blinding Trap on the ground in a room to level up a Pit Mamel (1-3F) into a Cave Mamel.
Set non-damaging traps (ex:
 Rust Trap) for Cave Mamel to step on for 200 exp per activation,
then end with a trap that deals damage (ex:
 Rock Trap) for 4,000 experience points.
Monster Stats (1-2F)
| Floor | Monster | HP | Atk | Def | Exp | Type |
|---|---|---|---|---|---|---|
| 1-2 | Mamel | 8 | 3 | 4 | 2 | Normal |
| 1-2 | Octopling | 14 | 4 | 6 | 4 | Aquatic |
| 1-2 | Spearfish | 16 | 6 | 2 | 7 | Aquatic |
| 1-3 | Pit Mamel | 11 | 5 | 8 | 5 | Normal |
3-4F
Pit Mamel (1-3F) is still around on 3F, so continue hunting Cave Mamels if possible.
Froggo (3-5F) drops Gitan when slain, and shops can be generated, so stock up on Gitan.
Pumphantasm (4-5F) is a Floating type monster, so traps it moves on top of don't activate.
Use Wooden Arrows from a distance or traps against Scorpion (4-7F) to avoid strength loss.
Monster Stats (3-4F)
| Floor | Monster | HP | Atk | Def | Exp | Type |
|---|---|---|---|---|---|---|
| 1-3 | Pit Mamel | 11 | 5 | 8 | 5 | Normal |
| 3-4 | Armordillo | 20 | 11 | 15 | 15 | Beast |
| 3-5 | Froggo | 23 | 10 | 13 | 18 | Normal |
| 3-5 | Chintala | 15 | 9 | 4 | 12 | Beast |
| 4-5 | Pumphantasm | 23 | 16 | 10 | 25 | Ghost/Floating |
| 4-7 | Scorpion | 37 | 14 | 14 | 33 | Draining |
5-12F
Thiefwalrus (5-13F) is a rare spawn that always drops an item when slain.
It has 25 attack power, so be careful if you decide to inflict Sealed status on it.
Hell Reaper (7-9F) is a Floating type with Swift 2 speed - beware if your shield is weak.
A shield strength of 11~12 makes them a non-issue, but otherwise consider rushing stairs.
Crossbowboy (10-12F) overlaps with Bored Kappa (10-12F), so collect Iron Arrows if desired.
However, don't go overboard with arrow collection, since the first clear is only 20F.
Masked Samurai (10-12F) and Mudkin (11-14F) overlap on 11-12F,
so it's possible to hunt Lv3 Mudsters (460 exp) or Lv4 Mudders (920 exp) to rapidly level up.
Mudster (35) and Mudder (45) both have higher attack power, so don't inflict Sealed status.
Traps like
 Delusion Trap can be used to handle higher level monsters in emergencies.
Monster Stats (5-12F)
| Floor | Monster | HP | Atk | Def | Exp | Type |
|---|---|---|---|---|---|---|
| 3-5 | Froggo | 23 | 10 | 13 | 18 | Normal |
| 3-5 | Chintala | 15 | 9 | 4 | 12 | Beast |
| 4-5 | Pumphantasm | 23 | 16 | 10 | 25 | Ghost/Floating |
| 4-7 | Scorpion | 37 | 14 | 14 | 33 | Draining |
| 5-13 | Thiefwalrus | 65 | 25 | 23 | 75 | Aquatic |
| 6-9 | Bowboy | 45 | 17 | 18 | 60 | Normal |
| 6-9 | Hoppin' Hitter | 32 | 22 | 15 | 34 | Normal |
| 6-10 | Mid Chintala | 45 | 23 | 10 | 27 | Beast |
| 7-9 | Hell Reaper | 45 | 12 | 15 | 30 | Ghost/Floating |
| 10-12 | Bored Kappa | 50 | 18 | 11 | 48 | Aquatic |
| 10-12 | Crossbowboy | 55 | 20 | 20 | 80 | Normal |
| 10-12 | Masked Samurai | 47 | 18 | 18 | 48 | Normal |
| 10-13 | Fresh Octopling | 60 | 19 | 14 | 55 | Aquatic |
| 11-14 | Mudkin | 70 | 5 | 9 | 53 | Draining/Aquatic |
13-15F
Floor Dragon (13-15F) can't be ensnared by traps - this applies to the entire family.
Depending on your level and equipment, it might be best to switch to rushing stairs now.
However, if you've performed farming techniques and can handle Floor Dragons fine,
this floor range should still be relatively safe to fully explore.
The other notable threat is Metalhead (13-15F), who attacks up to 2 tiles ahead.
Metalhead's extended range makes it tricky to ensnare in traps compared to other foes.
Monster Stats (13-15F)
| Floor | Monster | HP | Atk | Def | Exp | Type |
|---|---|---|---|---|---|---|
| 5-13 | Thiefwalrus | 65 | 25 | 23 | 75 | Aquatic |
| 10-13 | Fresh Octopling | 60 | 19 | 14 | 55 | Aquatic |
| 11-14 | Mudkin | 70 | 5 | 9 | 53 | Draining/Aquatic |
| 13-14 | Lt. Spearfish | 60 | 24 | 17 | 55 | Aquatic |
| 13-15 | Metalhead | 66 | 30 | 19 | 61 | Cyclops |
| 13-15 | Floor Dragon | 55 | 25 | 20 | 80 | Dragon |
| 13-15 | Tiger Thrower | 68 | 26 | 22 | 77 | Beast |
16-20F
Pop Tank (16-18F) and Rumbledon (17-20F) are both Slow and weak to
 Rust Trap.
Ghost Radish (16-17F) throws Poison Grass 2 tiles ahead, reducing strength and speed.
Ghost Radish gets boosted by Poison Arrows and
 Rust Trap, so use other options against it.
N'dubba (18-20F) disguises itself as an item, so rely on your inventory instead of floor items.
That said, N'dubba only has 16 attack power, so being ambushed by one isn't a big deal.
Flamepuff (18-20F) is a Floating type that can blow a 20 damage flame when adjacent.
Skull Wizard (19-20F) can inflict Confused status from a distance, so Look Around in rooms.
Explochin (20F) turns red when HP ≤ 50%, and explodes when HP ≤ 24 (96+ damage dealt).
Overall, it's best to utilize traps and consumables and rush to the stairs on 19-20F.
Monster Stats (16-20F)
| Floor | Monster | HP | Atk | Def | Exp | Type |
|---|---|---|---|---|---|---|
| 16-17 | Ghost Radish | 40 | 18 | 15 | 49 | Ghost |
| 16-17 | Hat Prankster | 70 | 15 | 6 | 50 | Cyclops |
| 16-18 | Pop Tank | 90 | 20 | 24 | 100 | Metal/Exploding |
| 16-20 | Minotaur | 70 | 31 | 20 | 90 | Beast |
| 16-20 | Master Hen | 70 | 33 | 21 | 400 | Beast |
| 17-20 | Rumbledon | 125 | 53 | 45 | 899 | Metal |
| 18-20 | Flamepuff | 50 | 25 | 20 | 175 | Dragon/Floating |
| 18-20 | N'dubba | 32 | 16 | 8 | 16 | Metal |
| 19-20 | Skull Wizard | 88 | 35 | 24 | 250 | Ghost |
| 20 | Explochin | 120 | 25 | 22 | 55 | Exploding/Cyclops/Aquatic |
Sacred Tree Extension
General Advice
Focus on a balanced inventory of equipment, traps, movement related staves, and arrows.
Keep an eye out for weapons and shields with special abilities, along with items that restore HP.
Try to reach 10+ Max Strength so that you can equip 2 bracelets at the same time.
The monster table doesn't change much past 30F, food is plentiful, and Behemoths don't spawn.
So feel free to start rushing stairs between 30-99F once your item selection looks good.
Hallways are dark on 51-99F, so a stronger shield or Monster-find Bracelet helps a lot.
1-20F
Perform farming techniques to level up to Lv20+ for the fastest HP regen speed,
increase Max Fullness by creating Grilled Onigiri, identify items, explore for dungeon shops,
hunt Thiefwalrus (5-13F) for item drops, and collect Iron Arrows from Crossbowboy (10-12F).
It's fine to sell or discard gear that doesn't seem useful, but be sure to identify bracelets.
Remember that Mixers and Synthesis Pots don't appear - synthesis isn't possible.
Monster Stats (1-20F)
| Floor | Monster | HP | Atk | Def | Exp | Type |
|---|---|---|---|---|---|---|
| 1-2 | Mamel | 8 | 3 | 4 | 2 | Normal |
| 1-2 | Octopling | 14 | 4 | 6 | 4 | Aquatic |
| 1-2 | Spearfish | 16 | 6 | 2 | 7 | Aquatic |
| 1-3 | Pit Mamel | 11 | 5 | 8 | 5 | Normal |
| 3-4 | Armordillo | 20 | 11 | 15 | 15 | Beast |
| 3-5 | Froggo | 23 | 10 | 13 | 18 | Normal |
| 3-5 | Chintala | 15 | 9 | 4 | 12 | Beast |
| 4-5 | Pumphantasm | 23 | 16 | 10 | 25 | Ghost/Floating |
| 4-7 | Scorpion | 37 | 14 | 14 | 33 | Draining |
| 5-13 | Thiefwalrus | 65 | 25 | 23 | 75 | Aquatic |
| 6-9 | Bowboy | 45 | 17 | 18 | 60 | Normal |
| 6-9 | Hoppin' Hitter | 32 | 22 | 15 | 34 | Normal |
| 6-10 | Mid Chintala | 45 | 23 | 10 | 27 | Beast |
| 7-9 | Hell Reaper | 45 | 12 | 15 | 30 | Ghost/Floating |
| 10-12 | Bored Kappa | 50 | 18 | 11 | 48 | Aquatic |
| 10-12 | Crossbowboy | 55 | 20 | 20 | 80 | Normal |
| 10-12 | Masked Samurai | 47 | 18 | 18 | 48 | Normal |
| 10-13 | Fresh Octopling | 60 | 19 | 14 | 55 | Aquatic |
| 11-14 | Mudkin | 70 | 5 | 9 | 53 | Draining/Aquatic |
| 13-14 | Lt. Spearfish | 60 | 24 | 17 | 55 | Aquatic |
| 13-15 | Metalhead | 66 | 30 | 19 | 61 | Cyclops |
| 13-15 | Floor Dragon | 55 | 25 | 20 | 80 | Dragon |
| 13-15 | Tiger Thrower | 68 | 26 | 22 | 77 | Beast |
| 16-17 | Ghost Radish | 40 | 18 | 15 | 49 | Ghost |
| 16-17 | Hat Prankster | 70 | 15 | 6 | 50 | Cyclops |
| 16-18 | Pop Tank | 90 | 20 | 24 | 100 | Metal/Exploding |
| 16-20 | Minotaur | 70 | 31 | 20 | 90 | Beast |
| 16-20 | Master Hen | 70 | 33 | 21 | 400 | Beast |
| 17-20 | Rumbledon | 125 | 53 | 45 | 899 | Metal |
| 18-20 | Flamepuff | 50 | 25 | 20 | 175 | Dragon/Floating |
| 18-21 | N'dubba | 32 | 16 | 8 | 16 | Metal |
| 19-21 | Skull Wizard | 88 | 35 | 24 | 250 | Ghost |
| 20-22 | Explochin | 120 | 25 | 22 | 55 | Exploding/Cyclops/Aquatic |
21-23F
Explochin (20-22F), Blazeous (21-23F), and Super Gazer (22-24F) are common.
Beware of Super Gazer's hypnosis in particular if you have Bottomless Pots or incenses,
as it has the potential to destroy valuable items including your main weapon or shield.
Monster Stats (21-23F)
| Floor | Monster | HP | Atk | Def | Exp | Type |
|---|---|---|---|---|---|---|
| 18-21 | N'dubba | 32 | 16 | 8 | 16 | Metal |
| 19-21 | Skull Wizard | 88 | 35 | 24 | 250 | Ghost |
| 20-22 | Explochin | 120 | 25 | 22 | 55 | Exploding/Cyclops/Aquatic |
| 21-23 | Blazeous | 92 | 36 | 24 | 150 | Normal |
| 22-23 | Skull Mage | 77 | 31 | 21 | 210 | Ghost |
| 22-24 | Super Gazer | 66 | 30 | 26 | 222 | Cyclops |
24-29F
The monster table resembles Serpentcoil Island, including Porko (24-27F) and Dragon (27-30F).
Pesky Kappa (24-27F) potentially destroys items found on the ground, so check rooms quickly.
If you're running low on items, consider hunting Greenwalrus (25-29F) for extra item drops.
Behemoth monsters don't spawn in this dungeon, so collecting Porky's Rocks is a low priority.
That said, Porky's Rocks can be used to check for incoming foes on dark hallway (51-99F) floors,
so if you haven't found a Monster-find Bracelet and also happen to have an Evasive Incense,
go ahead and collect some Porky's Rocks for the second half of this dungeon.
Monster Stats (24-29F)
| Floor | Monster | HP | Atk | Def | Exp | Type |
|---|---|---|---|---|---|---|
| 22-24 | Super Gazer | 66 | 30 | 26 | 222 | Cyclops |
| 24-25 | Dark Owl | 90 | 16 | 25 | 120 | Normal |
| 24-25 | Capt. Spearfish | 100 | 39 | 30 | 410 | Aquatic |
| 24-25 | Famed Octopling | 99 | 25 | 30 | 420 | Aquatic |
| 24-27 | Porko | 65 | 36 | 18 | 840 | Beast |
| 24-27 | Froggucchi | 60 | 20 | 30 | 80 | Normal |
| 24-27 | Pesky Kappa | 75 | 29 | 22 | 330 | Aquatic |
| 24-27 | Corporal Ant | 100 | 40 | 20 | 220 | Normal |
| 24-28 | N'dulu | 70 | 40 | 31 | 230 | Metal |
| 24-28 | Dartingfrog | 75 | 40 | 28 | 300 | Aquatic |
| 25-29 | Greenwalrus | 88 | 30 | 27 | 240 | Aquatic |
| 26-29 | Daze Radish | 80 | 37 | 27 | 400 | Ghost |
| 27-30 | Dragon | 120 | 45 | 40 | 1000 | Dragon |
| 28-99 | Sky Dragon | 140 | 55 | 50 | 1600 | Dragon |
| 29-99 | Baby Tank | 85 | 40 | 30 | 450 | Normal |
30-39F
The long-term threats of the Sacred Tree Mode extension begin to appear one after the next.
It begins with Sky Dragon (28-99F), Baby Tank (29-99F), and Polygon Shaka (30-99F),
then continues with Vile Scorpion (32-86F) and Hoppin' Slugger (37-89F).
Dragon Head (30-39F) also appears as a threat that can't be ensnared by traps at all.
Sky Dragon is the toughest monster in this dungeon, so reaching a point where you can slay it
within 2 hits by grinding experience points and collecting strong gear will raise your clear rate.
However, you're unlikely to have the level ups, strength, and Sumo status to do so as of 30F,
so use plenty of Iron Arrows and Poison Arrows to get by while building up to that point.
Restock Iron Arrows from Baby Tank as needed using an Earthmound Staff or Evasive Incense,
but beware of Sky Dragon's room-wide flame if you plan on collecting arrows in a large room.
Vile Scorpion lowers strength by 2 when adjacent - shoot arrows when hallways are visible.
Once hallways become dark starting on 51F, switch to using traps to disable Vile Scorpions.
Don't give up if your strength gets very low, since reviving with Revival Grass restores it.
Polygon Shaka and Dragon Head shouldn't be a notable problem compared to later threats,
so do your best to defeat them while conserving inventory items.
Monster Stats (30-39F)
| Floor | Monster | HP | Atk | Def | Exp | Type |
|---|---|---|---|---|---|---|
| 27-30 | Dragon | 120 | 45 | 40 | 1000 | Dragon |
| 28-99 | Sky Dragon | 140 | 55 | 50 | 1600 | Dragon |
| 29-99 | Baby Tank | 85 | 40 | 30 | 450 | Normal |
| 30-39 | Dragon Head | 88 | 31 | 25 | 266 | Dragon |
| 30-99 | Polygon Shaka | 70 | 34 | 33 | 360 | Draining |
| 32-86 | Vile Scorpion | 108 | 45 | 33 | 500 | Draining |
| 37-89 | Hoppin' Slugger | 72 | 39 | 31 | 400 | Normal |
40-59F
Froggon (40-59F) and Skull Mage (40-59F) appear, and hallways are dark between 51-99F.
The former always drops a high value Gitan bag, and the latter can drop Skull Mage's Staff.
Gitan bags can be paired with
 Far-throwing Trap to help clear out a Monster House.
Throw traps instead of shooting arrows when checking for incoming foes in hallways,
since Hoppin' Slugger (37-89F) has a 50% chance to reflect arrows.
Soul Reaper and Pumplich are 2 Floating types that normally can't be ensnared by traps.
Soul Reaper appears on 40F, 54-60F, 64-70F, 75-79F, 85-89F, and 95-99F.
Pumplich appears on 49-53F, 60-63F, 70-74F, 80-84F, and 90-94F.
Basically, these 2 monsters alternate every 5-7 floors.
Soul Reaper is immune to traps, passes through walls, and has Swift 2 action speed.
It's likely to strike first thanks to dark hallways, and deals heavy damage with a weak shield.
Thankfully the initial enemy counts aren't as high as Heart of Serpentcoil Island or such,
so stepping in place at the start and slaying initial spawns before exploring is effective.
Throw an Eradication Scroll if you lack a good shield, Sumo status, or Monster-find Bracelet.
Monster Stats (40-59F)
| Floor | Monster | HP | Atk | Def | Exp | Type |
|---|---|---|---|---|---|---|
| 28-99 | Sky Dragon | 140 | 55 | 50 | 1600 | Dragon |
| 29-99 | Baby Tank | 85 | 40 | 30 | 450 | Normal |
| 30-99 | Polygon Shaka | 70 | 34 | 33 | 360 | Draining |
| 32-86 | Vile Scorpion | 108 | 45 | 33 | 500 | Draining |
| 37-89 | Hoppin' Slugger | 72 | 39 | 31 | 400 | Normal |
| 40, 54-60 | Soul Reaper | 75 | 40 | 40 | 555 | Ghost/Floating |
| 40-59 | Froggon | 100 | 30 | 45 | 350 | Normal |
| 40-59 | Skull Mage | 77 | 31 | 21 | 210 | Ghost |
| 49-53 | Pumplich | 100 | 50 | 30 | 800 | Ghost/Floating |
60-64F
Flying Egg (60-64F) and N'dama (60-62F, 69-71F, 78-80F, 97-99F) appear.
Hunt Flying Eggs on 61-63F where Soul Reaper doesn't spawn if you want Huge Onigiri.
N'dama appears for 3 floors in a row, and can be tricky if disguised as consumable items.
If you're able to handle Soul Reapers, throw an Eradication Scroll at N'dama instead.
Otherwise, focus on traps or just rush stairs instead of picking up items on N'dama floors.
Monster Stats (60-64F)
| Floor | Monster | HP | Atk | Def | Exp | Type |
|---|---|---|---|---|---|---|
| 28-99 | Sky Dragon | 140 | 55 | 50 | 1600 | Dragon |
| 29-99 | Baby Tank | 85 | 40 | 30 | 450 | Normal |
| 30-99 | Polygon Shaka | 70 | 34 | 33 | 360 | Draining |
| 32-86 | Vile Scorpion | 108 | 45 | 33 | 500 | Draining |
| 37-89 | Hoppin' Slugger | 72 | 39 | 31 | 400 | Normal |
| 54-60, 64-70 | Soul Reaper | 75 | 40 | 40 | 555 | Ghost/Floating |
| 60-62 | N'dama | 135 | 50 | 35 | 650 | Metal |
| 60-63 | Pumplich | 100 | 50 | 30 | 800 | Ghost/Floating |
| 60-64 | Flying Egg | 7 | 4 | 16 | 9 | Cyclops |
65-80F
Nothing noteworthy about this floor range's enemies that hasn't already been said.
Soul Reaper, Pumplich, and N'dama periodically appear for a few floors in a row,
and otherwise all of the long-term threats are still around.
Monster Stats (65-80F)
| Floor | Monster | HP | Atk | Def | Exp | Type |
|---|---|---|---|---|---|---|
| 28-99 | Sky Dragon | 140 | 55 | 50 | 1600 | Dragon |
| 29-99 | Baby Tank | 85 | 40 | 30 | 450 | Normal |
| 30-99 | Polygon Shaka | 70 | 34 | 33 | 360 | Draining |
| 32-86 | Vile Scorpion | 108 | 45 | 33 | 500 | Draining |
| 37-89 | Hoppin' Slugger | 72 | 39 | 31 | 400 | Normal |
| 64-70, 75-79 | Soul Reaper | 75 | 40 | 40 | 555 | Ghost/Floating |
| 69-71, 78-80 | N'dama | 135 | 50 | 35 | 650 | Metal |
| 70-74, 80-84 | Pumplich | 100 | 50 | 30 | 800 | Ghost/Floating |
81-89F
Hiding Egg (81-89F) always drops Special Onigiri, which can potentially raise strength.
Some players use a
 Monsterizing Trap + Mapping or Windblade scroll to farm them,
but it's quite debatable if it's worth the effort when the goal is so close.
Vile Scorpion exits the table after 86F, so feel free to discard Cleansing Bracelet on 87F.
 Poison Arrow Trap is visible with Trapper status, so you're unlikely to lose strength now.
Hoppin' Slugger exits the table after 89F, so you can safely start shooting arrows in hallways
from 90F to check for incoming monsters if you still haven't found a Monster-find Bracelet.
Monster Stats (81-89F)
| Floor | Monster | HP | Atk | Def | Exp | Type |
|---|---|---|---|---|---|---|
| 28-99 | Sky Dragon | 140 | 55 | 50 | 1600 | Dragon |
| 29-99 | Baby Tank | 85 | 40 | 30 | 450 | Normal |
| 30-99 | Polygon Shaka | 70 | 34 | 33 | 360 | Draining |
| 32-86 | Vile Scorpion | 108 | 45 | 33 | 500 | Draining |
| 37-89 | Hoppin' Slugger | 72 | 39 | 31 | 400 | Normal |
| 80-84 | Pumplich | 100 | 50 | 30 | 800 | Ghost/Floating |
| 81-89 | Hiding Egg | 8 | 5 | 17 | 10 | Cyclops |
| 85-89 | Soul Reaper | 75 | 40 | 40 | 555 | Ghost/Floating |
90-99F
Popdillo (90-99F), Dragon Pit (93-99F), and Soul Reaper (95-99F) are the major threats.
It's highly recommended to activate Sumo status to stop Popdillos from making you trip.
Dragon Pit has Swift 1 speed and can't be ensnared by traps, but isn't especially powerful.
Overall, monsters shouldn't be a big problem if you have Sumo status and Poison Arrows.
Use items you've been saving like
 Pitfall Trap and Blank Scroll to quickly reach the goal.
There's no special item waiting to be found on 99F, so just rush to the stairs.
Monster Stats (90-99F)
| Floor | Monster | HP | Atk | Def | Exp | Type |
|---|---|---|---|---|---|---|
| 28-99 | Sky Dragon | 140 | 55 | 50 | 1600 | Dragon |
| 29-99 | Baby Tank | 85 | 40 | 30 | 450 | Normal |
| 30-99 | Polygon Shaka | 70 | 34 | 33 | 360 | Draining |
| 90-94 | Pumplich | 100 | 50 | 30 | 800 | Ghost/Floating |
| 90-99 | Popdillo | 100 | 51 | 45 | 1200 | Beast |
| 93-99 | Dragon Pit | 130 | 54 | 40 | 960 | Dragon |
| 95-99 | Soul Reaper | 75 | 40 | 40 | 555 | Ghost/Floating |
| 97-99 | N'dama | 135 | 50 | 35 | 650 | Metal |
Monsters
See Monsters for individual monster details.
- F - Dark hallways
- S - Shop is possible
- M - Monster House is possible
Monster Colors = Farming, Useful, Lowers Stats, Targets Items, Dangerous
Items
※ This section is currently incomplete.
Item Table Key
| ID | Explanation |
|---|---|
| F | Floor |
| S | Shop |
| P | Peddler |
| M | Monster drop |
| B | Buried |
| H | Thiefwalrus |
| I | Island |
| T | Transmutation Pot |
| U | Surprise Pot |
| W | Tunnel of Wishes |
 Weapon
| Weapon | ||||||||||
|---|---|---|---|---|---|---|---|---|---|---|
| Name | F | S | P | M | B | H | I | T | U | W |
| Wooden Sword | ||||||||||
| Bronze Sword | ||||||||||
| Katana | ||||||||||
| Doutanuki | ||||||||||
| Manji Kabura | ||||||||||
| Kajin Fuuma | ||||||||||
| Kabura Sutegi | ||||||||||
| Golden Sword | ||||||||||
| Kama Itachi | ||||||||||
| Axe of the Minotaur | ||||||||||
| Accurate Sword | ||||||||||
| Swift Sword | ||||||||||
| Watersplitter | ||||||||||
| Primal Axe | ||||||||||
| Dragonkiller | ||||||||||
| Crescent Blade | ||||||||||
| Sky Sword | ||||||||||
| Sickle of Salvation | ||||||||||
| Drain Slayer | ||||||||||
| Cyclops Bane | ||||||||||
| Steel Severer | ||||||||||
| Whopping Harisen | ||||||||||
| Healing Sword | ||||||||||
| Peach Club | ||||||||||
| Spender's Club | ||||||||||
| Ferrous Greatsword | ||||||||||
| Steak Knife | ||||||||||
| Jagged Sword | ||||||||||
| Quad-edge | ||||||||||
| Auspicious Kumade | ||||||||||
| Pickaxe | ||||||||||
| Golden Pickaxe | ||||||||||
| Wooden Mallet | ||||||||||
| Epic Hammer | ||||||||||
| Trapseeker | ||||||||||
| Bonito Block | ||||||||||
| Yamanba's Cleaver | ||||||||||
| Break-Off Blade | ||||||||||
 Shield
| Shield | ||||||||||
|---|---|---|---|---|---|---|---|---|---|---|
| Name | F | S | P | M | B | H | I | T | U | W |
| Wooden Shield | ||||||||||
| Bronze Shield | ||||||||||
| Iron Shield | ||||||||||
| Wolfshead | ||||||||||
| Fuuma Shield | ||||||||||
| Rasen Fuuma | ||||||||||
| Golden Shield | ||||||||||
| Counter Shield | ||||||||||
| Watchful Shield | ||||||||||
| Dragon Shield | ||||||||||
| Blast Shield | ||||||||||
| Targe of the Minotaur | ||||||||||
| Walrus Stopper | ||||||||||
| Froggo Stopper | ||||||||||
| Hat Stopper | ||||||||||
| Nigiri Stopper | ||||||||||
| Spearscale Shield | ||||||||||
| Kappa's Dish | ||||||||||
| Gazer Shield | ||||||||||
| Shield of Negation | ||||||||||
| Unmoving Wall | ||||||||||
| Zabuton | ||||||||||
| Spender's Shield | ||||||||||
| Ferrous Kite | ||||||||||
| Steak Plate | ||||||||||
| Gutsy Shield | ||||||||||
| Hunky-dory Shield | ||||||||||
| Bodhi Shield | ||||||||||
| Shield of Sating | ||||||||||
| Auspicious Omamori | ||||||||||
| Shield of Presage | ||||||||||
| Yamanba's Potlid | ||||||||||
| Break-Off Shield | ||||||||||
 Bracelet
| Bracelet | ||||||||||
|---|---|---|---|---|---|---|---|---|---|---|
| Name | F | S | P | M | B | H | I | T | U | W |
| Healing Bracelet | ||||||||||
| Strength Bracelet | ||||||||||
| Bellyexpand Bracelet | ||||||||||
| Bellyshrink Bracelet | ||||||||||
| Fortune Bracelet | ||||||||||
| Cleansing Bracelet | ||||||||||
| Focusing Bracelet | ||||||||||
| Rousing Bracelet | X | |||||||||
| Rustproof Bracelet | ||||||||||
| Cursebreak Bracelet | ||||||||||
| Affixing Bracelet | X | |||||||||
| Far-throwing Bracelet | ||||||||||
| Bad-aim Bracelet | ||||||||||
| Sure-aim Bracelet | ||||||||||
| Bouncy Bracelet | ||||||||||
| Rapid-fire Bracelet | X | |||||||||
| Daredevil Bracelet | ||||||||||
| Dreaded Bracelet | ||||||||||
| Leaping Bracelet | ||||||||||
| Blasting Bracelet | ||||||||||
| Clairvoyant Bracelet | ||||||||||
| Monster-find Bracelet | ||||||||||
| Item-find Bracelet | ||||||||||
| Passage-find Bracelet | ||||||||||
| Waterwalk Bracelet | X | |||||||||
| Floating Bracelet | ||||||||||
| Wallpass Bracelet | ||||||||||
| Tiptoe Bracelet | ||||||||||
| Passerby Bracelet | ||||||||||
| Item-losing Bracelet | ||||||||||
| Gitan-losing Bracelet | ||||||||||
| Monstercall Bracelet | ||||||||||
| Trapmore Bracelet | ||||||||||
| Haggling Bracelet | X | |||||||||
| Trapper's Bracelet | X | |||||||||
| Appraiser's Bracelet | ||||||||||
| Cannonboost Bracelet | ||||||||||
 Projectile
| Projectile | ||||||||||
|---|---|---|---|---|---|---|---|---|---|---|
| Name | F | S | P | M | B | H | I | T | U | W |
| Wooden Arrow | ||||||||||
| Iron Arrow | ||||||||||
| Silver Arrow | ||||||||||
| Poison Arrow | ||||||||||
| Truestrike Arrow | ||||||||||
| Rock | ||||||||||
| Porky's Rock | X | |||||||||
 Food
Food
| Food | ||||||||||
|---|---|---|---|---|---|---|---|---|---|---|
| Name | F | S | P | M | B | H | I | T | U | W |
| Onigiri | X | |||||||||
| Large Onigiri | ||||||||||
| Huge Onigiri | ||||||||||
| Rotten Onigiri | ||||||||||
| Grilled Onigiri | ||||||||||
| Special Onigiri | ||||||||||
| Sumo Onigiri | ||||||||||
| Sweet Potato | ||||||||||
| Yakitori | ||||||||||
| Rotten Peach Bun | ||||||||||
 Grass
Grass
| Grass | ||||||||||
|---|---|---|---|---|---|---|---|---|---|---|
| Name | F | S | P | M | B | H | I | T | U | W |
| Weeds | ||||||||||
| Herb | ||||||||||
| Otogirisou | ||||||||||
| Healing Grass | ||||||||||
| Life Grass | ||||||||||
| Fragrant Grass | ||||||||||
| Revival Grass | ||||||||||
| Bellyexpand Seed | ||||||||||
| Bellyshrink Seed | ||||||||||
| Dragon Grass | ||||||||||
| Leaping Grass | ||||||||||
| Antidote Grass | ||||||||||
| Strength Grass | ||||||||||
| Poison Grass | ||||||||||
| Confusion Grass | ||||||||||
| Sedating Grass | ||||||||||
| Berserk Seed | ||||||||||
| Blinding Grass | ||||||||||
| Seewell Grass | ||||||||||
| Swift Grass | ||||||||||
| Power-up Grass | ||||||||||
| Invincible Grass | ||||||||||
| Fortune Grass | ||||||||||
| Angel Seed | ||||||||||
| Feeble Grass | ||||||||||
| Unlucky Seed | ||||||||||
| Ill-fated Seed | ||||||||||
 Scroll
| Scroll | ||||||||||
|---|---|---|---|---|---|---|---|---|---|---|
| Name | F | S | P | M | B | H | I | T | U | W |
| Confusion Scroll | ||||||||||
| Slumber Scroll | ||||||||||
| Jitters Scroll | ||||||||||
| Windblade Scroll | ||||||||||
| Expulsion Scroll | ||||||||||
| Exorcism Scroll | ||||||||||
| Identifier Scroll | ||||||||||
| Heavenly Scroll | ||||||||||
| Earthly Scroll | ||||||||||
| Plating Scroll | ||||||||||
| Slot-adding Scroll | ||||||||||
| Rune-eraser Scroll | ||||||||||
| Silver-seal Scroll | ||||||||||
| Silverpurge Scroll | ||||||||||
| Pot-upsize Scroll | ||||||||||
| Extraction Scroll | ||||||||||
| Onigiri Scroll | ||||||||||
| Curse Scroll | ||||||||||
| Mapping Scroll | ||||||||||
| Map-loss Scroll | ||||||||||
| Trap-eraser Scroll | ||||||||||
| Trap Scroll | ||||||||||
| Water-drain Scroll | ||||||||||
| Monstercall Scroll | ||||||||||
| Wall-less Scroll | ||||||||||
| Gathering Scroll | ||||||||||
| Collection Scroll | ||||||||||
| Gambler's Scroll | ||||||||||
| Muzzle Scroll | ||||||||||
| Carry-ban Scroll | ||||||||||
| Swift Foe Scroll | ||||||||||
| Fixer Scroll | ||||||||||
| Escape Scroll | ||||||||||
| Eradication Scroll | ||||||||||
| Sanctuary Scroll | ||||||||||
| Blank Scroll | X | |||||||||
| Wet Scroll | ||||||||||
 Staff
Staff
| Staff | ||||||||||
|---|---|---|---|---|---|---|---|---|---|---|
| Name | F | S | P | M | B | H | I | T | U | W |
| Ordinary Staff | ||||||||||
| Paralyzing Staff | ||||||||||
| Sealing Staff | ||||||||||
| Disguising Staff | ||||||||||
| Empathetic Staff | ||||||||||
| Narrow-escape Staff | ||||||||||
| Knockback Staff | ||||||||||
| Switching Staff | ||||||||||
| Vaulting Staff | ||||||||||
| Skull Mage's Staff | ||||||||||
| Thunderbolt Staff | ||||||||||
| Burrowing Staff | ||||||||||
| Earthmound Staff | ||||||||||
| Balance Staff | ||||||||||
| Guiding Staff | ||||||||||
| Swift Staff | ||||||||||
| Sluggish Staff | ||||||||||
| Fortune Staff | ||||||||||
| Unlucky Staff | ||||||||||
| Peach Staff | ||||||||||
 Pot
Pot
| Pot | ||||||||||
|---|---|---|---|---|---|---|---|---|---|---|
| Name | F | S | P | M | B | H | I | T | U | W |
| Preservation Pot | ||||||||||
| Identifier Pot | ||||||||||
| Transmutation Pot | ||||||||||
| Cashing Pot | ||||||||||
| Synthesis Pot | ||||||||||
| Exorcism Pot | ||||||||||
| Curse Pot | ||||||||||
| Upgrading Pot | ||||||||||
| Degrading Pot | ||||||||||
| Bottomless Pot | ||||||||||
| Warehouse Pot | ||||||||||
| Handtrapper Pot | ||||||||||
| Unbreakable Pot | ||||||||||
| Ordinary Pot | ||||||||||
| Hiding Pot | ||||||||||
| Rejuvenation Pot | ||||||||||
| Walrus Pot | ||||||||||
| Water Gun Pot | ||||||||||
| Hilarious Pot | ||||||||||
| Monster Pot | ||||||||||
| Surprise Pot | ||||||||||
 Incense
| Incense | ||||||||||
|---|---|---|---|---|---|---|---|---|---|---|
| Name | F | S | P | M | B | H | I | T | U | W |
| Heat-ban Incense | ||||||||||
| Evasive Incense | ||||||||||
| Cautious Incense | ||||||||||
| Reflective Incense | ||||||||||
| Aggressive Incense | ||||||||||
| Defensive Incense | ||||||||||
| Blurry Incense | ||||||||||
| Weighted Incense | ||||||||||
| Unwanting Incense | ||||||||||
